VirtualBox Setup Tutorial
System Requirements
To properly run the provided Ubuntu image, we recommend the following at the minimum:
- 1GB of main memory
- 10GB of free disk space.
Overview
We will now set up the virtual machine for the class project. Roughly, you need to take the following steps.
- Download and install VirtualBox software
- Download and import CS144 virtual machine image
- Set up shared folder
- Power on and log into the virtual machine
Step 1: Install VirtualBox Software
- Download and install the VirtualBox software.
- In case you have a problem with the latest version, Version 4.3.20 for Windows and Mac OS X are known to work well.
- Follow the screen instructions to complete the installation.
- If it asks for installation permission, give the permission.
Step 2: Import Virtual Machine Image
- Download the CS144.ova file. This is the virtual machine image for the class project. Since it is a very large file (~ 1.2GB), it will take a while to download.
- Verify the integrity of the downloaded file by checking its checksum:
- SHA-1 checksum: 8c6118c805017c69a07e71ead54327f27efdd3a5
- MD5 checksum: 5b33a6474925106639910f3890abb553
On OS X, you can run "shasum CS144.ova" to compute the SHA1 checksum of the downloaded file. On Windows, you can use this tool.
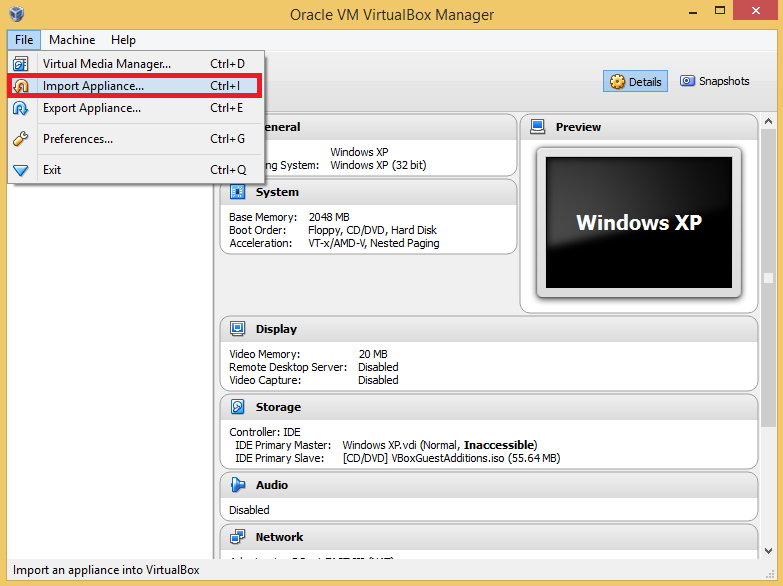
- Start VirtualBox.
- Once it starts, select "File > Import Appliance..." menu.
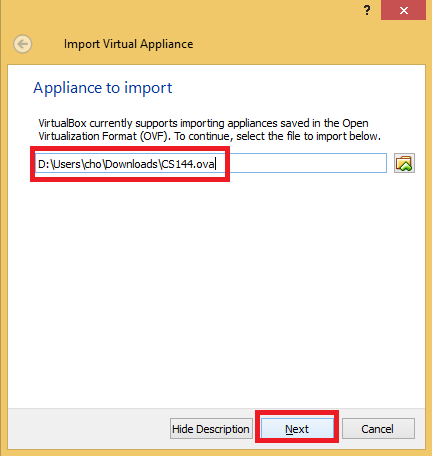
- Choose the downloaded CS144.ova file and click "Next".
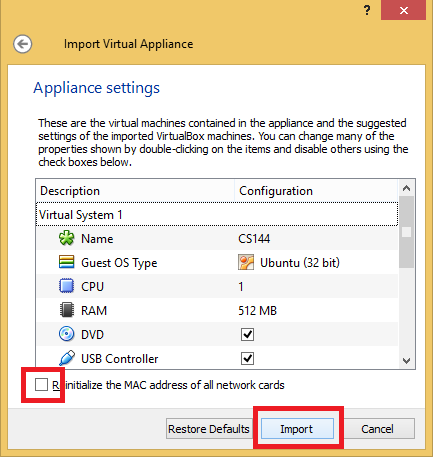
- Keep the default setting and click "Import" button. *Important*: DO NOT select "Reinitialize the MAC address..." option.
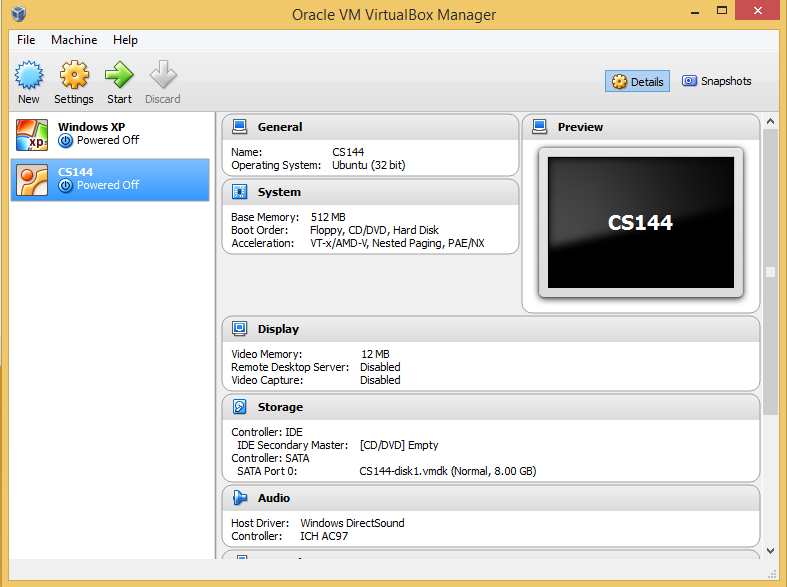
- Wait until import finishes. Once it is done, you will see the following window.
Step 3: Setup Shared Folder
You now need to set up a shared folder to transfer files between your host machine and the virtual machine easily.
- Create a new folder, say "C:\Users\cho\vm-shared", on your machine. This folder will be used as the shared folder between the host machine and the virtual machine.
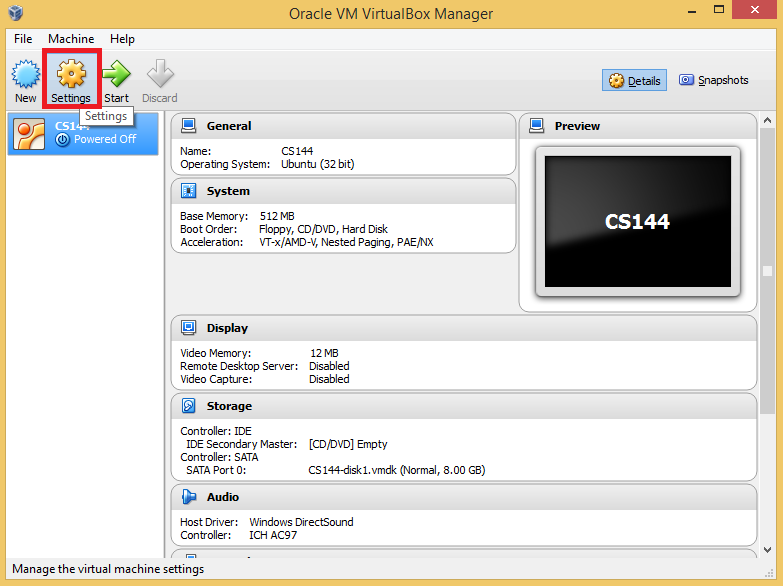
- Press "Settings" button on VirtualBox.
- Select "Shared Folders" and double click "vm-shared" in "Folders List".

- Fill in the following information in the dialog box

- Folder Path: select the shared folder that you created.
- Folder Name: vm-shared. (*It has to be vm-shared* even if your created folder name is different.)
- Do not select "Read-only" and select "Auto-mount"
- Press "OK" buttons to close dialog boxes.
Now your shared folder is set up. From now on, the "C:\Users\cho\vm-shared" folder on your host machine is accessible at "/home/cs144/shared/" in your virtual machine. If you copy a file to "C:\Users\cho\vm-shared" on your host machine, you can access the file in your virtual machine at "/home/cs144/shared/" and vice versa.
Step 4: Start Virtual Machine and Login
- Press "Start" button on your VirtualBox. Once the system finishes booting up, you will see the following screen.

- Now you can login to the virtual machine using
username: cs144 and password: password.
SSH login to Virtual Machine
If desired, you can login to the virtual machine at "localhost" port 1442
using a secure shell client from the host machine. This access method will make it easy to "cut-and-past" some text from host to a file in your virtual machine, for example. On OS X, you can do it as follows:
- Open a terminal in the host and type the command 'ssh localhost -p 1442 -l cs144'
- If the terminal asks 'Are you sure you want to continue connecting?', type 'yes'.
- Then if the terminal asks for password, type 'password'.
- Now you are inside the virtual machine.

On Windows, you can use a secure shell client software, such as PuTTY.
Turning Off VirtualBox
To turn off your virtual machine, simply close the virtual machine
terminal window. Then you will be prompted with 3 options.
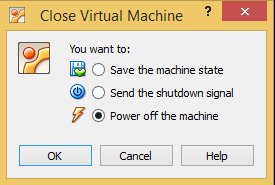
- Save the machine state: Save the current state (and resume from the current sate later). This is the recommended "suspend" method.
- Send the shutdown signal: Turn off the machine gracefully. This is the recommended "power off" method.
- Power off the machine: Turns off the guest machine immdiately. Do NOT use this option.
For a reboot, type "sudo reboot" in the virtual machine terminal.