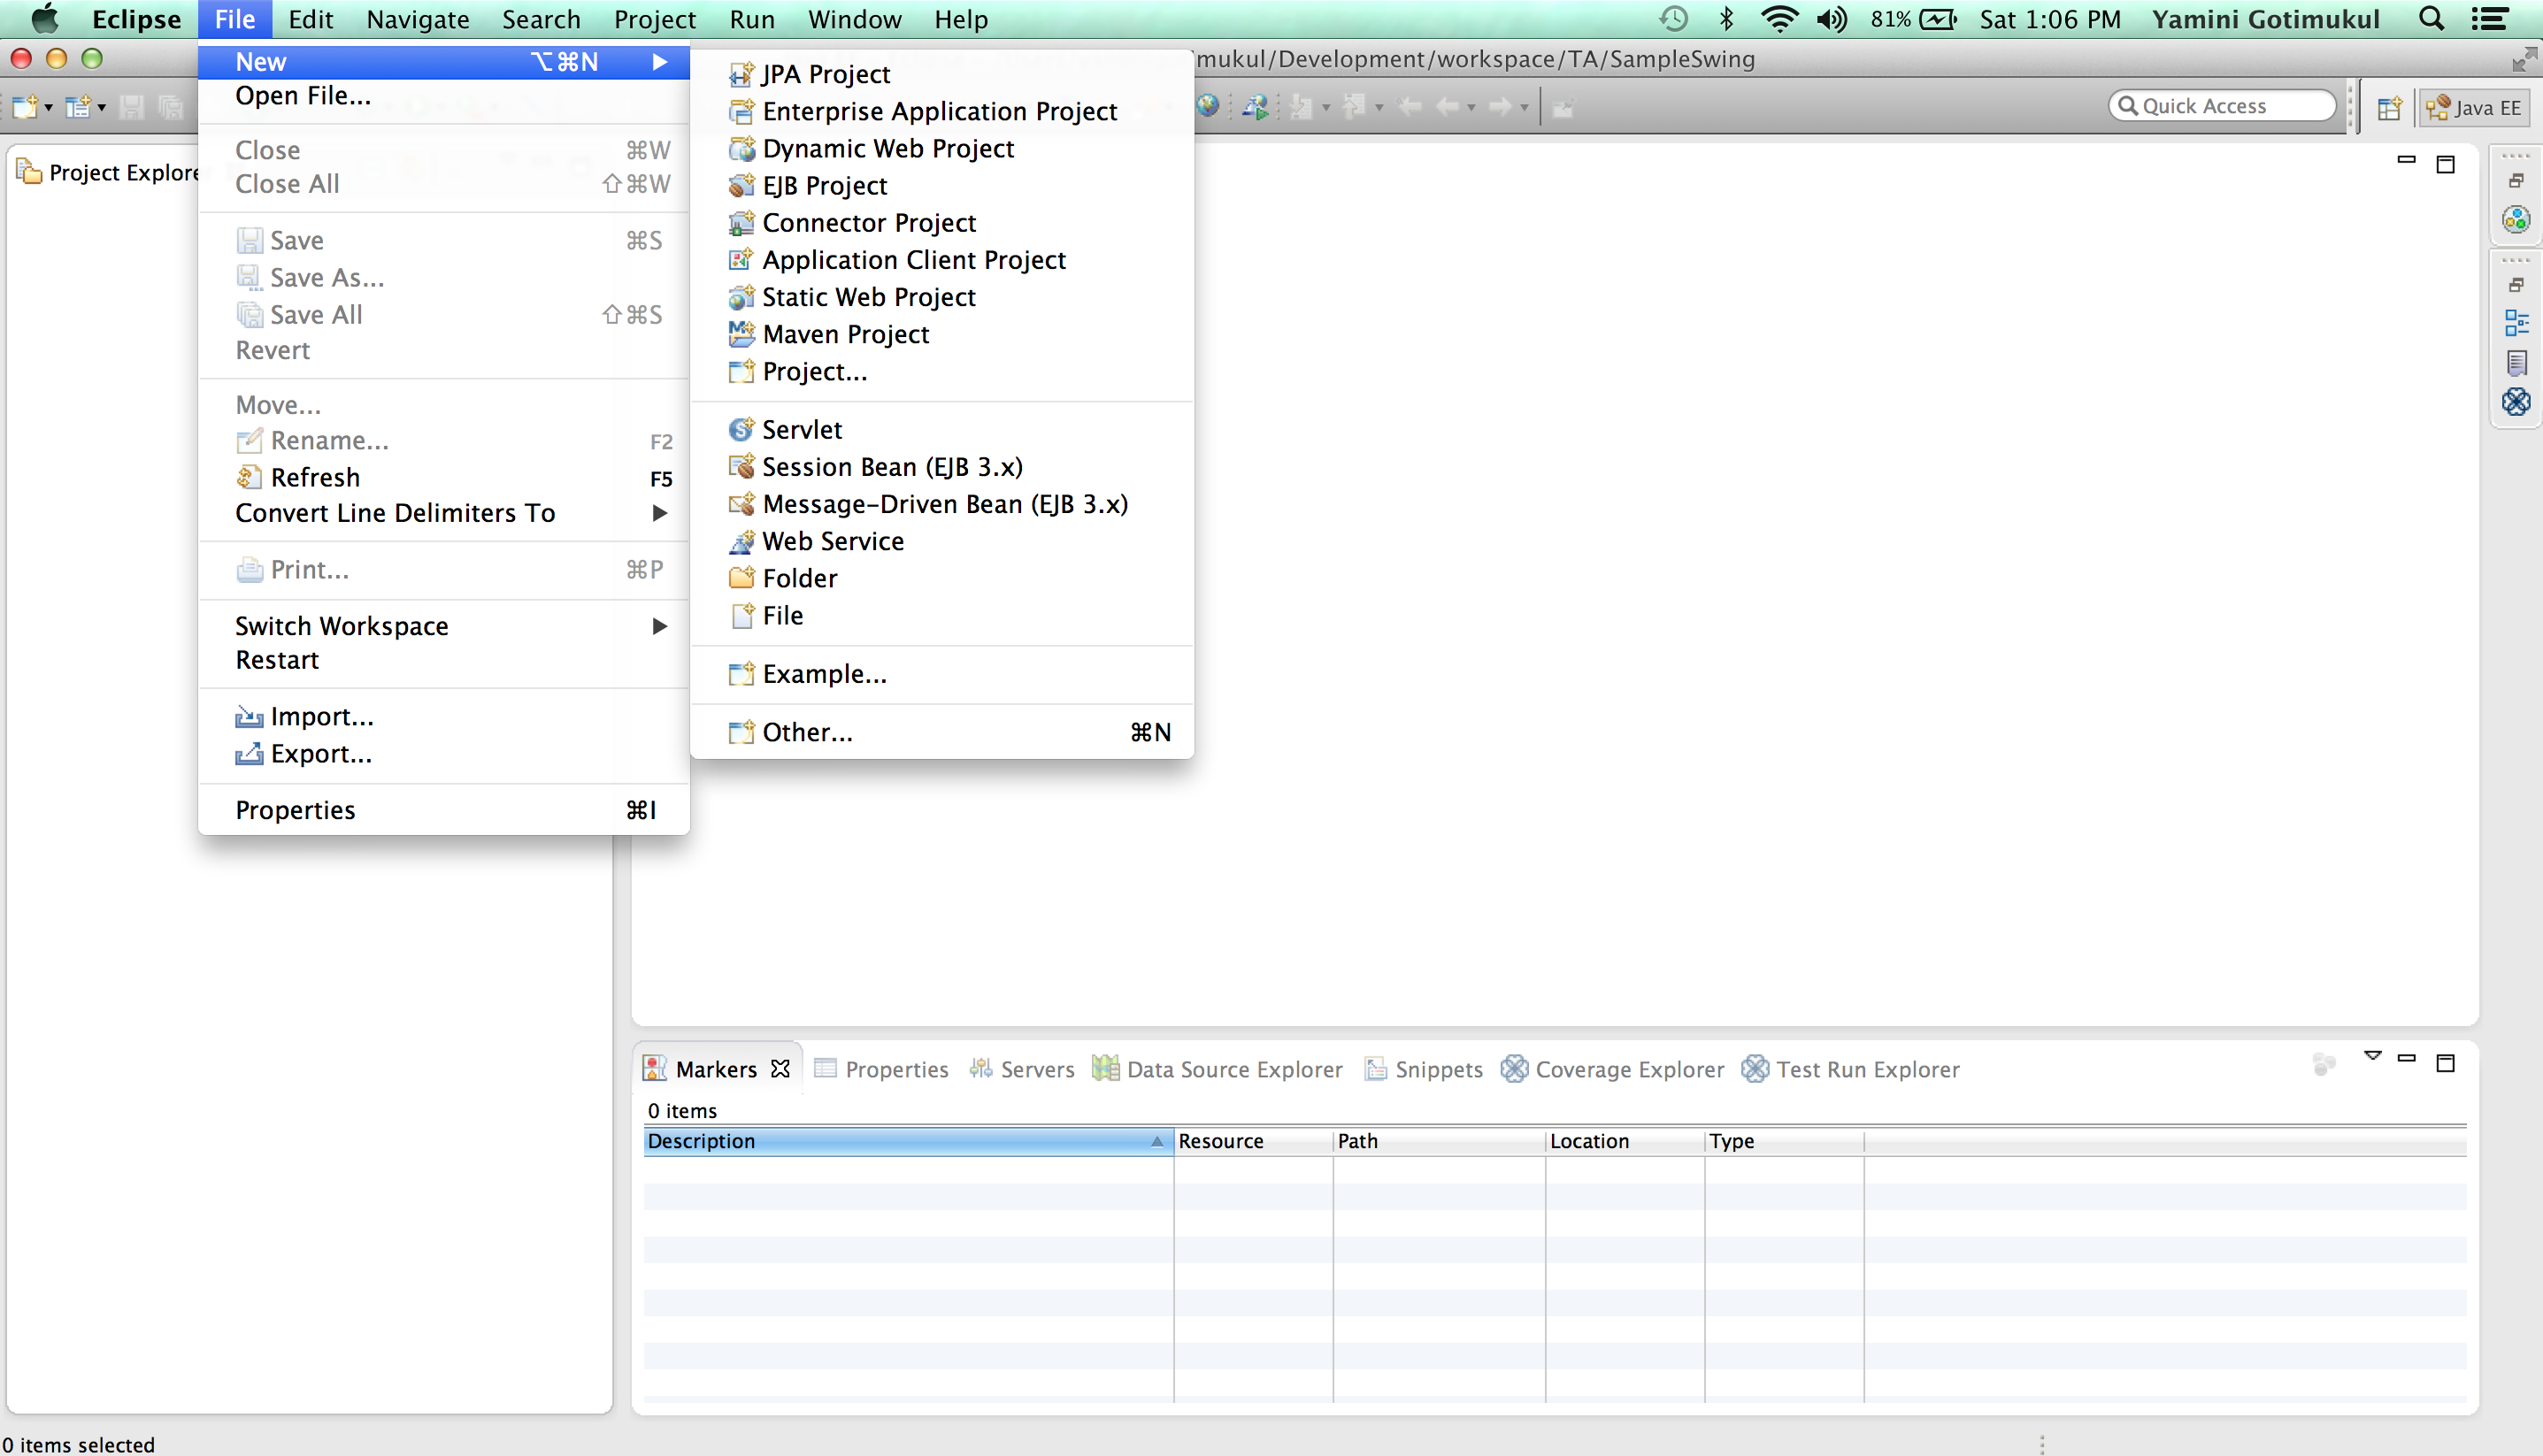
Step 1: Create a new Java project by selecting " java project " from the Select a wizard and click on Next button.
(Note: Steps for new java project creation, File menu --> New --> Other --> Select java project)

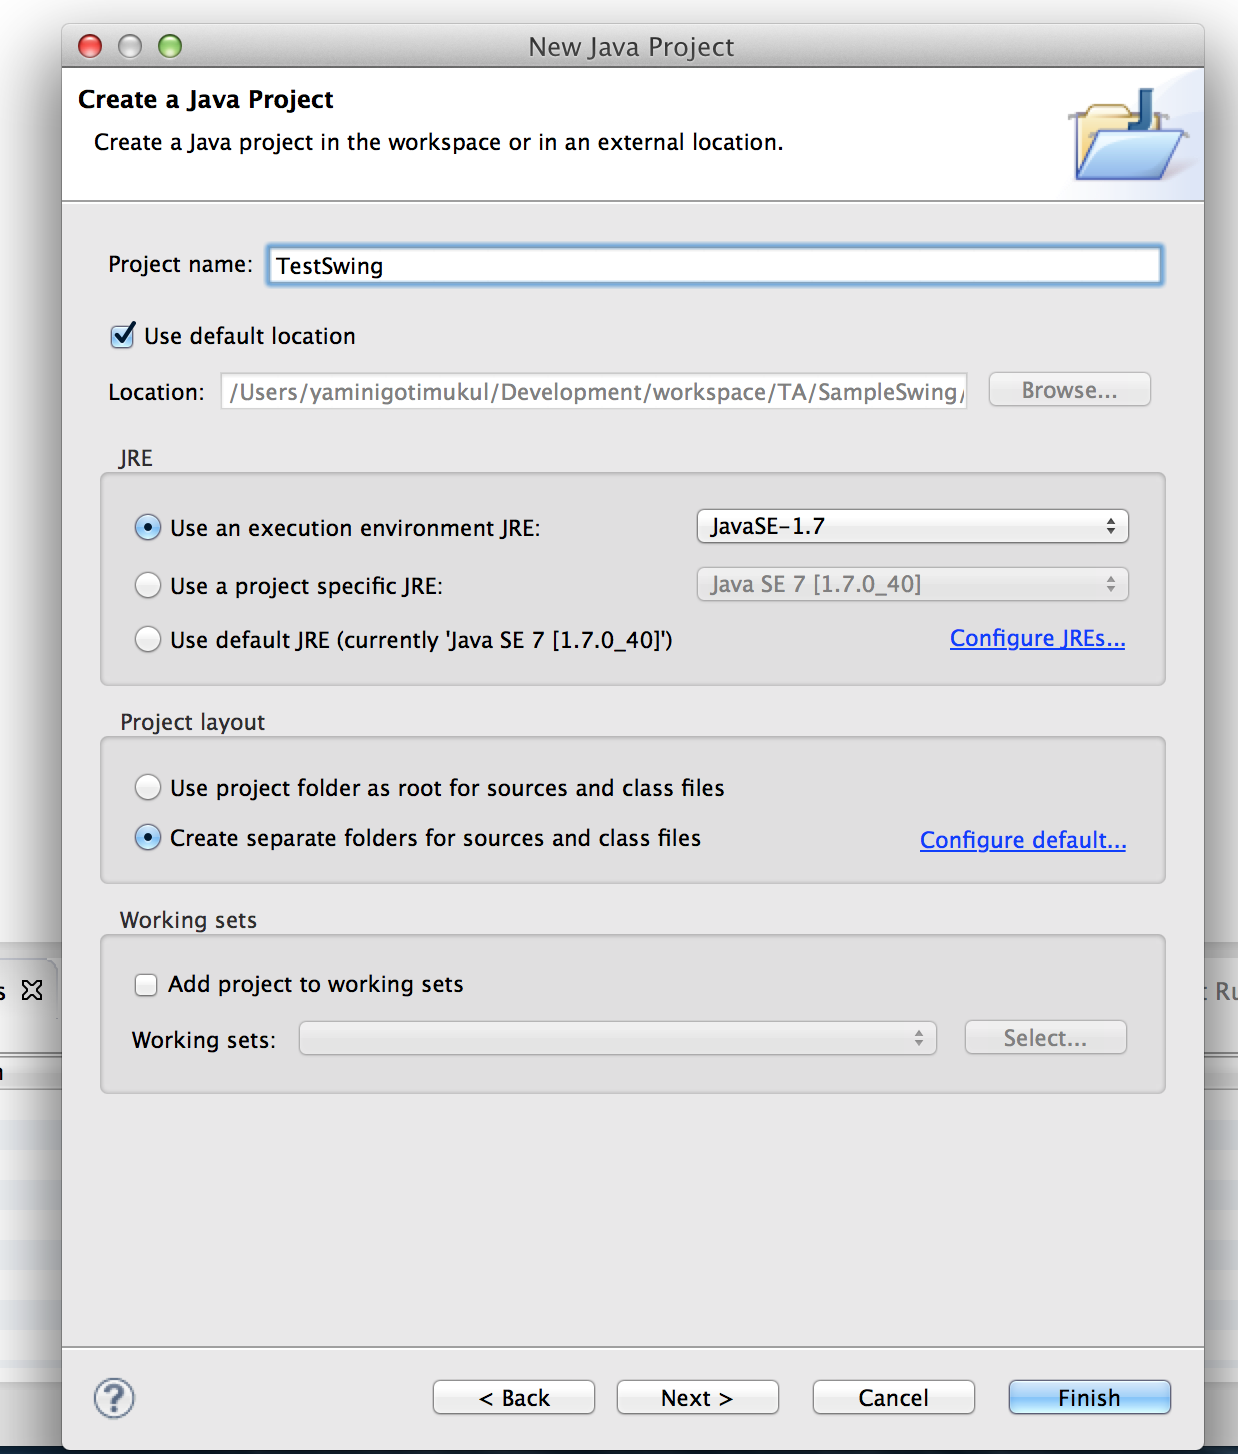
Step 2: Give a project name click finish.
Step 3: Create a new package in the src folder.
(Note: Steps for new java package, File menu --> New --> Package)
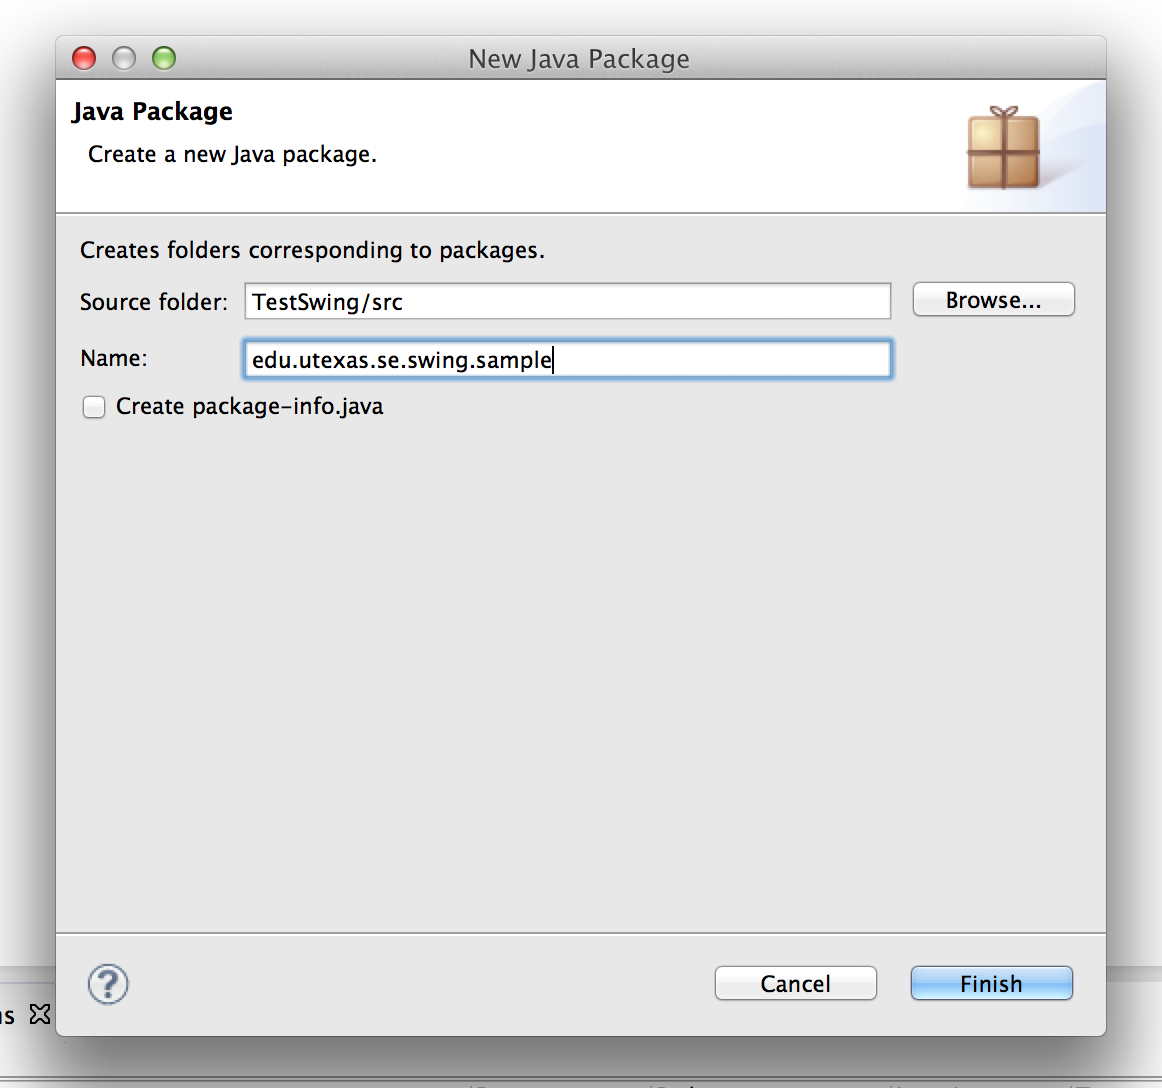
Click on the Finish button
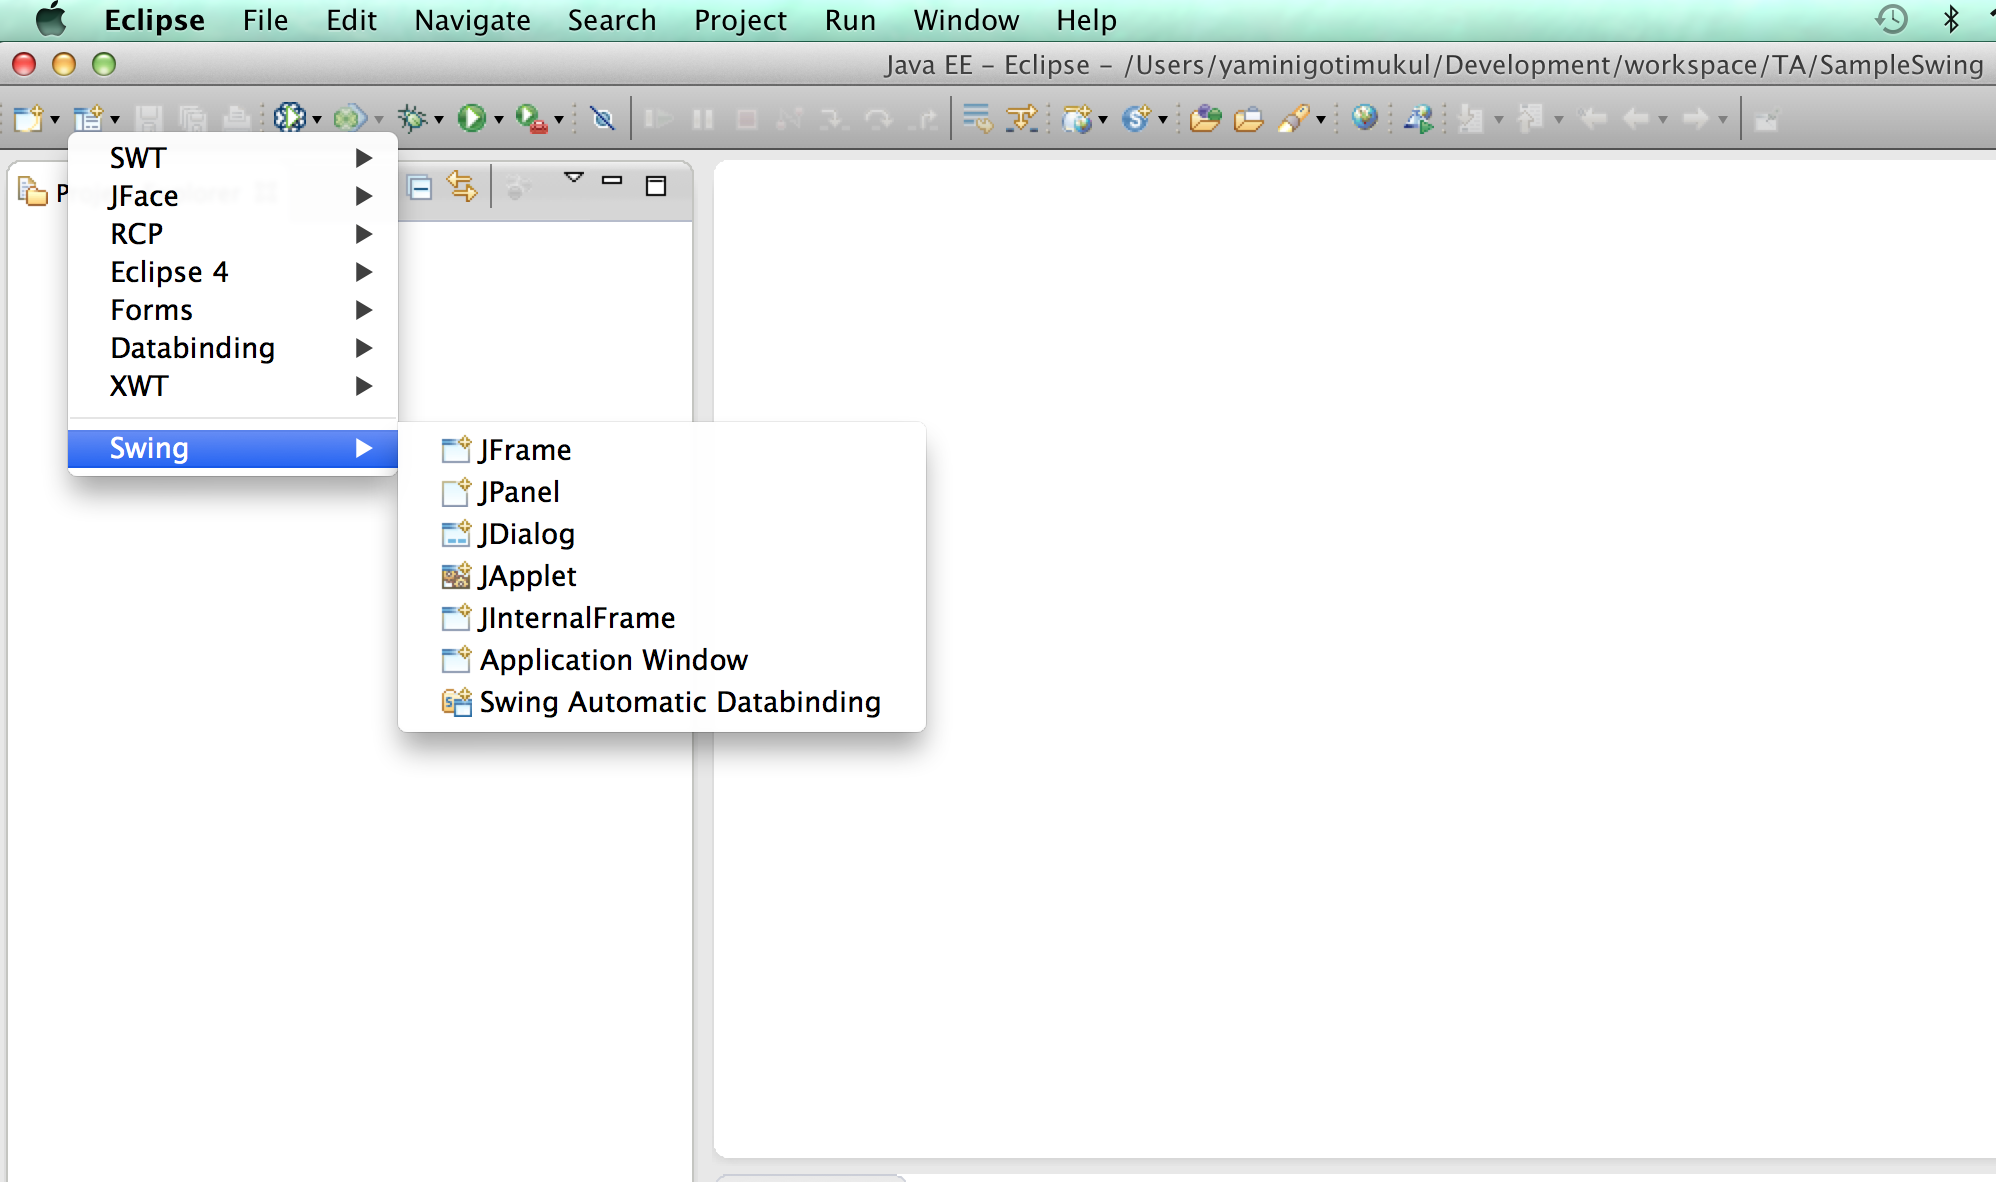
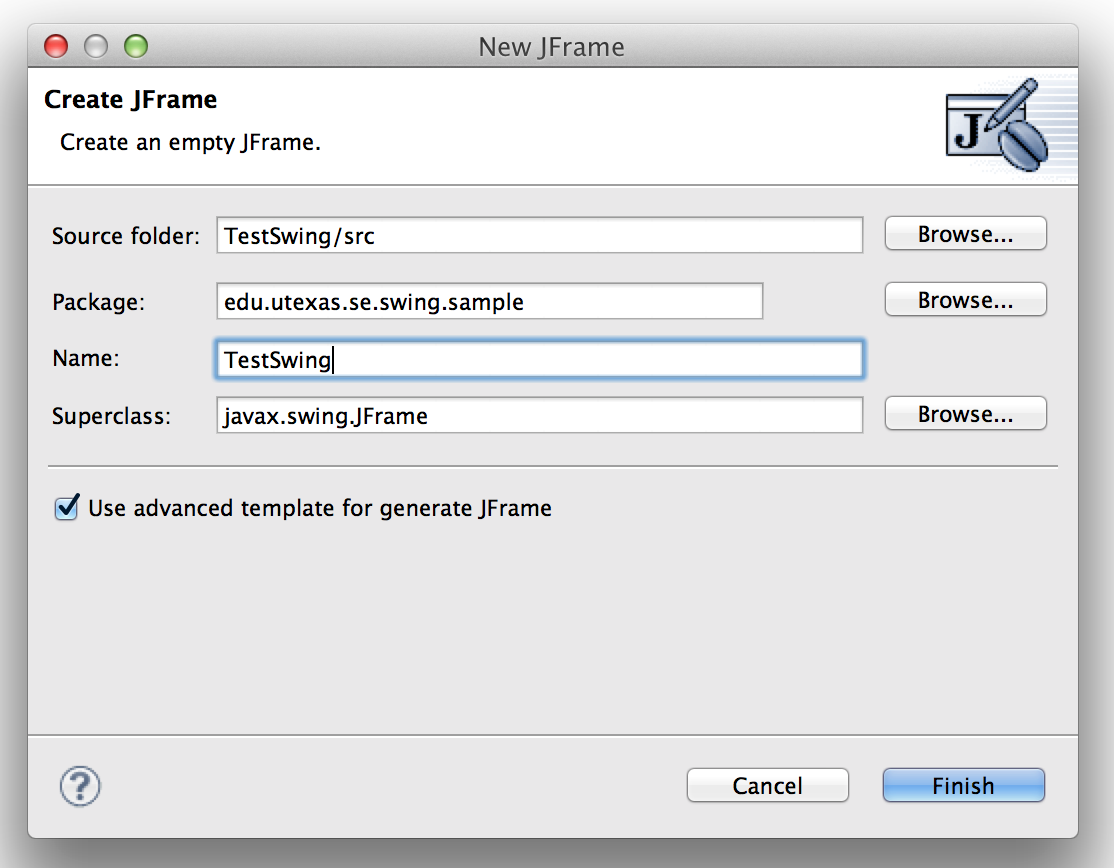
Step 4: Now select the package and click on the new visual class option in the tool bar and select Swing --> select JFrame and give a name to the class and click finish button.

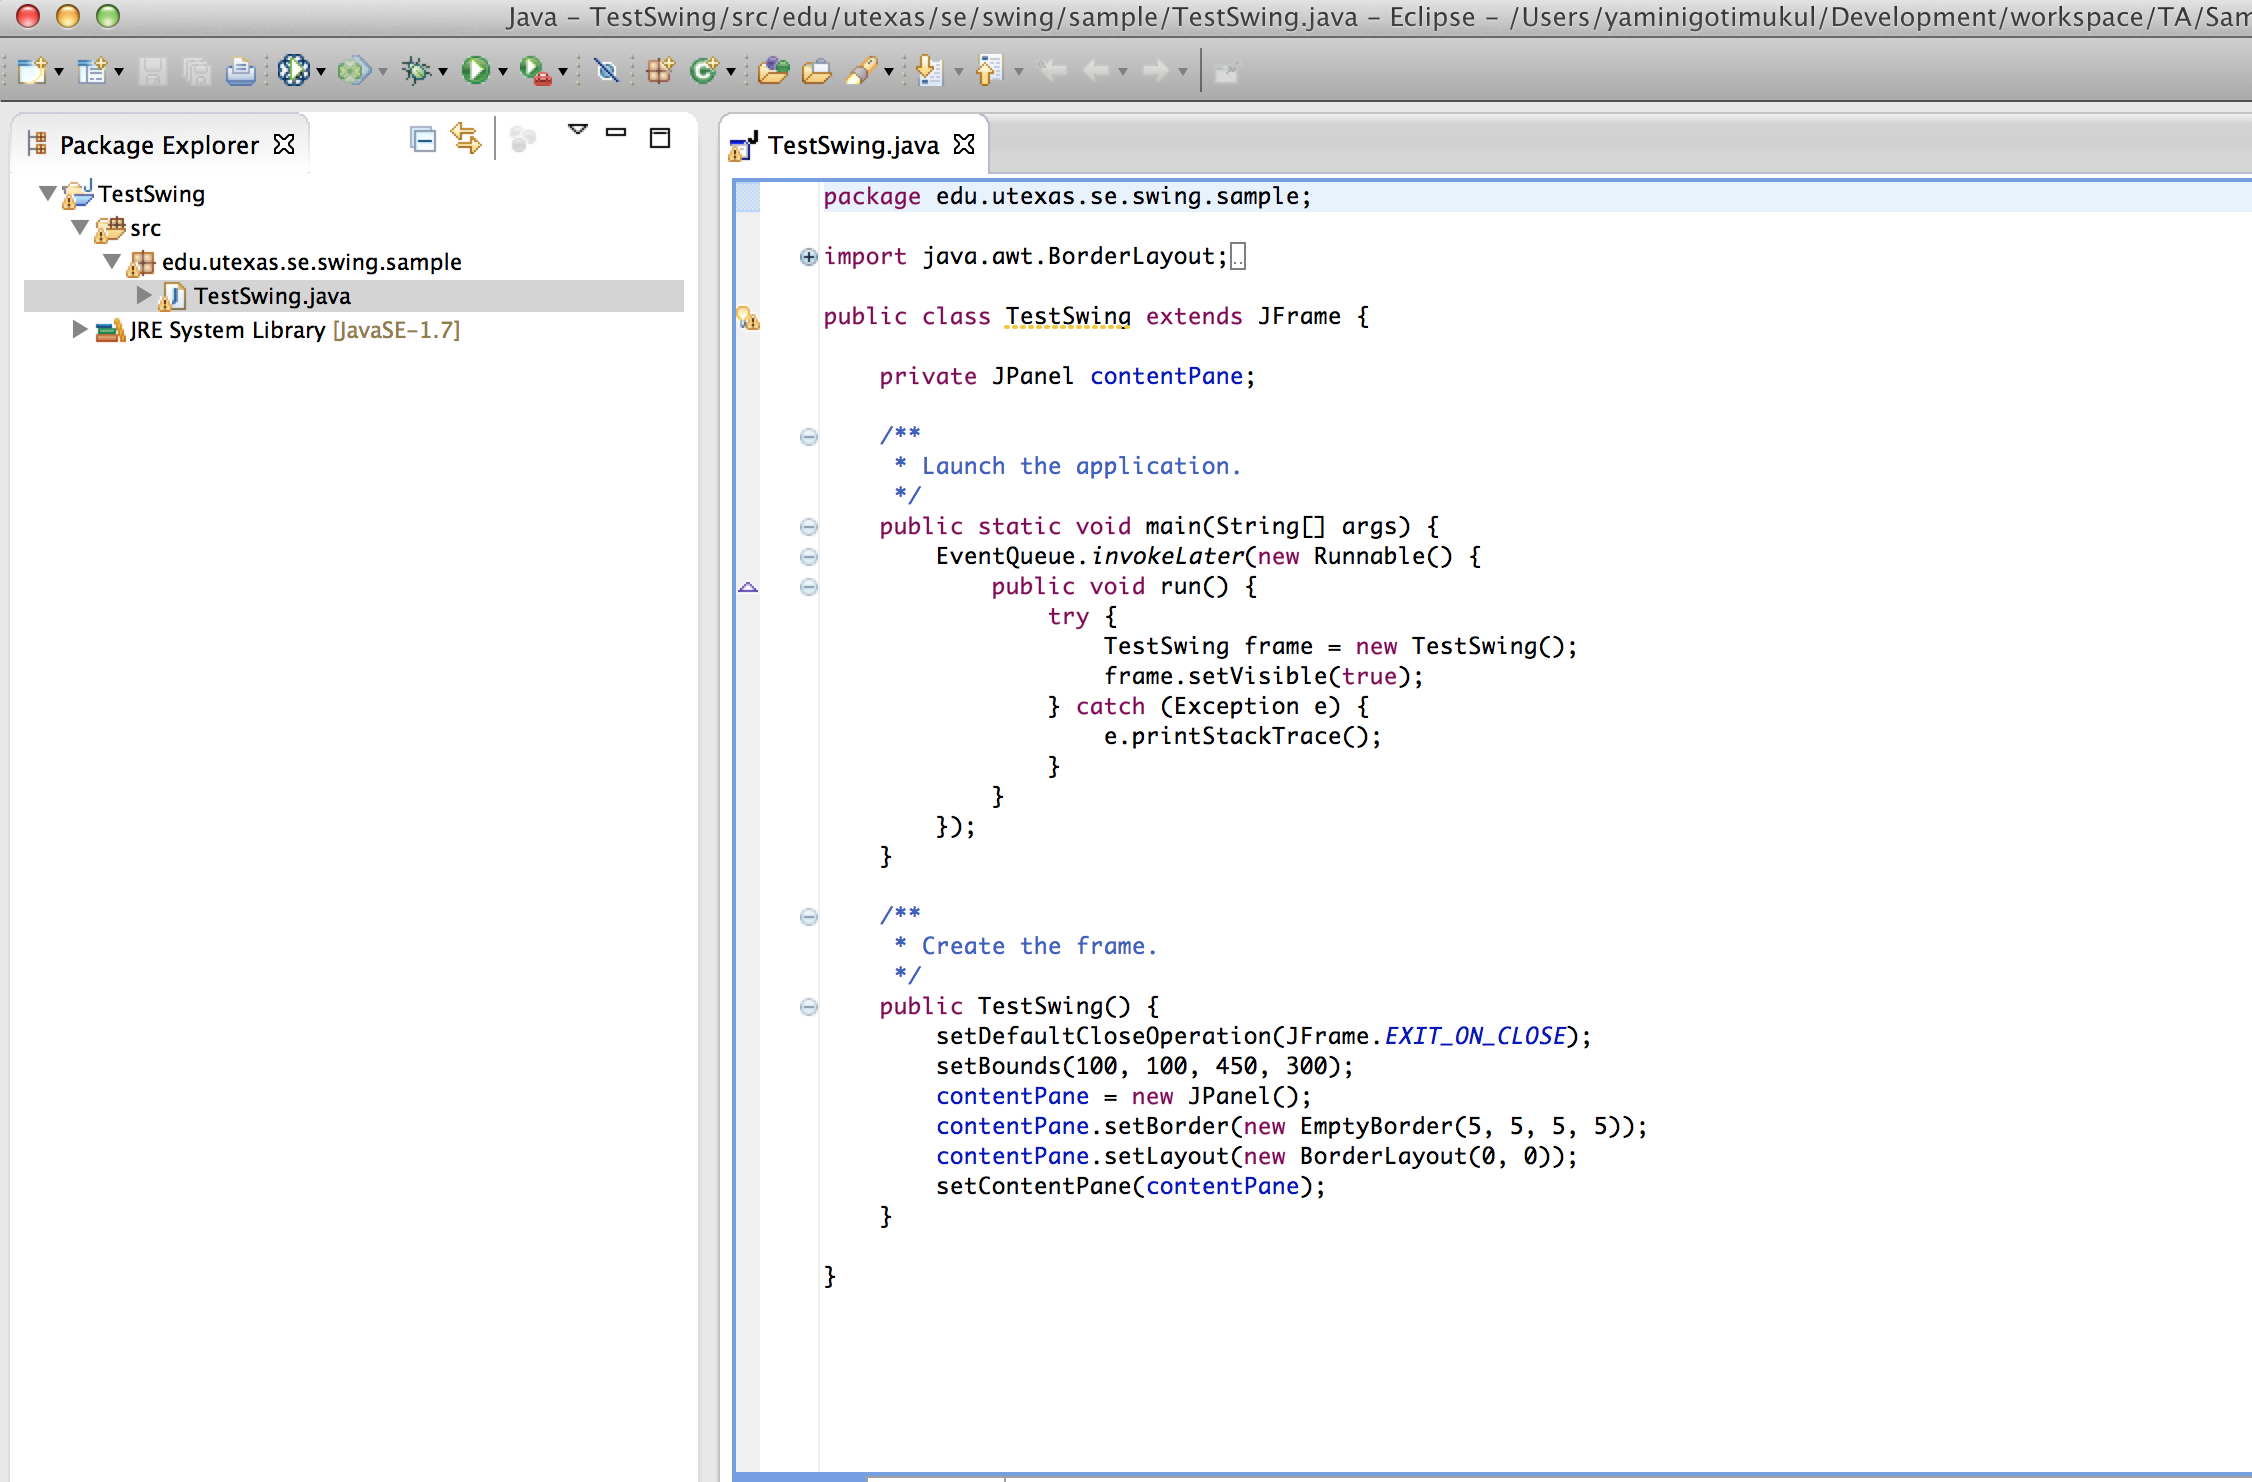
Step 5: A class with some existing code is created and now to use the window builder click on the " Design tab " at the bottom of the editor.
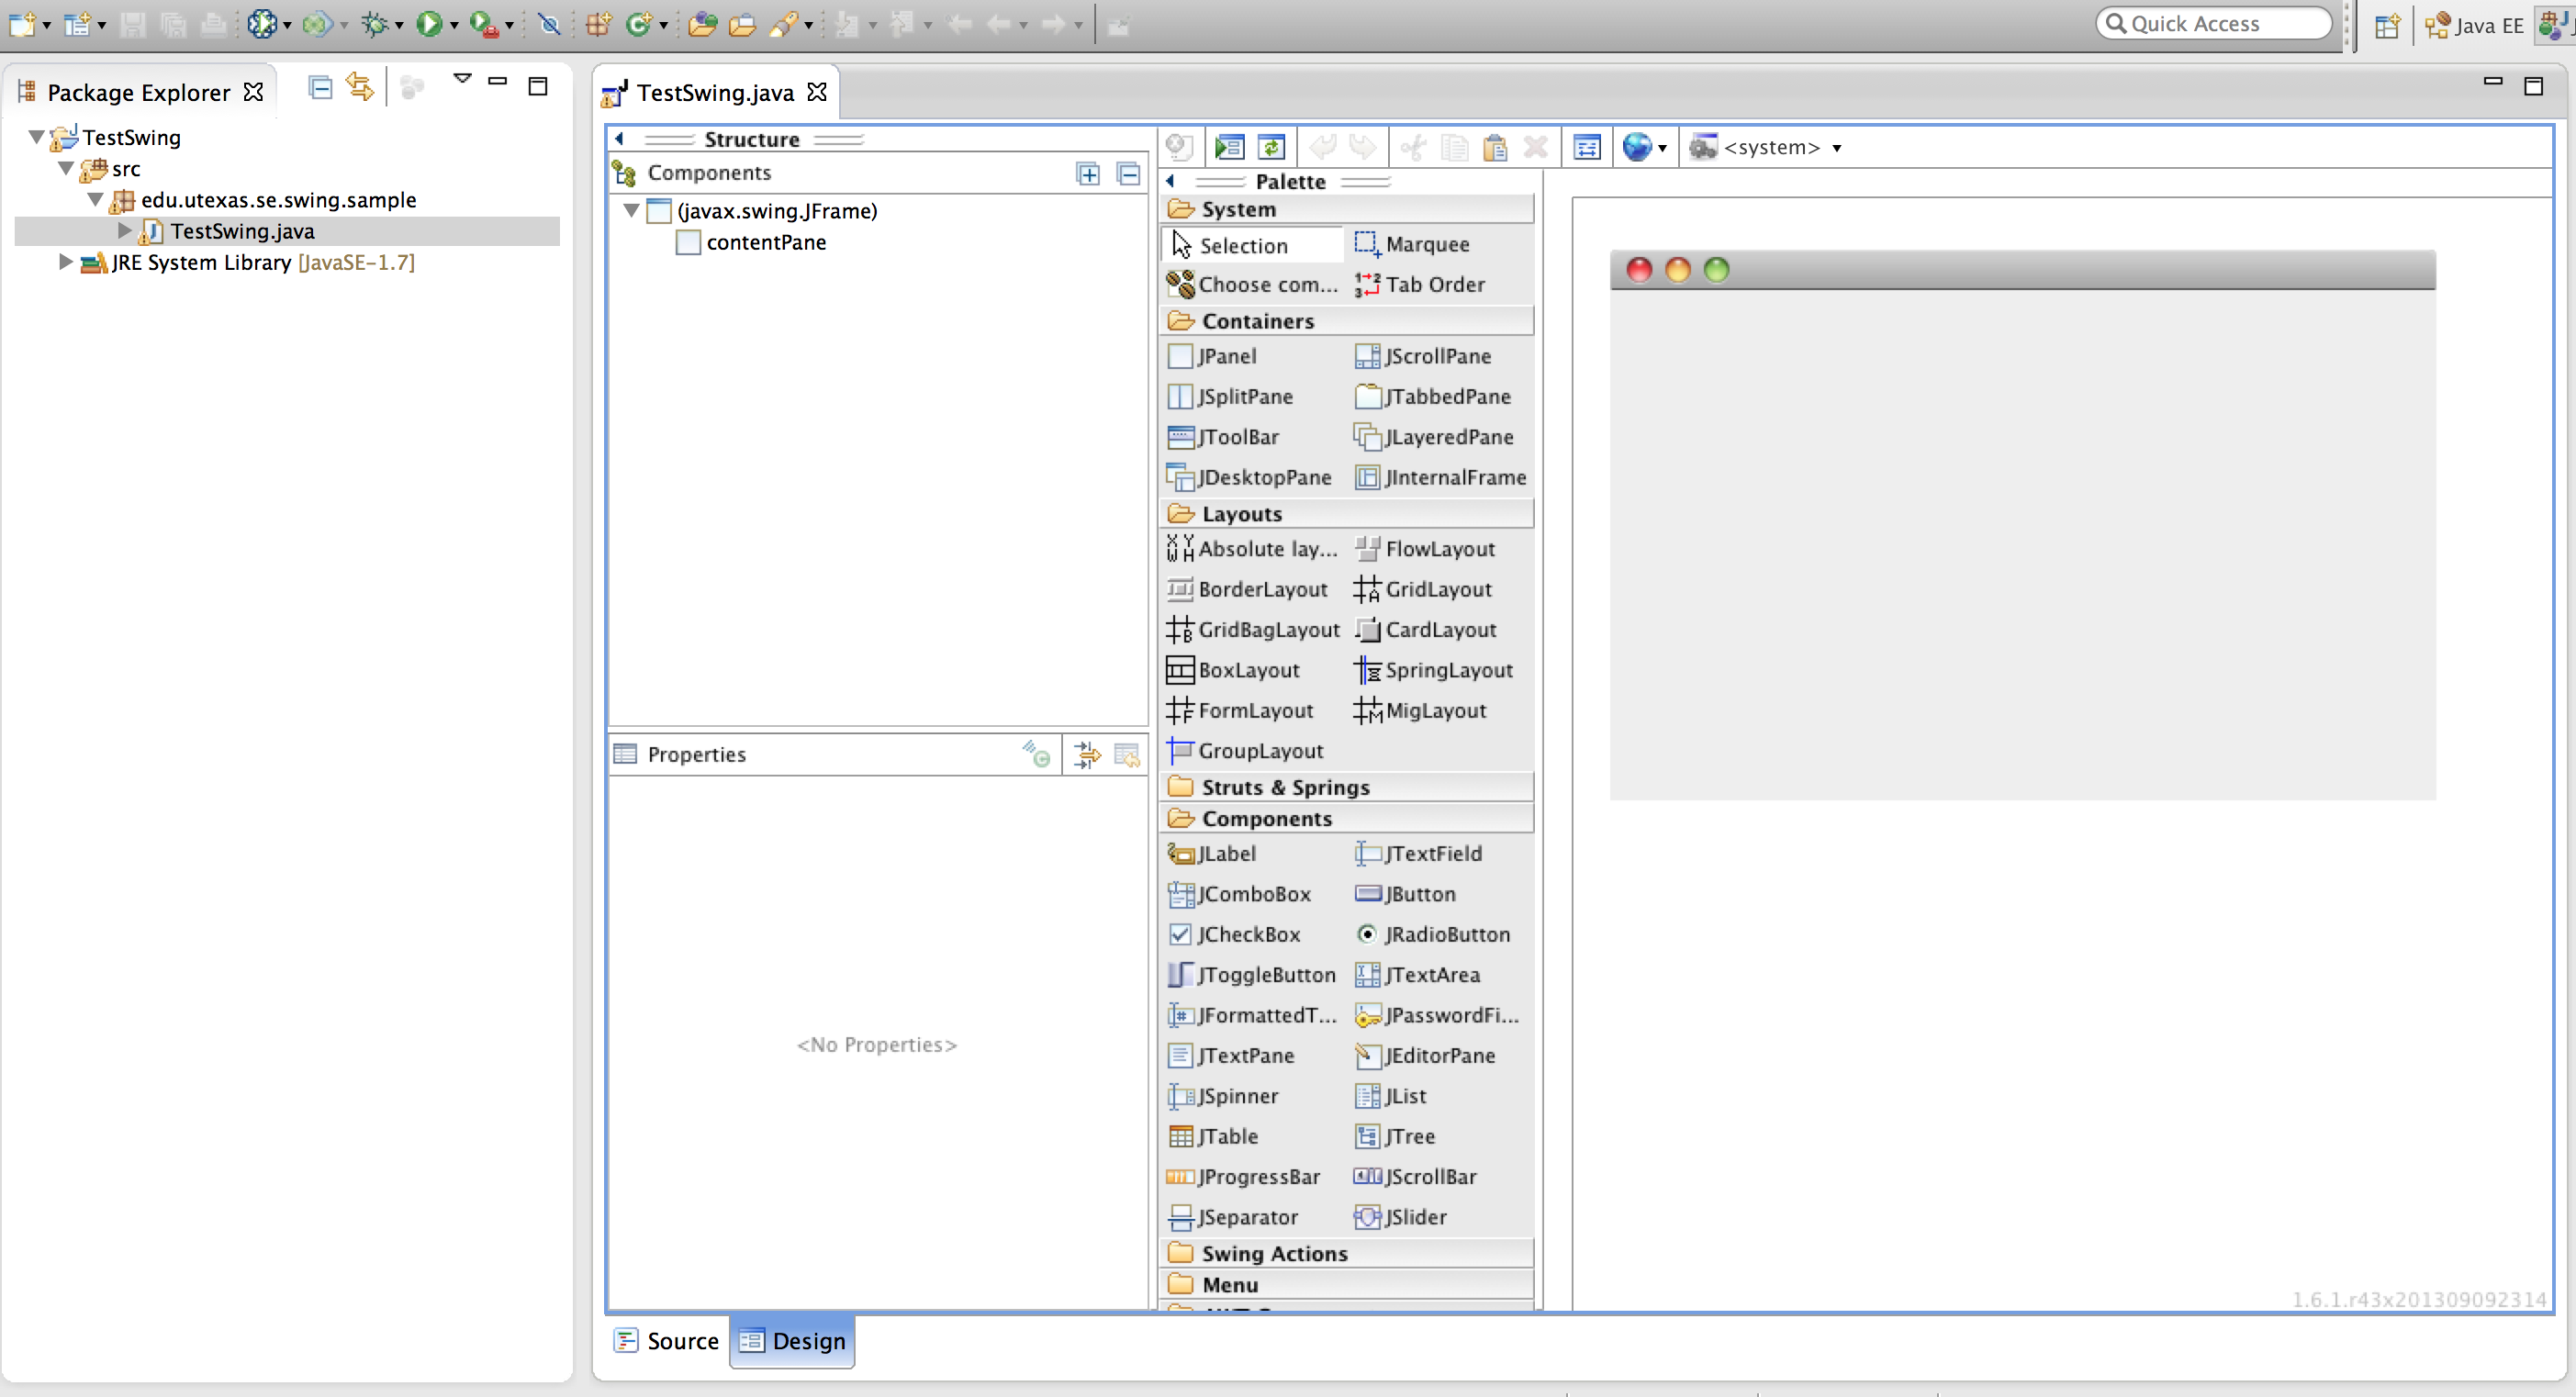
Step 6: Now the UI panel selection window opens up.You can drag drop the UI item on the sample screen and click on the " Source tab " to edit the UI related code
Step 7: The sample swing application is developed to add elements --> a Jbutton and a JtextArea, these elements can be added to the window by selecting the elements in the palette and dropping the element in right sample window .The application displays line wise diff output of two versions of the program in natural language format.
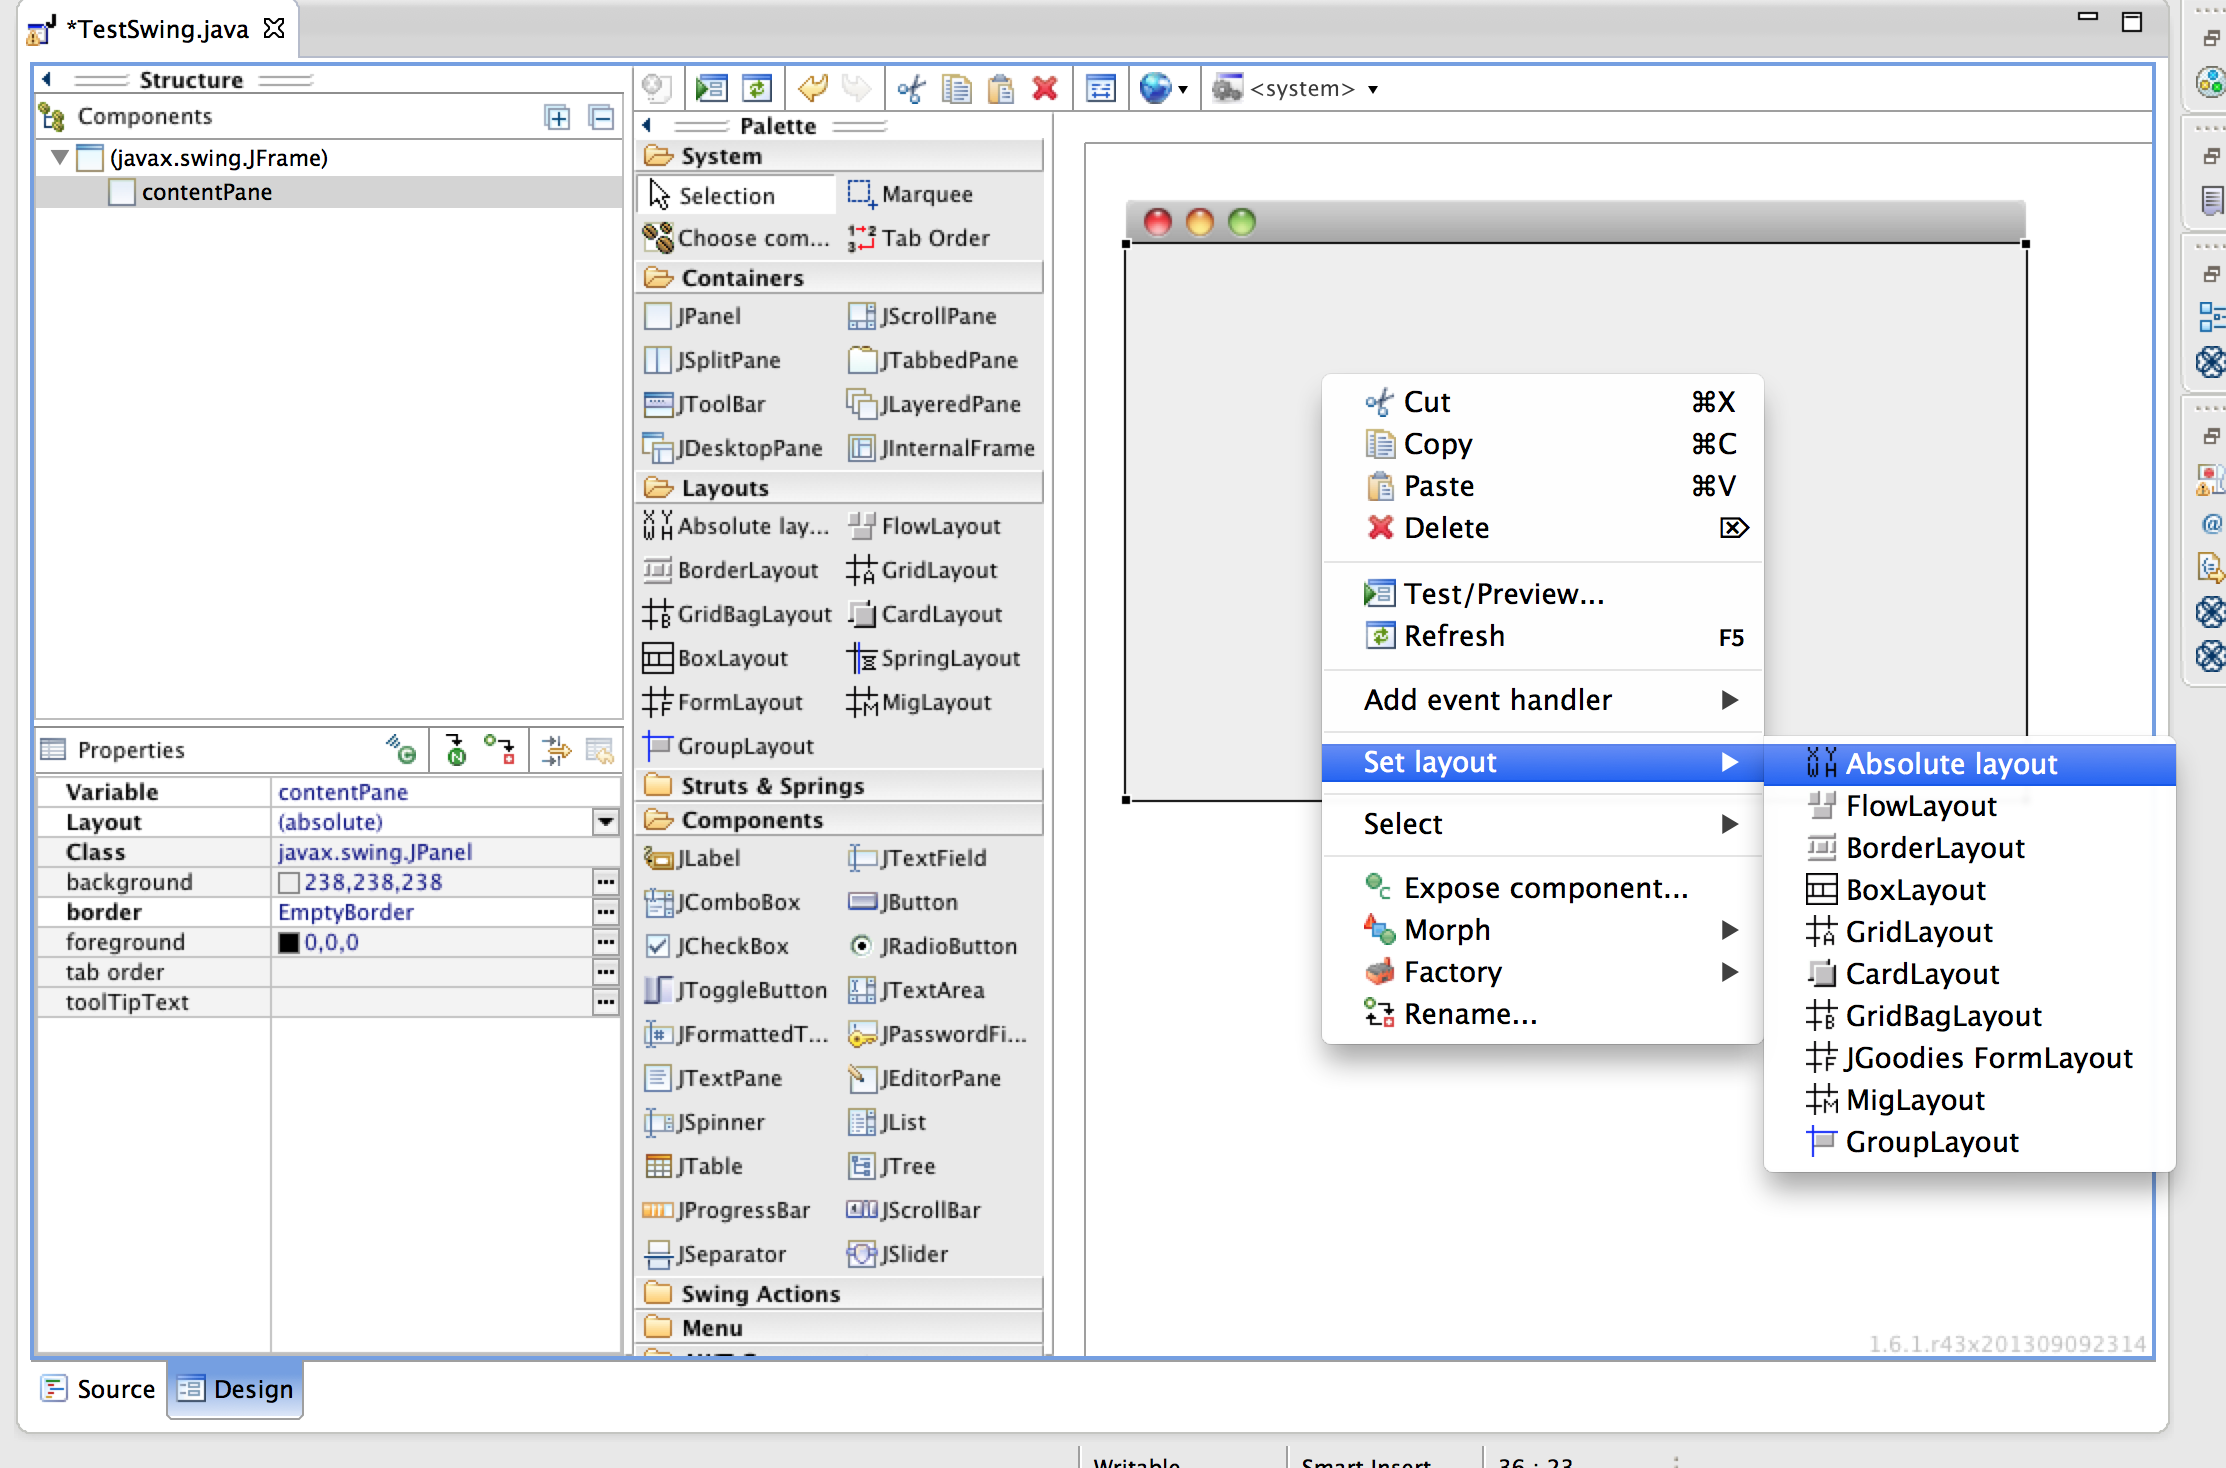
Step 8: This application is developed using the absolute layout.
To set layout, right click on the window frame and select " set layout " and select the appropriate layout and for the sample application " absolute layout " is selected
Step 9: Now drag and drop the button onto the Jframe. For the sample application, Jbutton, JTextArea have been selected. The following is the screenshot of the sample window application (After adjusting the size of the elements)
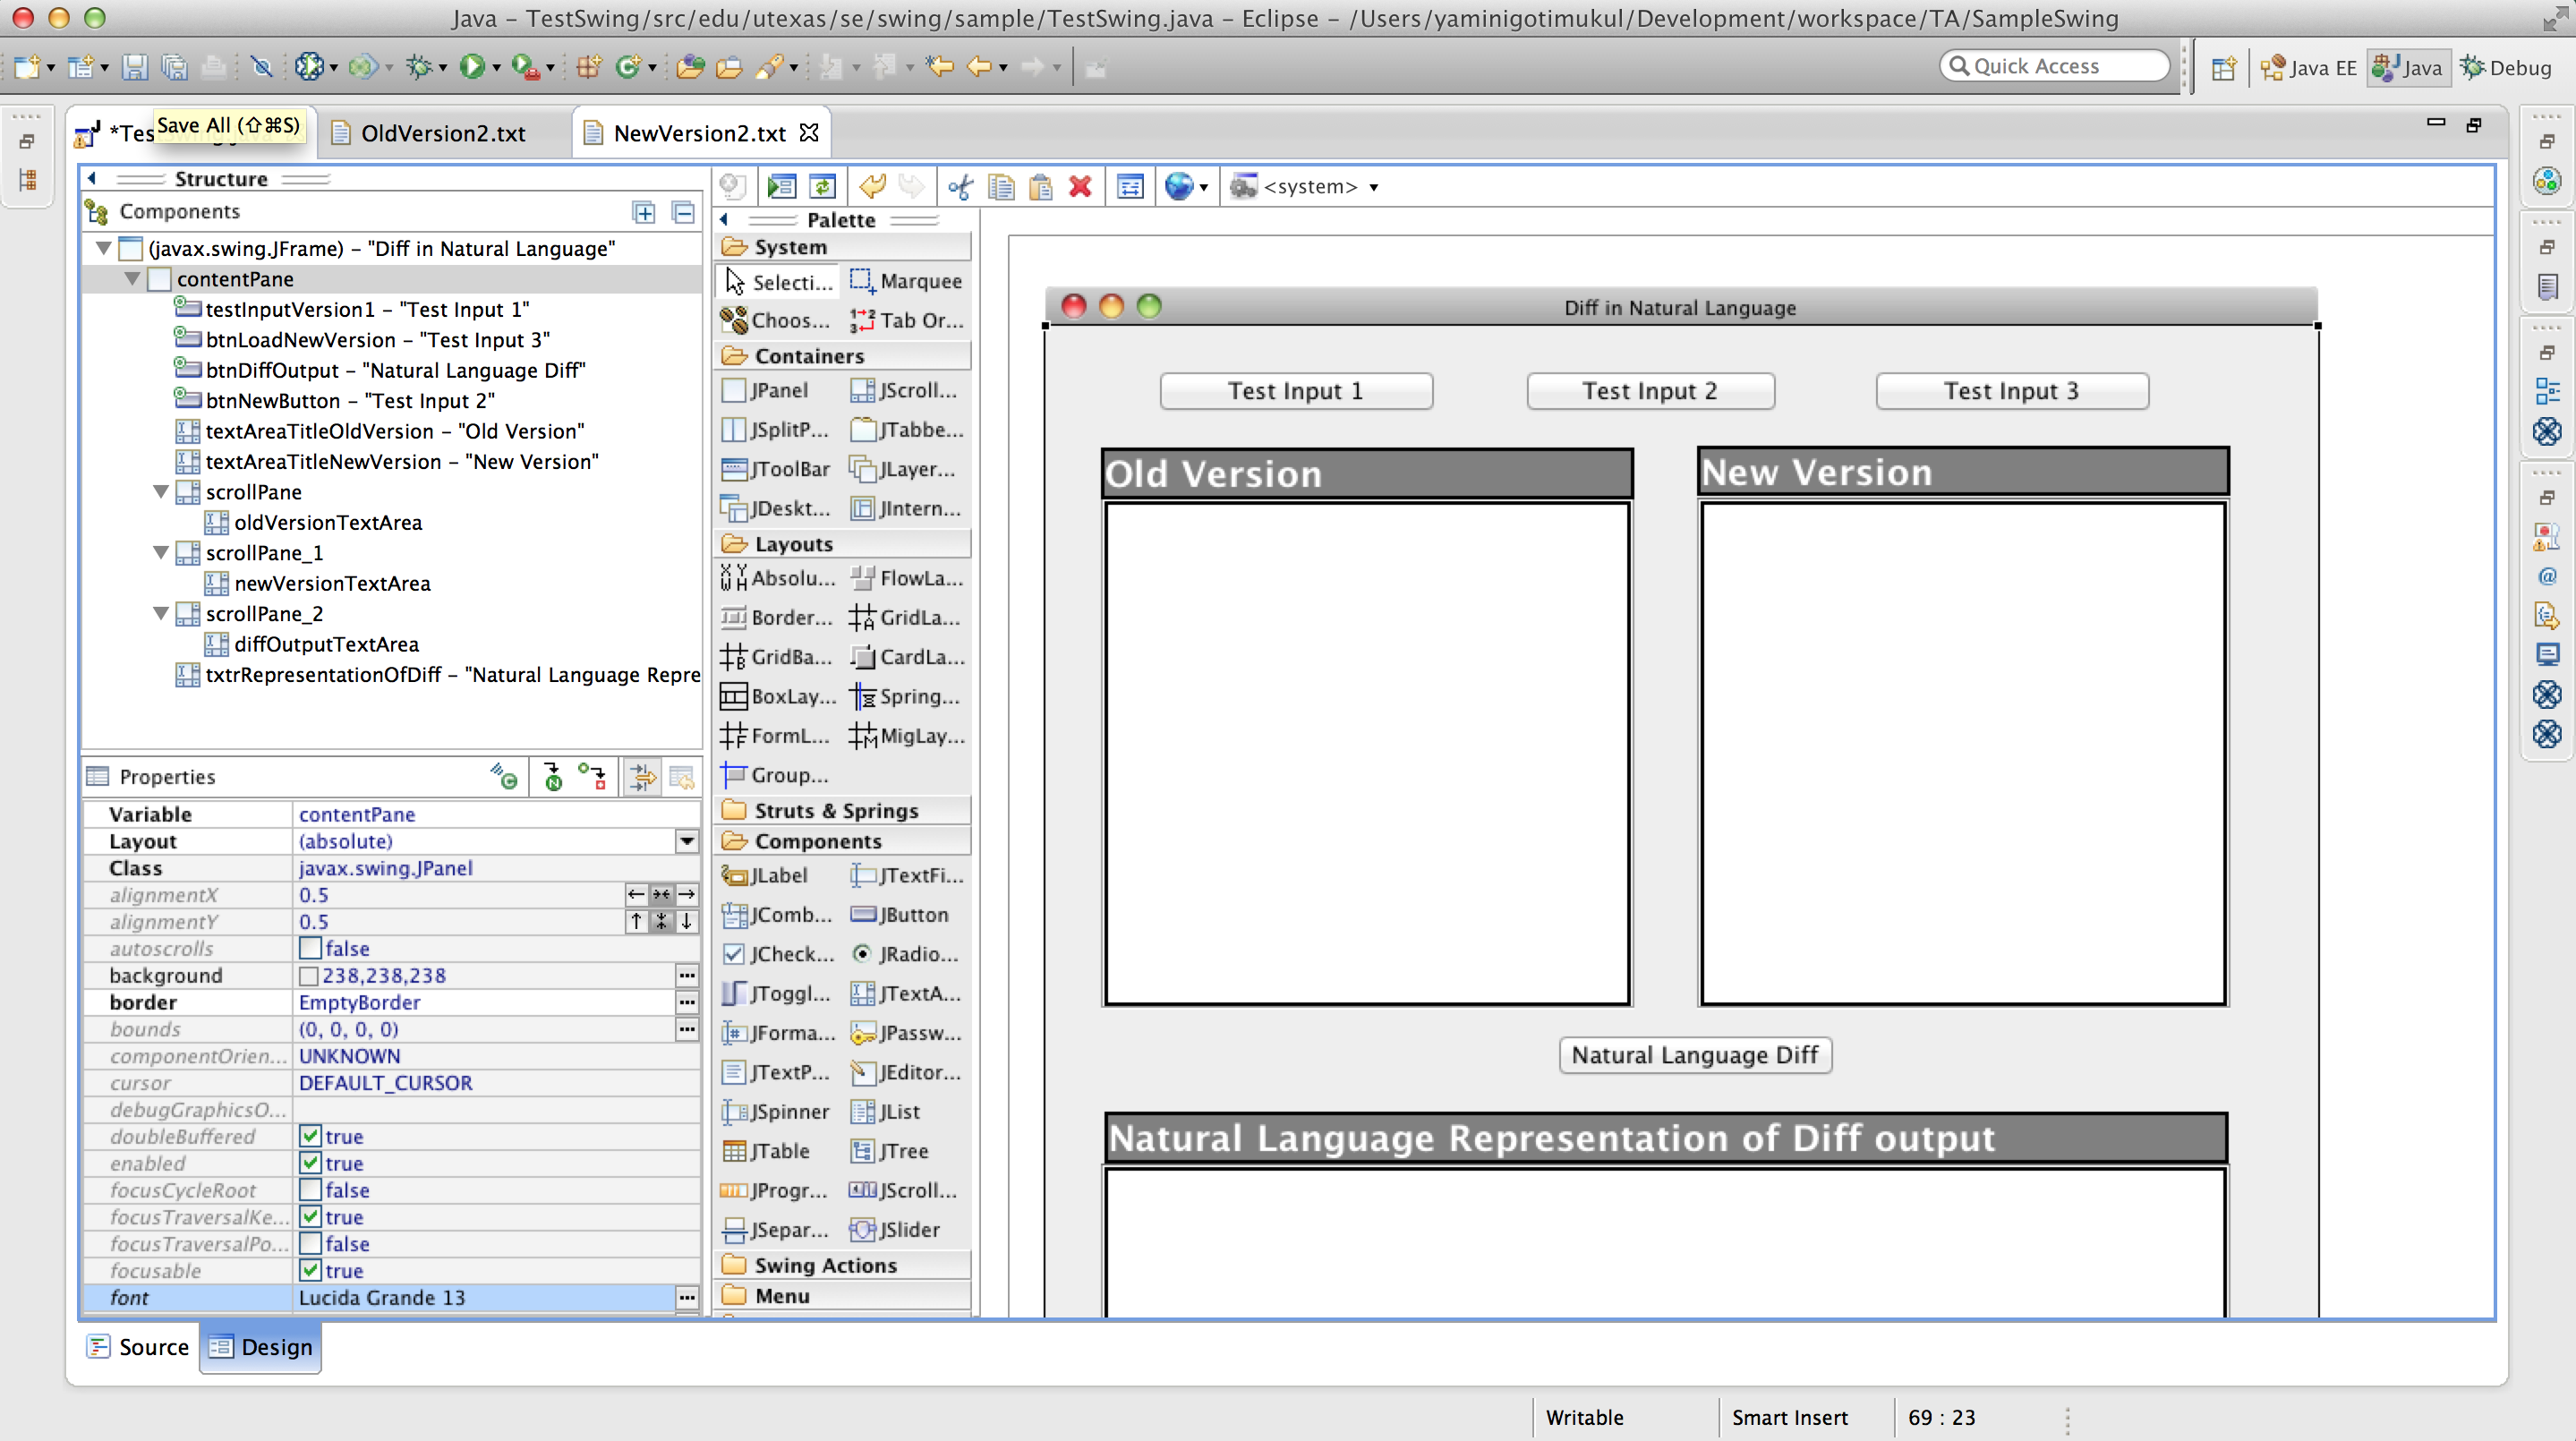
Note:To add the scroll bar to the text area first drag drop the jscrollpane and then add the jtextArea element to the jscrollpane
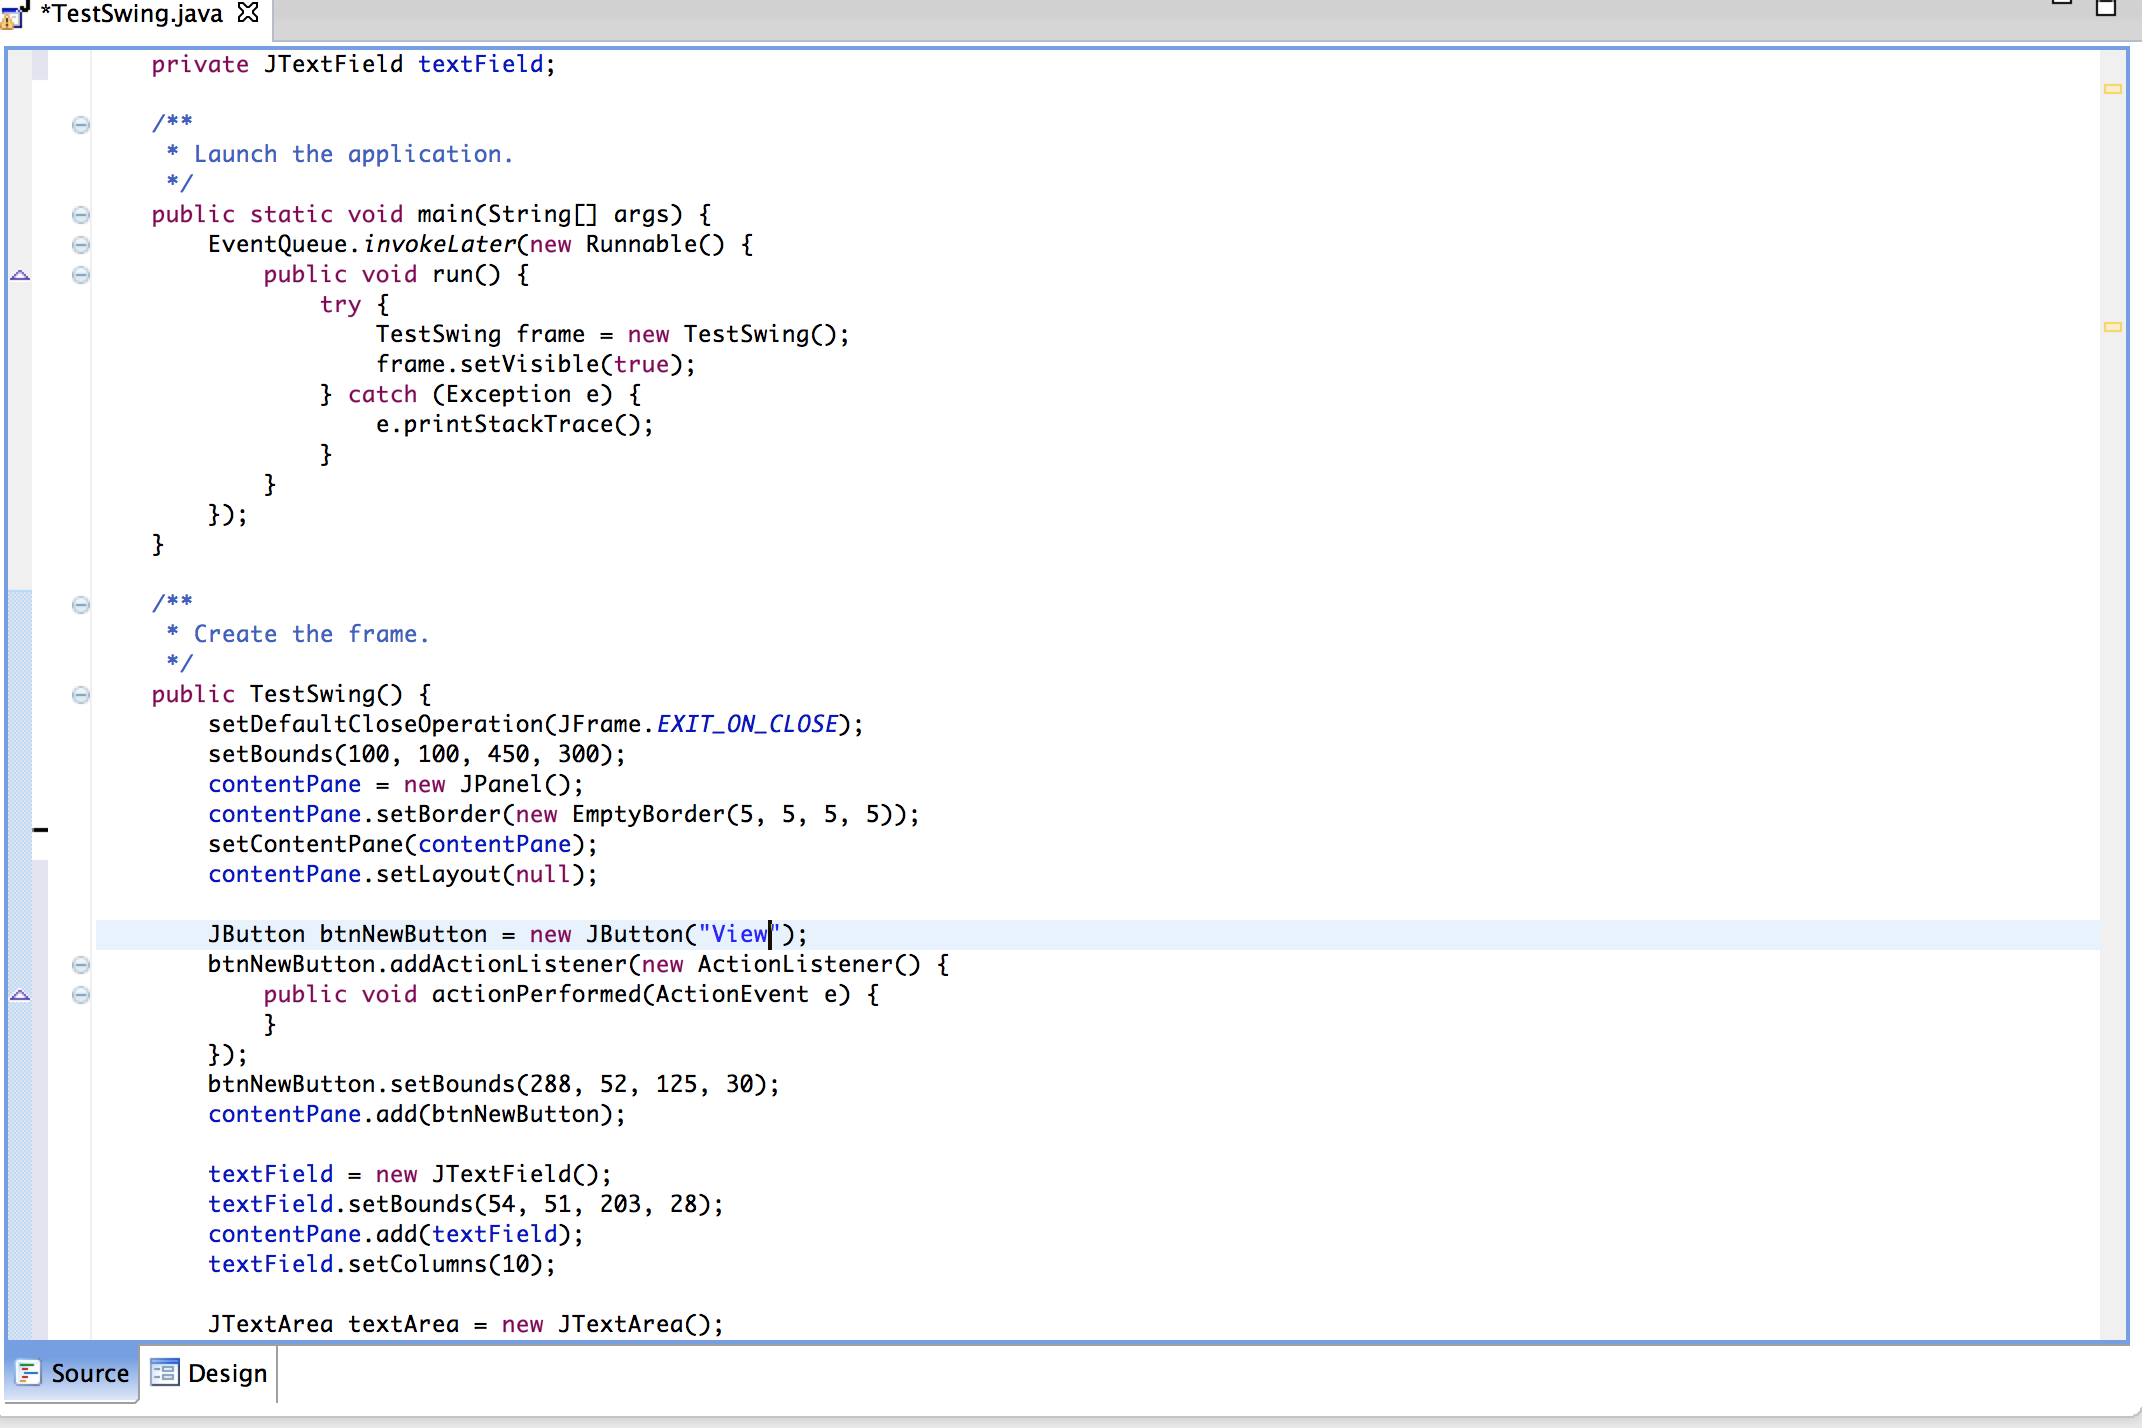
Step 10: You can change the attributes of the elements by double clicking on them, it opens source tab with cursor at the selected elements code.The properties like font , background color can changed properties pane in the left corner or by modifying the source code
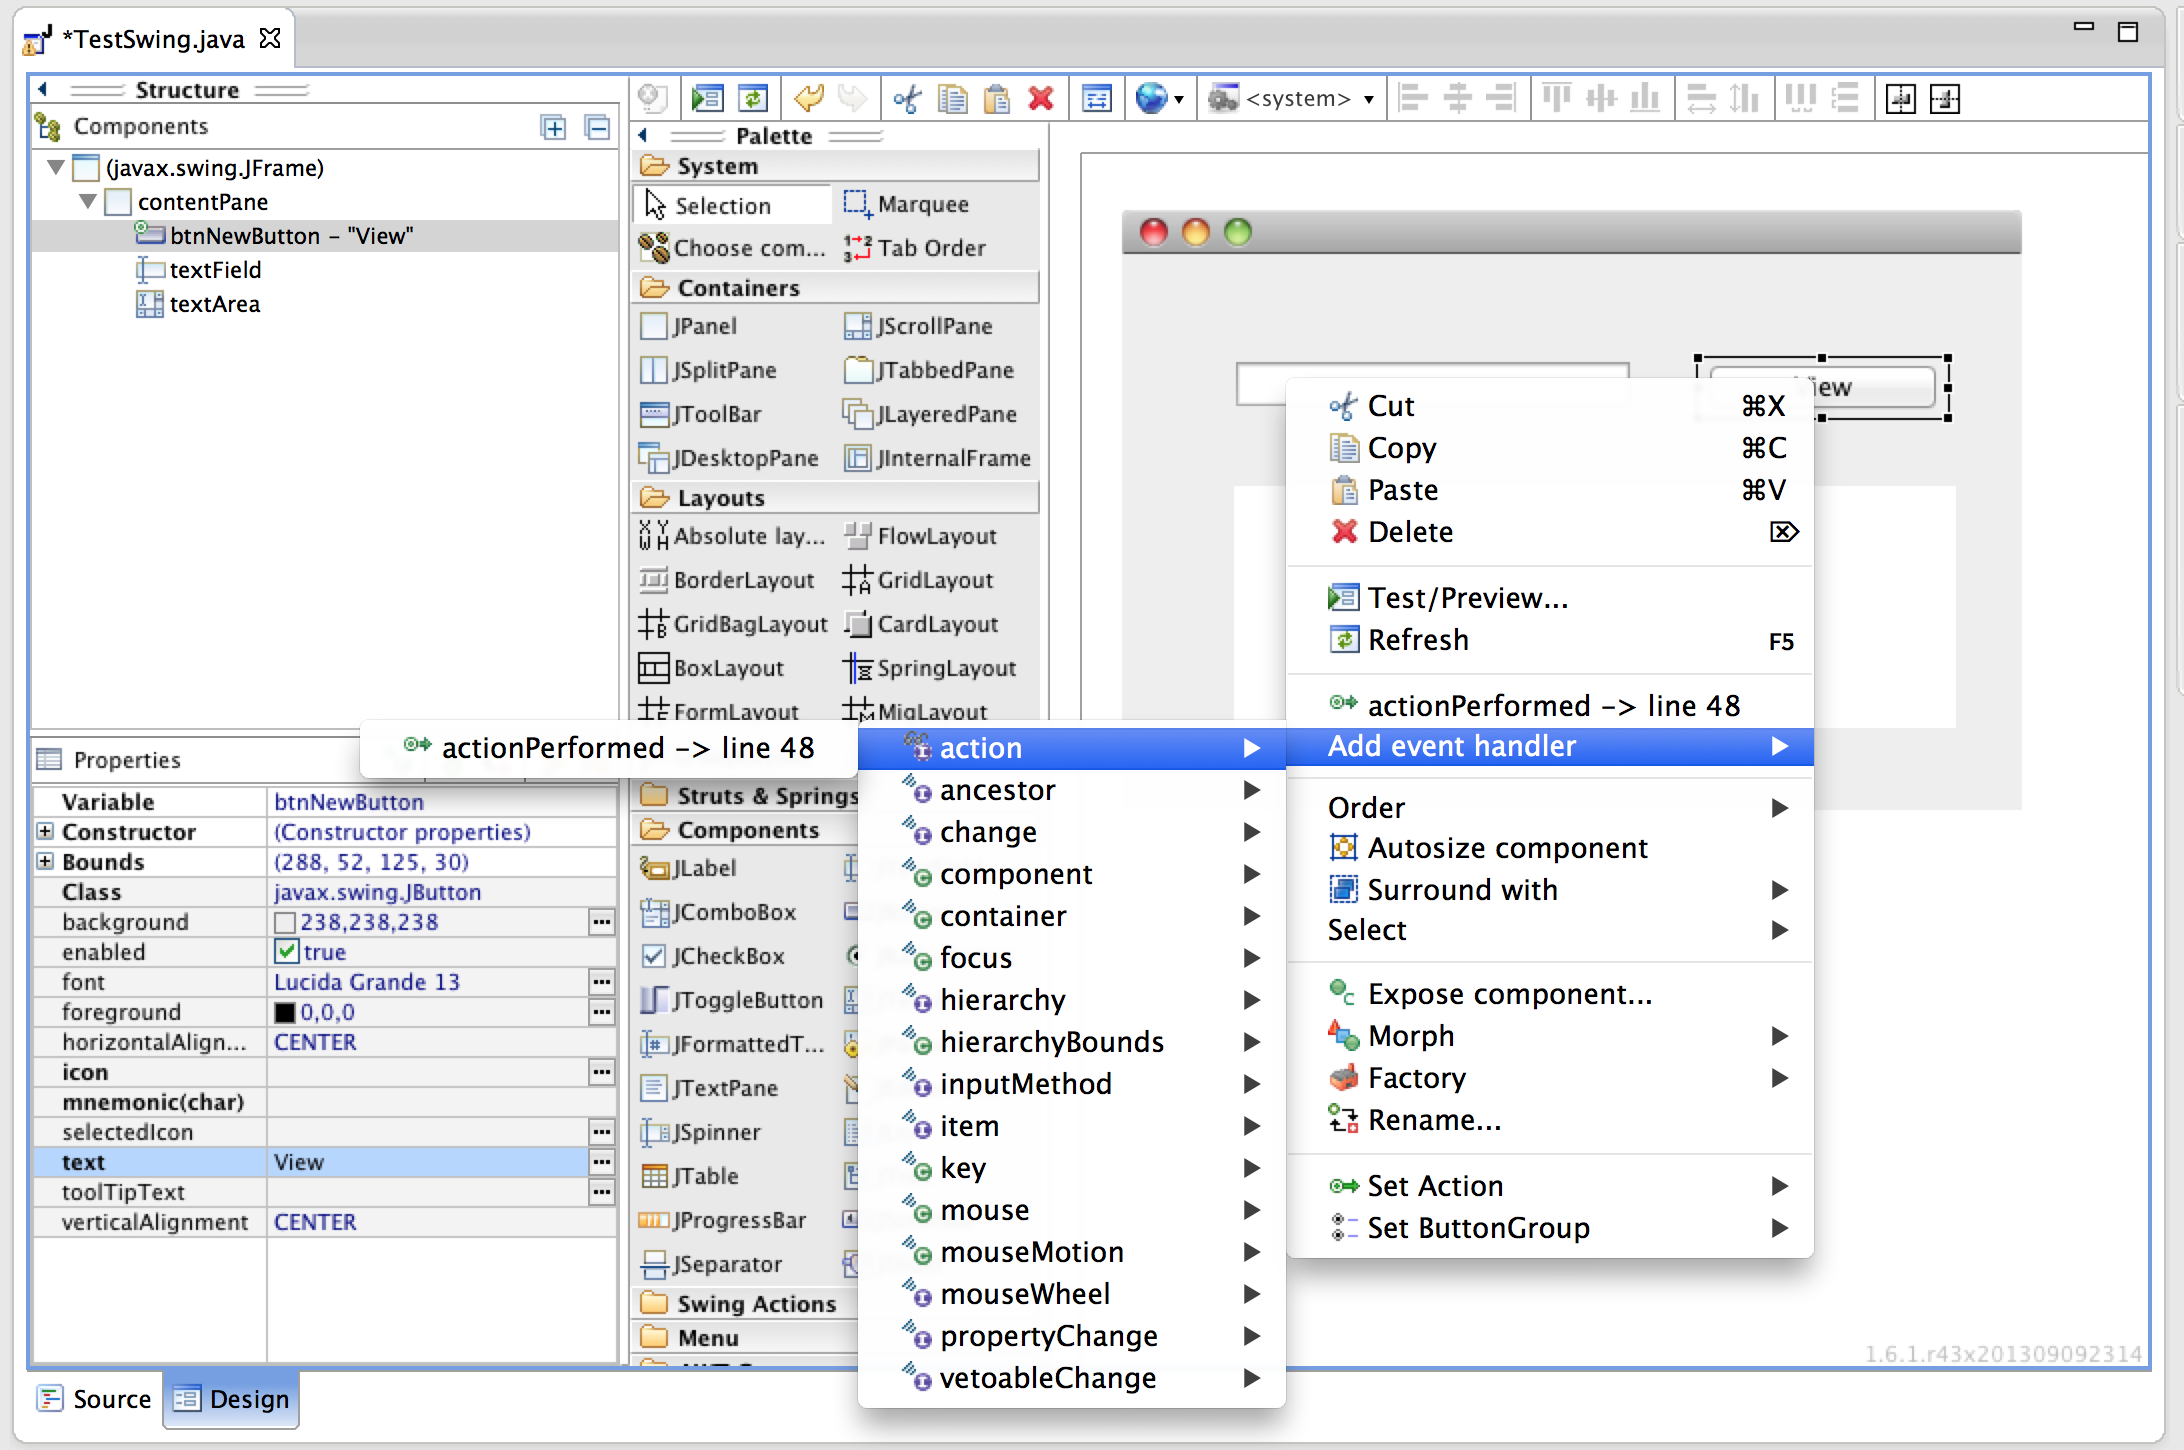
(Note: To add code for handling event on the button (like button clicking events) there are two ways,either double click on the element on the sample Jframe OR right click on the element and select add event handler --> action--> action performed. The corresponding event handling code gets added to the source.)
Step 11: You can view the sample code in the source folder in the following link
https://bitbucket.org/YaminiGotimukul/sampleswing/src/d551905ff5d00ded164a1e99466263943ba378b5?at=master
Step 12: To run the sample application right click on the project folder in the left navigation and click Run As --> Java Application
(Note : You can clone the application or copy the source code from the link specified in Step 11 before running the application )
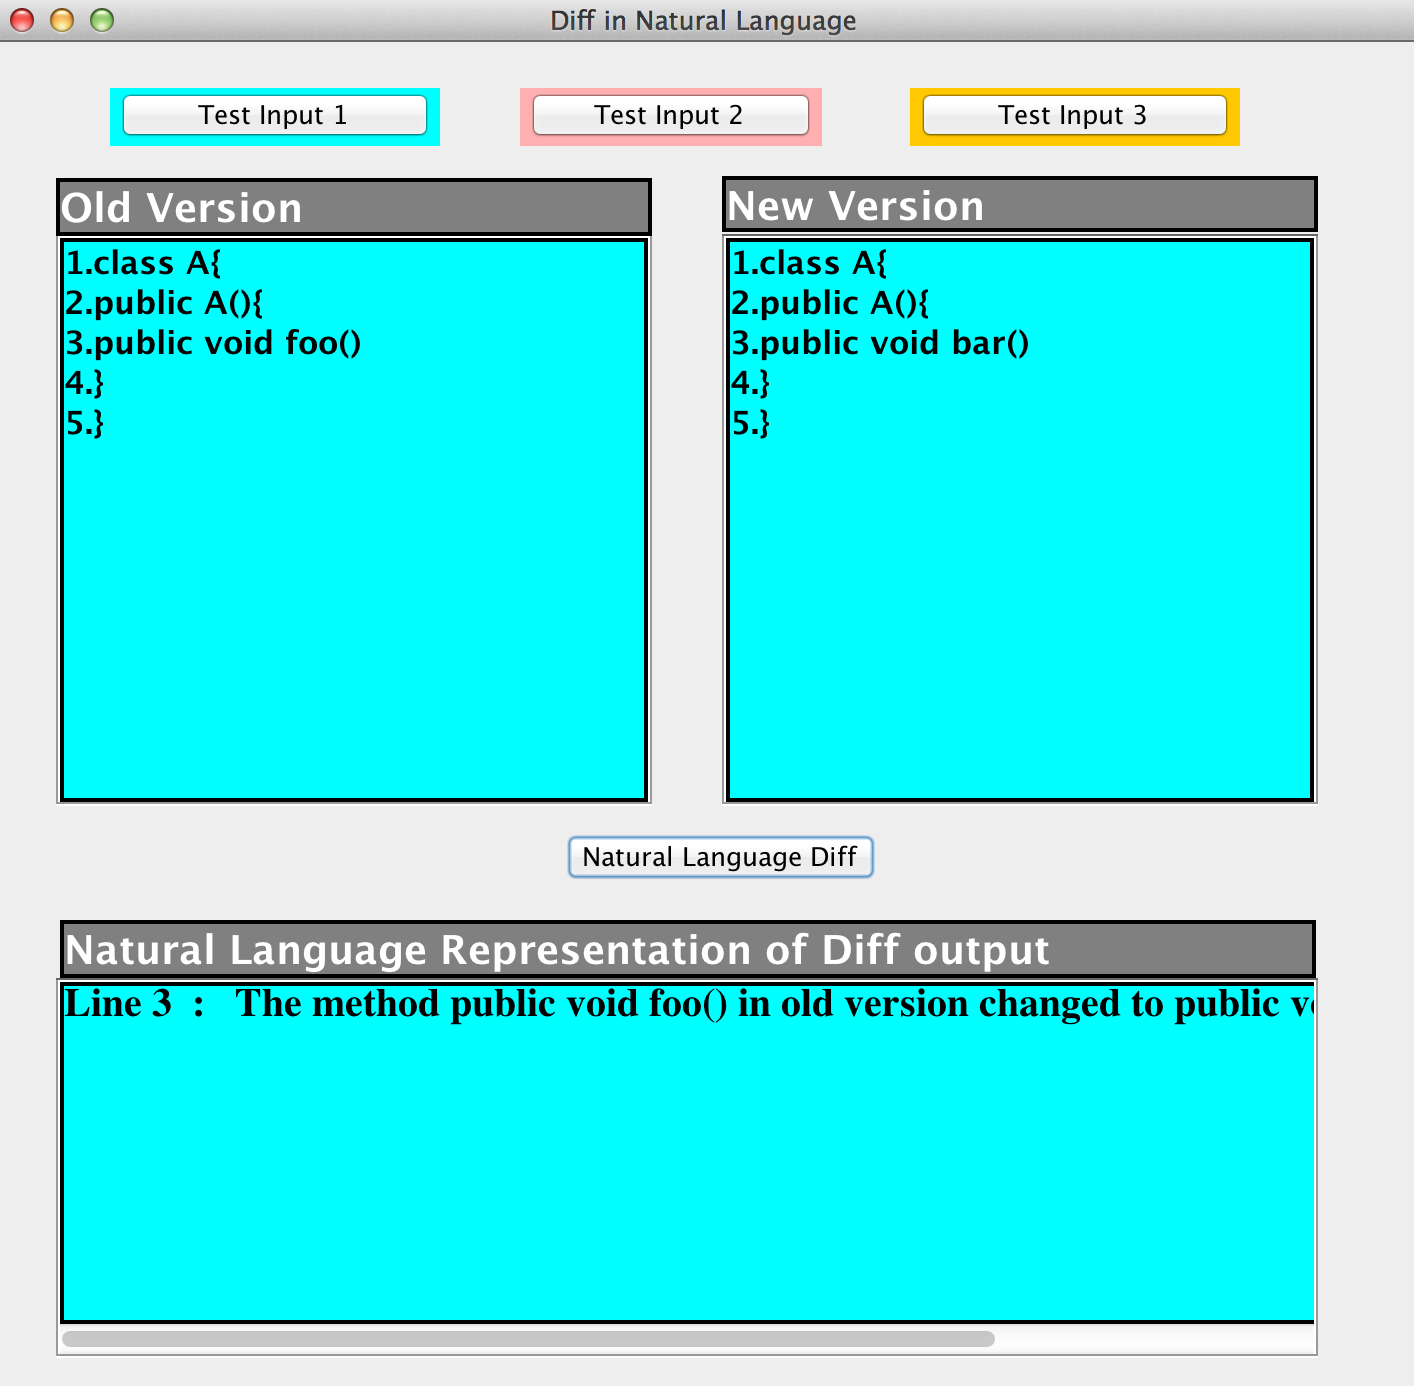
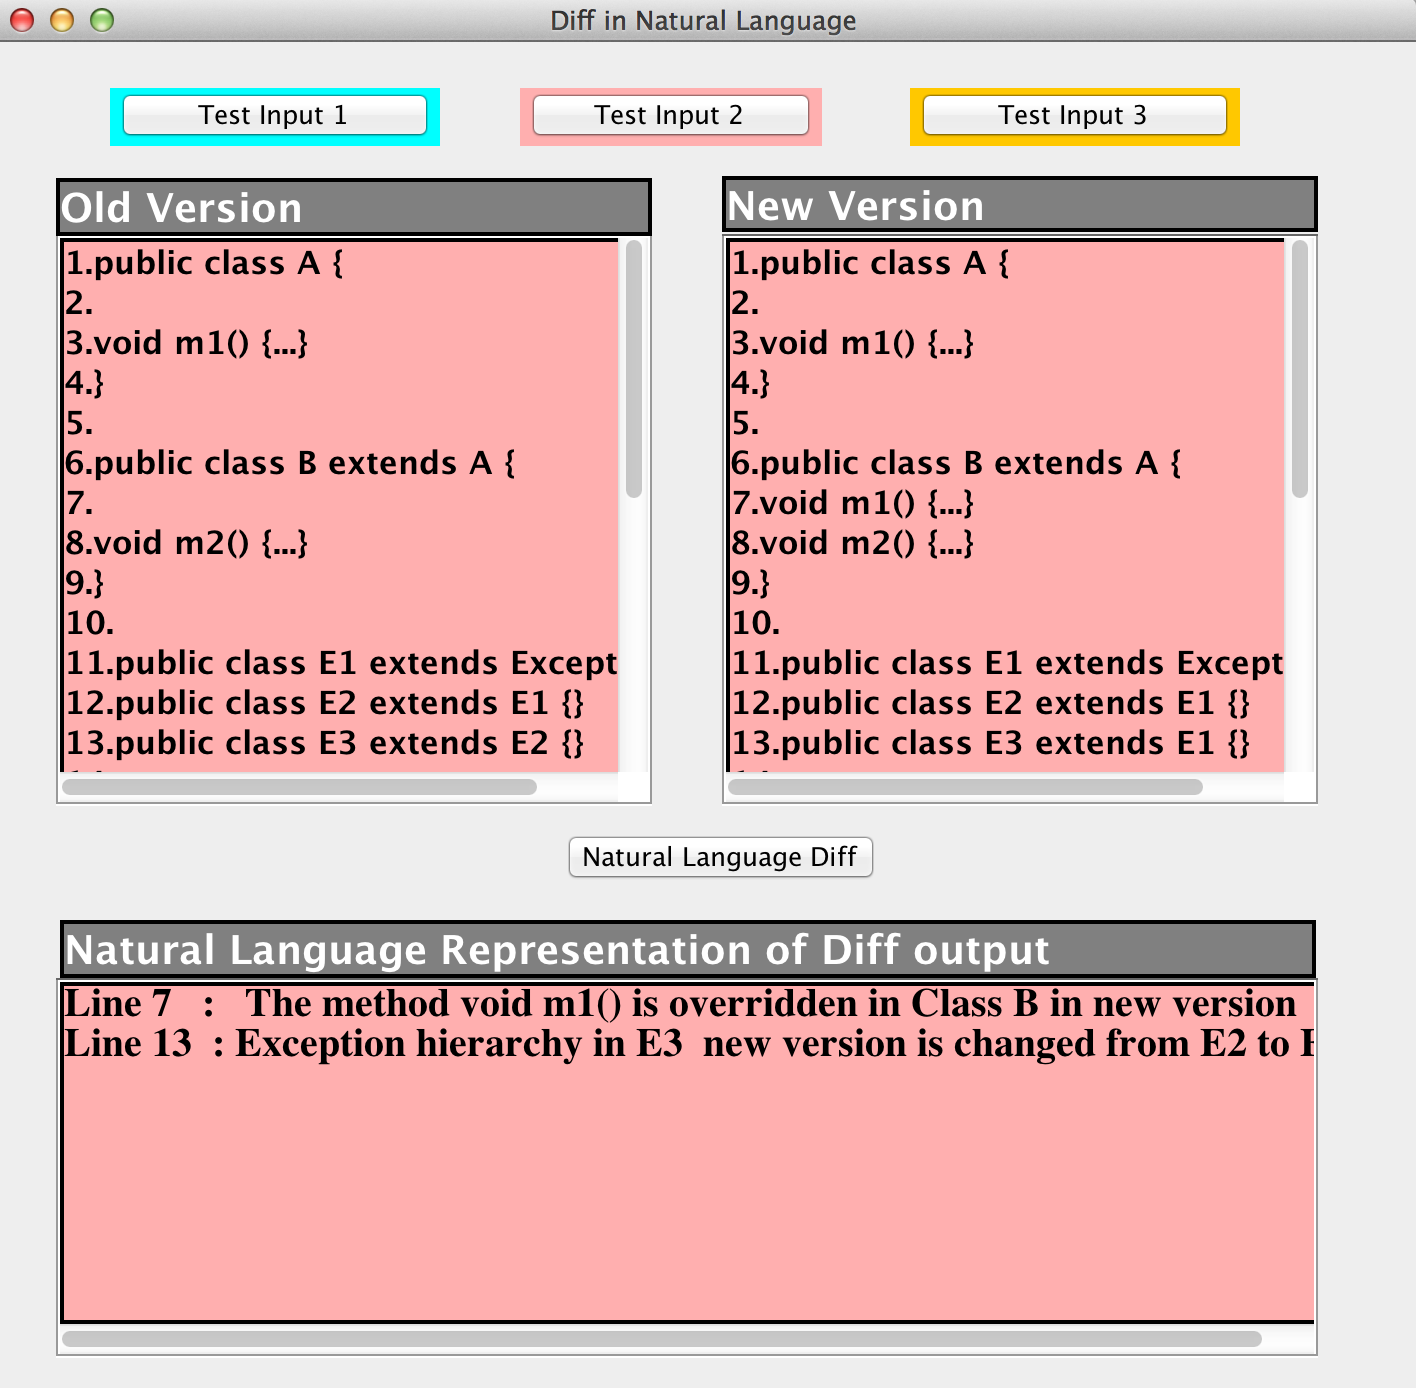
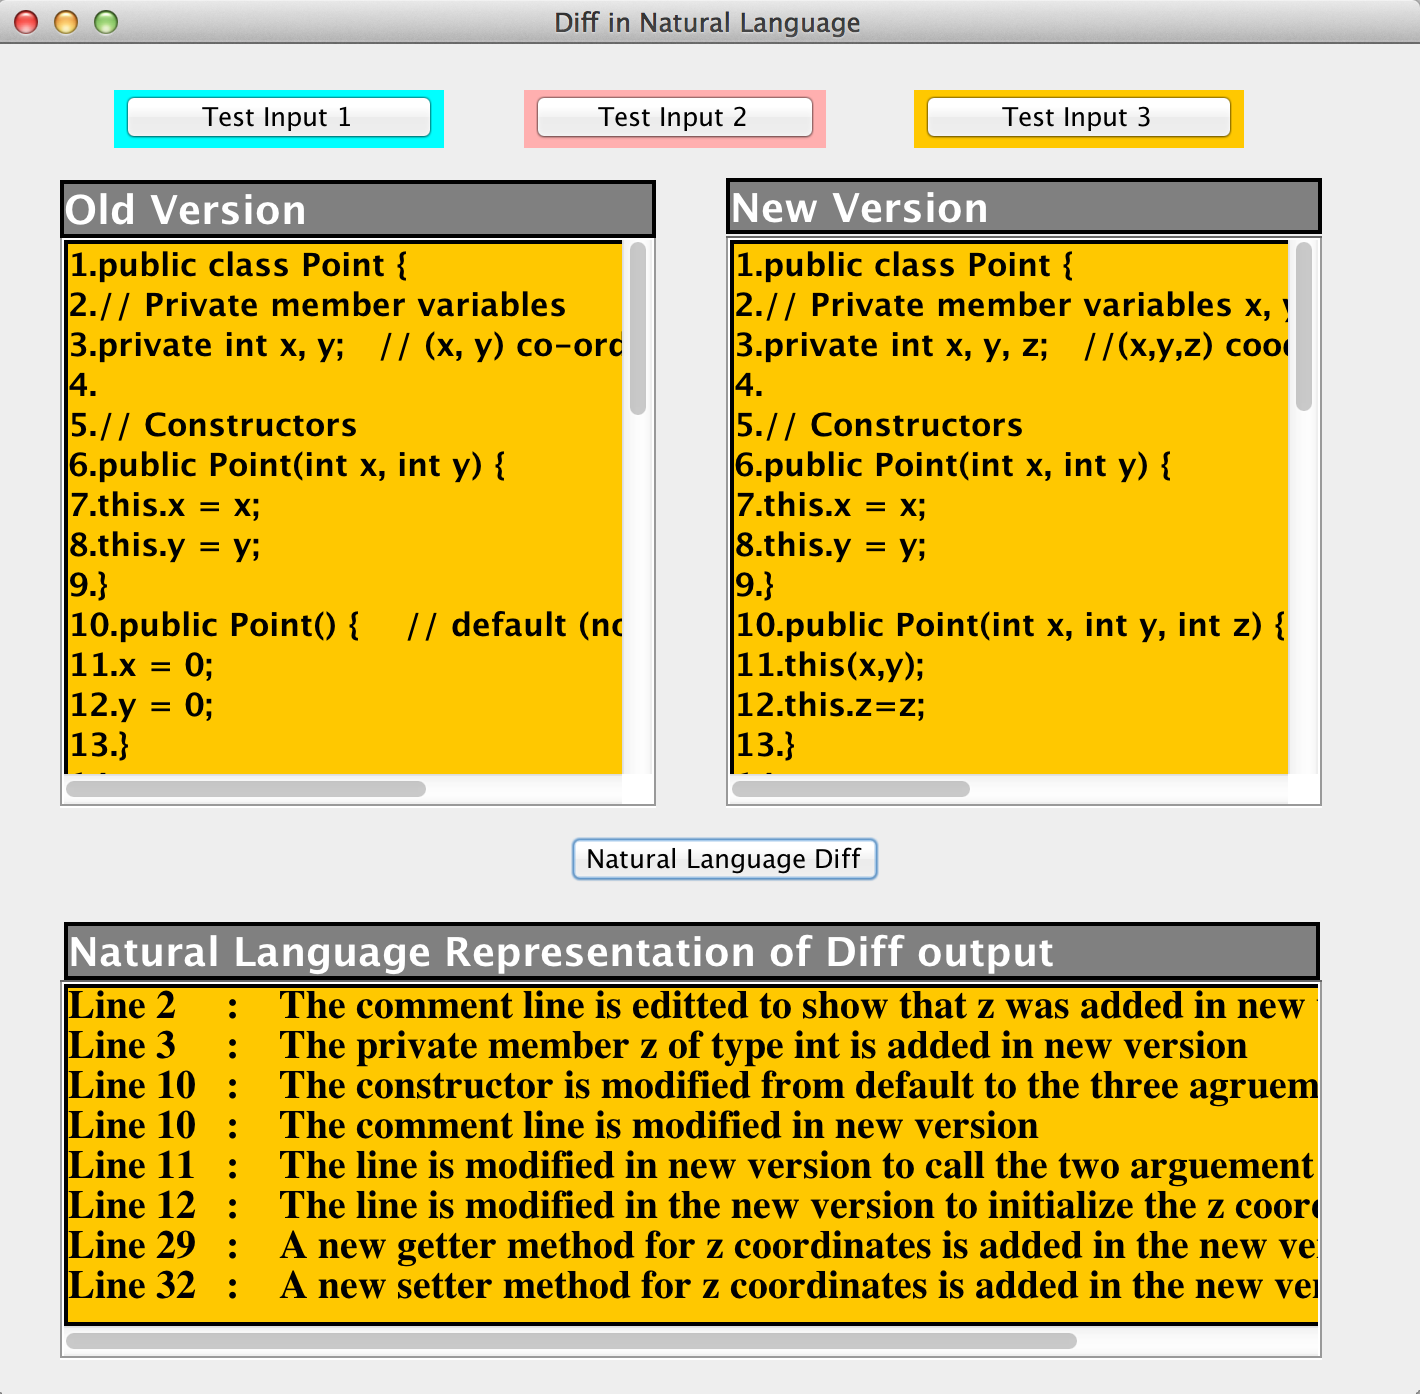
Step 13: You can choose any of the three inputs (by clicking on the buttons )and get the diff output in the natural language
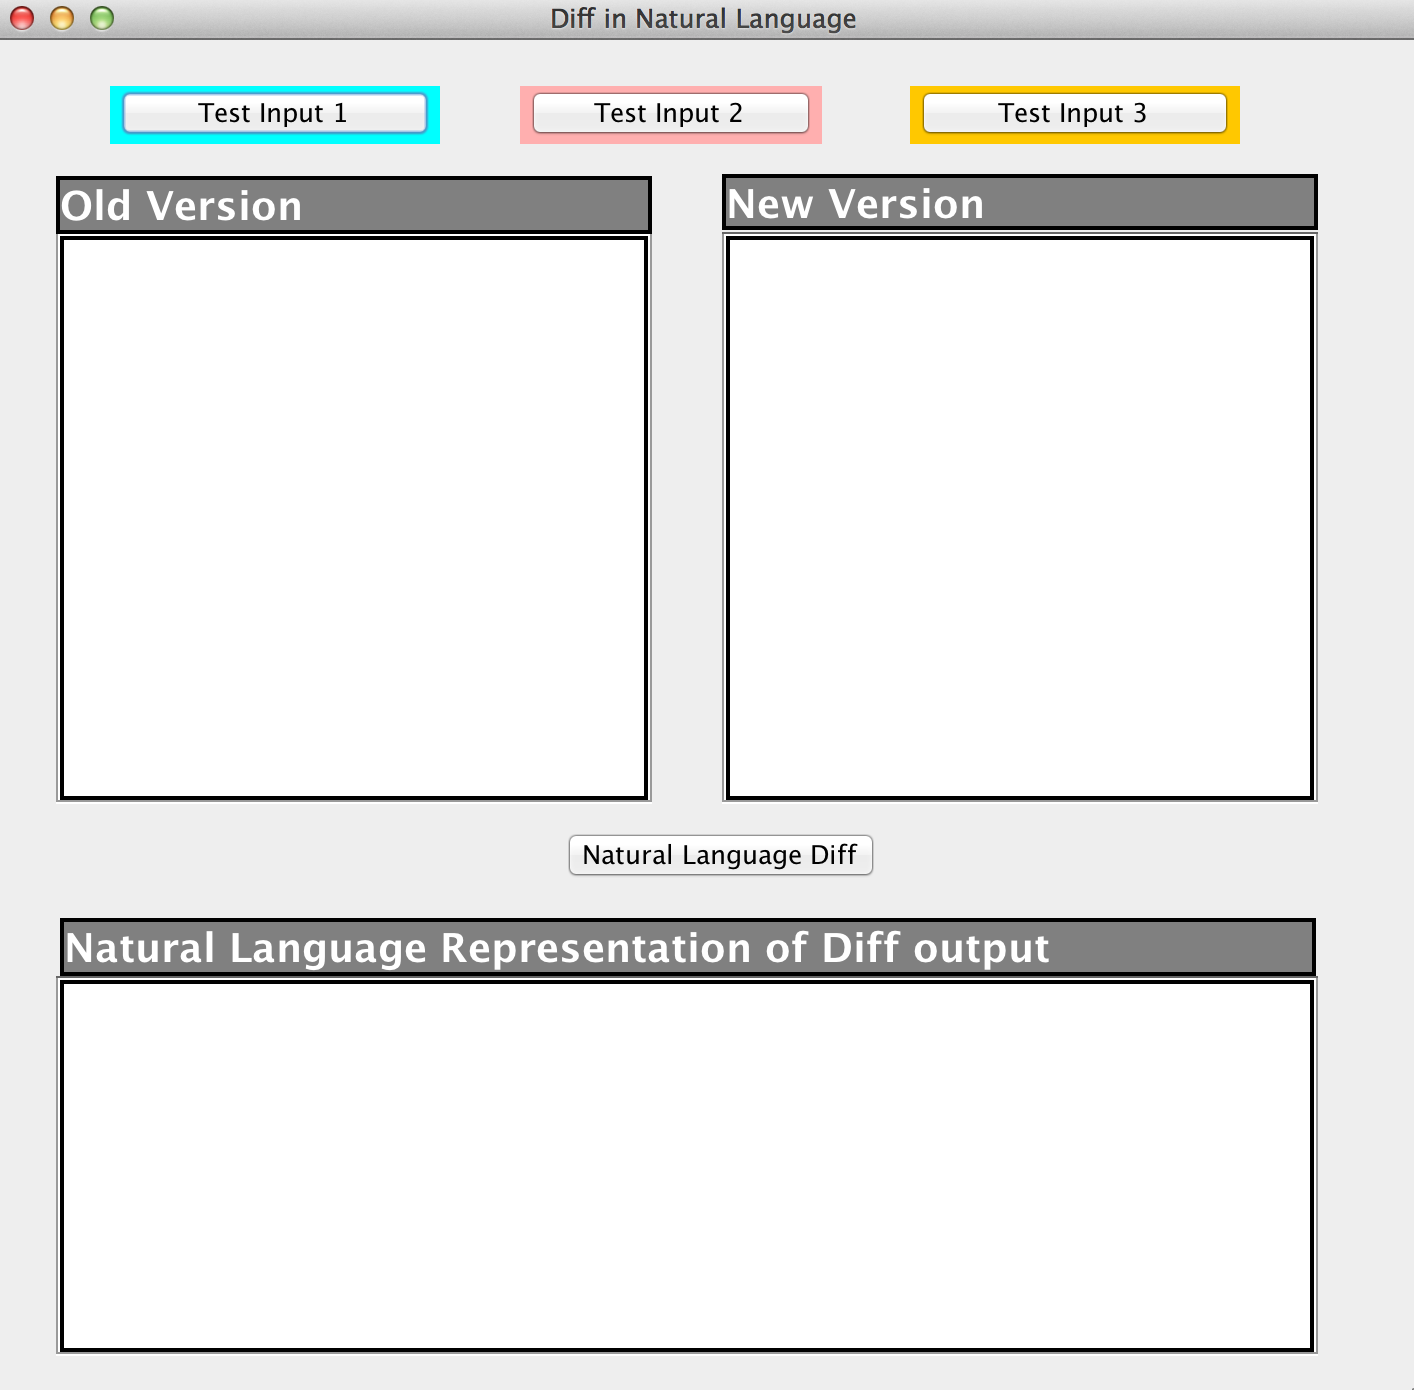
Sample Screenshots of the application

Sample application window
Sample diff outputs for different input programs
Test Input 1
Test Input 2
Test Input 3
(Note : The input is taken from 6 different file, if you want to run the application on your system keep the input files in the project root folder(refer screenshot under step 13) )