Visual C++ 2008
Microsoft Visual C++ 2008 is installed on the SEASnet machines, so if
you're willing to work only on those machines, you do not need to install
anything. Note that if you have a high-speed Internet connection, you can
remotely
access the SEASnet machines.
If you have another C++ compiler (e.g., g++ under LINUX) on your own
computer, and you do not want to install Visual C++ 2008, you are free to
use your own compiler during the course of your program development, but
you must ensure that what you turn in will compile and run correctly under
Visual C++ 2008. Be sure you budget enough time to transfer your program
files to a SEASnet machine and fix any portability problems.
(A naming note: Visual C++ 2008 is also known as Visual C++ 9.0.)
Obtaining Visual C++ 2008
If you would like to use Visual C++ 2008 on your own computer, you can
download
Visual C++ 2008 Express Edition for free from Microsoft
and install it. A few students in the past have had troubles with installing
software if they had not turned off their firewall and antivirus software for
the duration of the installation. During the installation, you'll be asked if
you want to install two optional components: Microsoft MSDN Express Library
for Visual Studio 2008 and Microsoft SQL Server 2005 Express Edition x86. For
CS 31, 32, and 33, you do not need to install these. The installation
appears to make no progress for about ten minutes while installing the .NET
3.5 Framework, but rest assured, it's doing something.
Just so you know, Microsoft has made the full Visual Studio 2008 Professional
Edition available at
no cost to you through the MSDN Academic Alliance program. However, for
CS 31, 32, and 33, this would be like using a flamethrower to light a candle
when a match would do, so you don't want to go this route.
Creating a Visual C++ Project
Visual C++ 2008 is designed to support developers of large systems, so to
use them as we will initially to write simple one-file programs may seem
like overkill. However, over time you will come to appreciate some
features (the debugger, especially).
Here is a way to set up a Visual C++ project to compile and run a
simple one-file program. A number of these steps may have alternate
ways to achieve the same end.
Start up the Visual C++ IDE (Integrated Development Environment).
If you don't have a shortcut on the Desktop, then from the taskbar you'll
probably select Start / Programs / Visual C++ 9.0 Express Edition / Microsoft
Visual C++ 2008 Express Edition.
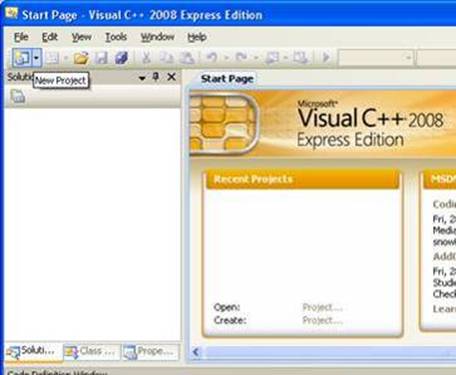
From the top toolbar, click the New Project icon (the leftmost icon).
Alternatively, from the menu, select File / New / Project...
In the New Project dialog, in the left panel, select Visual C++ / General.
In the right panel, select Empty Project. In the text boxes below, enter
a project name, such as "hello". So that you can more easily find
your projects later, you might want to change the Location to something like
"C:\CS31" on your own machine, or "Z:\CS31" on a SEASnet machine.

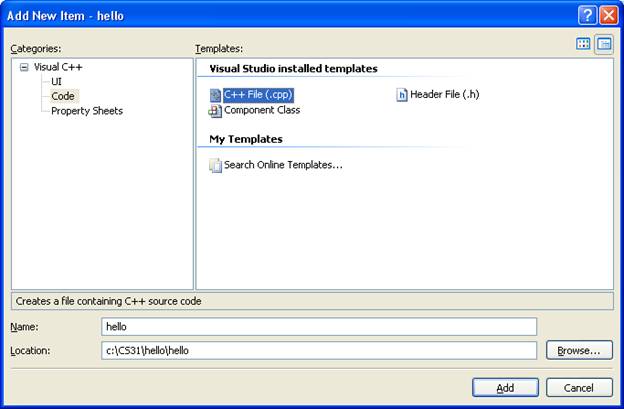
From the Project menu, select Add New Item. In the Add New Item dialog,
select Visual C++ in the left panel, then select C++ file (.cpp) in the
right panel. Enter a source file name, such as "hello", in the
Name text box below.
Edit the hello.cpp file in the window that appears. Type in a
program like
	#include <iostream>
	using namespace std;

	int main()
	{
	    cout << "Hey, this really works!" << endl;
	}
From the Debug menu, select Start Without Debugging. This will save your
source file, compile it, and run the resulting executable
if there were no build errors. (If you select Start Debugging, your
console window screen will disappear as soon as your program finishes
executing, which you don't want.)
If your program has any compile-time or link errors, a dialog box will appear
telling you there were build errors. Click No, you don't want to continue.
The Output window below your source file will list the errors. Scroll up to
the top error message, and double click on the message to see what it's
referring to in your code. Fix the error. You can click on and fix other
errors as well, but be aware that sometimes one mistake produces multiple
error messages, so your first fix may resolve those problems as well. Go back
to step 6.
If your program runs, its output will appear in a new console window that
pops up. When your program finishes, that console window will display the
text
Press any key to continue . . .
Press any key to dismiss the console window.