VirtualBox Tutorial for OS X
Download
System Requirements
To properly run the provided Ubuntu image, we recommend the following:
- 1GB of main memory
- 8GB of free disk space.
VirtualBox Installation
- Download
the VirtualBox.
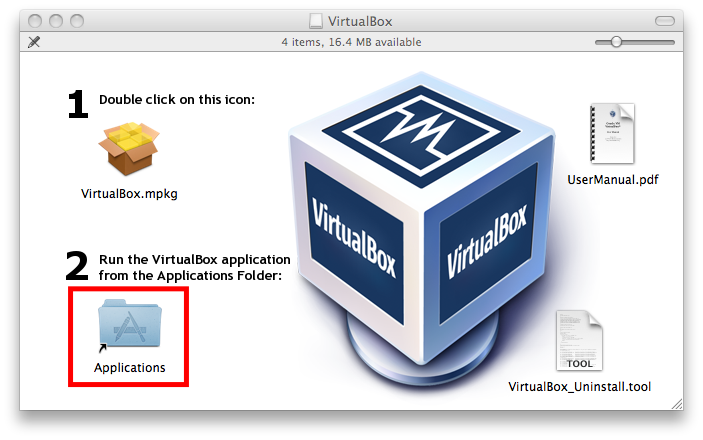
- Doble click the downloaded .dmg file and choose No 1. (double click 'VirtualBox.mpkg')

- Please follow the screen instructions to complete the installation.

VirtualBox Image Installation
- Download CS143.ova.
Since it's a very large file (~1GB), it will take some time.
Running VirtualBox for the First Time
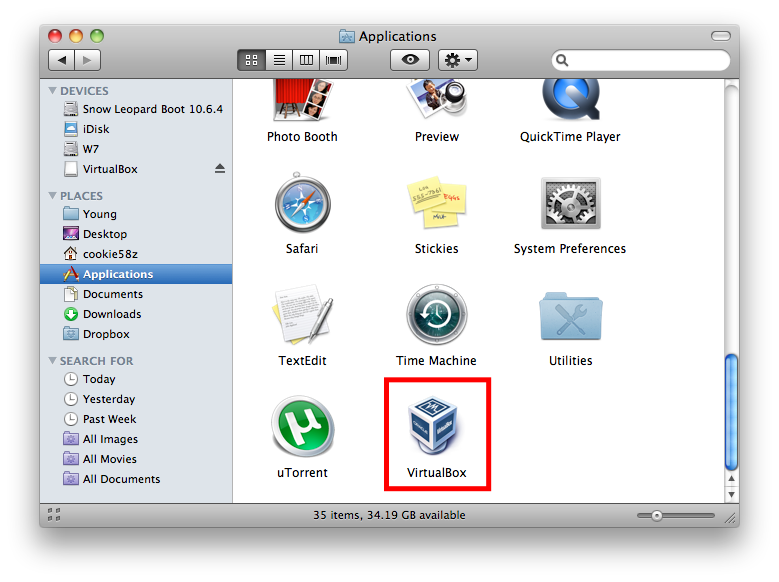
- Choose No 2 (double click 'Applications')
- To import CS143 virtual machine image, press 'command key(
 )'+'i' in the screen below.
- Note: Importing button is not listed in the button bar.
- From now on, we will call your Linux virtual machine as 'guest machine' or 'guest',
and your Mac as 'host machine' or 'host'.

- Click 'Choose...' button.

- Select the downloaded .ova file.
- Note: If you are using an older version VirtualBox, for instance, ver. 4.0.2,
it may not support reading *.ova file. You may use "tar" command
to unpack the ova file and get a .ovf file. (Note: however, we are NOT recommend
such a compromised solution, and we are not responsible for any problems caused by the solution.)

- Keep the default settings and start importing the virtual machine.
After a while, you will see the following screen.

- Before starting the guest machine, you need to set the shared folder
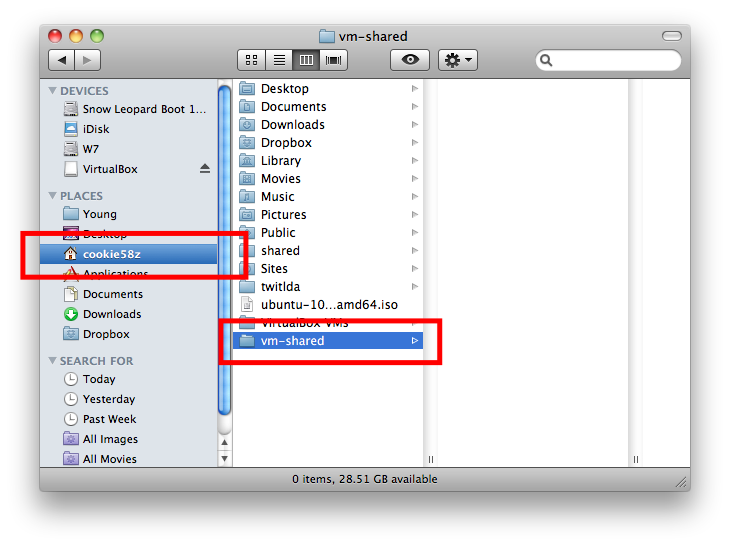
- In OS X Finder, create a folder you want to use for sharing between
the guest machine and the host machine. (e.g. /Users/YourUsername/vm-shared)
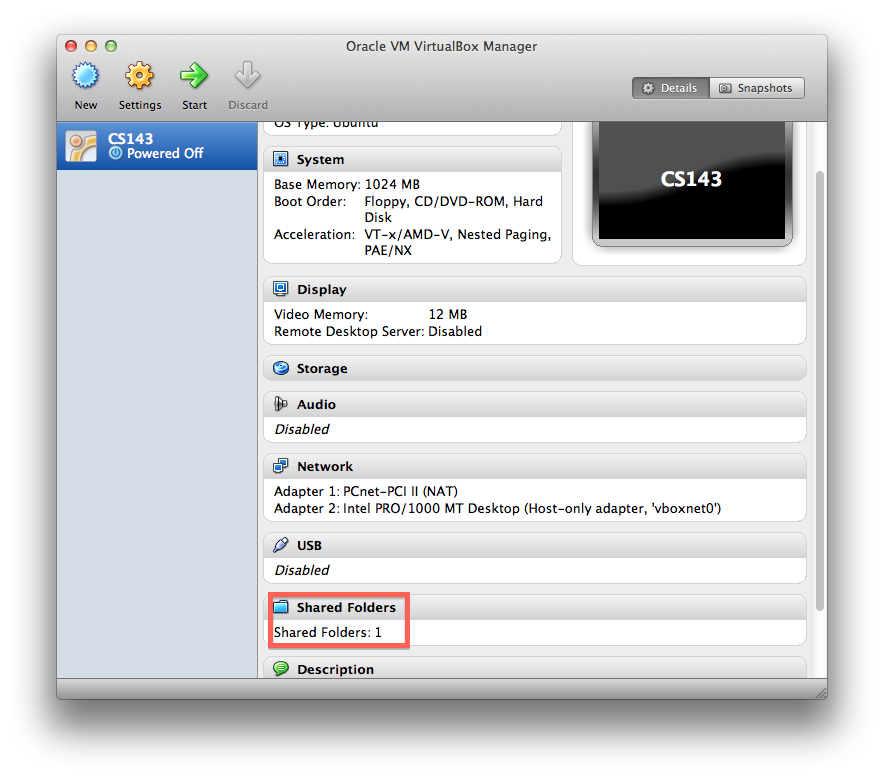
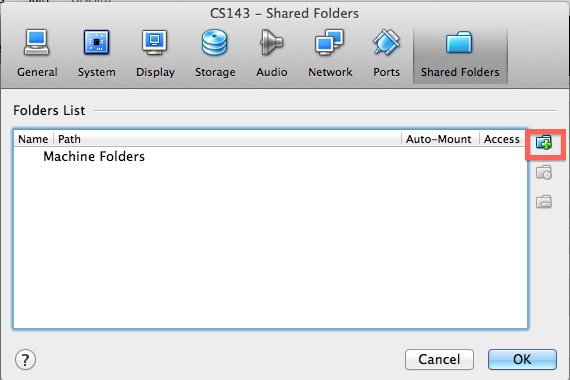
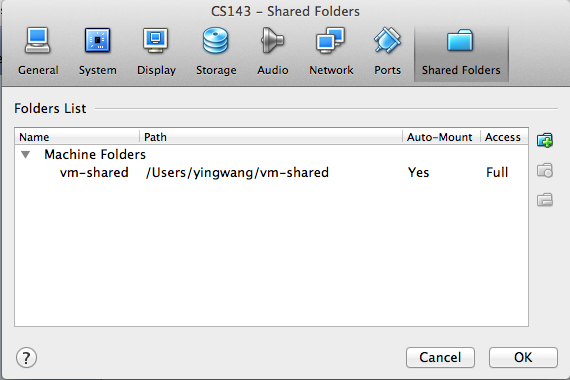
- In VirtualBox, scroll down and double click 'Shared Folders'
- Click 'Add' icon on the right side of the popup.
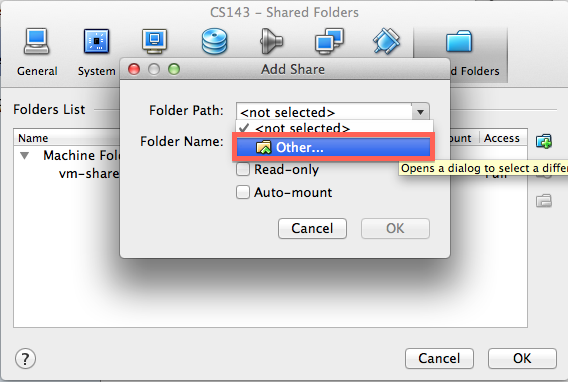
- Click the drop down button and select 'Other...'
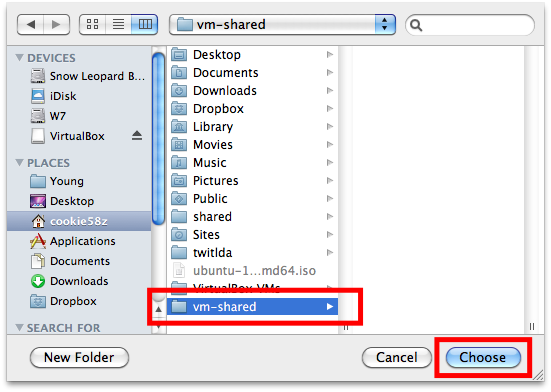
- Select the folder you created in OS X Finder.
- Note: The folder selected here is connected to '/home/cs143/www'
in the guest machine. If you copy a file to this folder in the host,
you can access the file in the guest machine and vice versa.
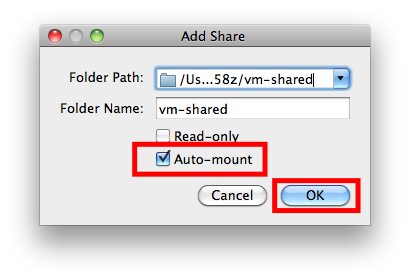
- For the second "Folder name" field, type "vm-shared", all lower case letters. Select the "Auto-mount" option, deselect the "Read-only" option and click "OK".
- Now you are ready to start the guest machine. Click 'Start' button
from the top button bar.

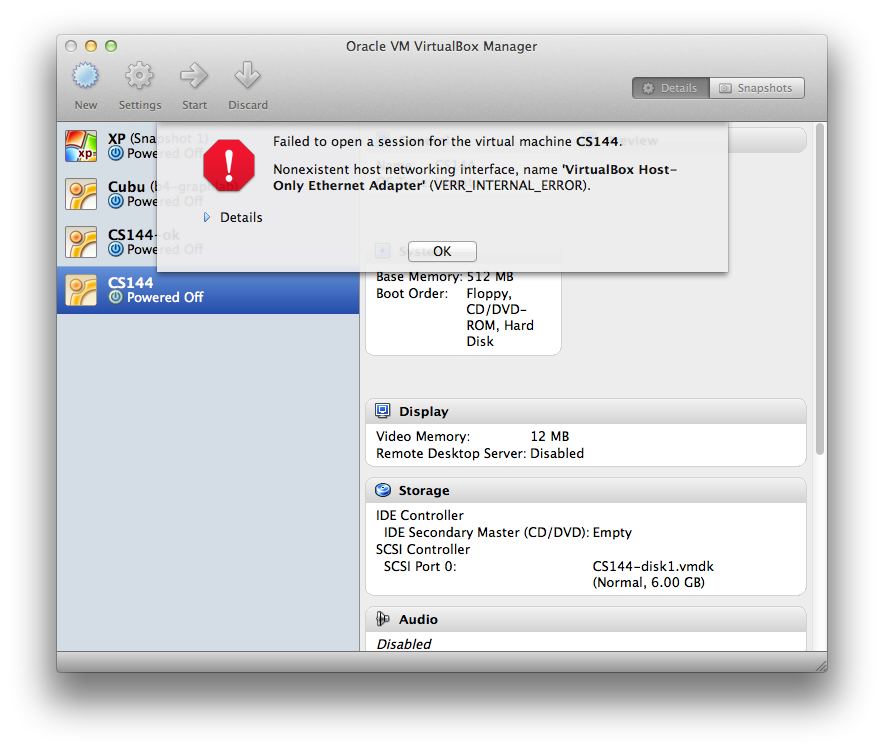
- You might see the error message below. (especially if you use the latest VirtualBox)
- In that case, go to the section Setting Host-Only Networks
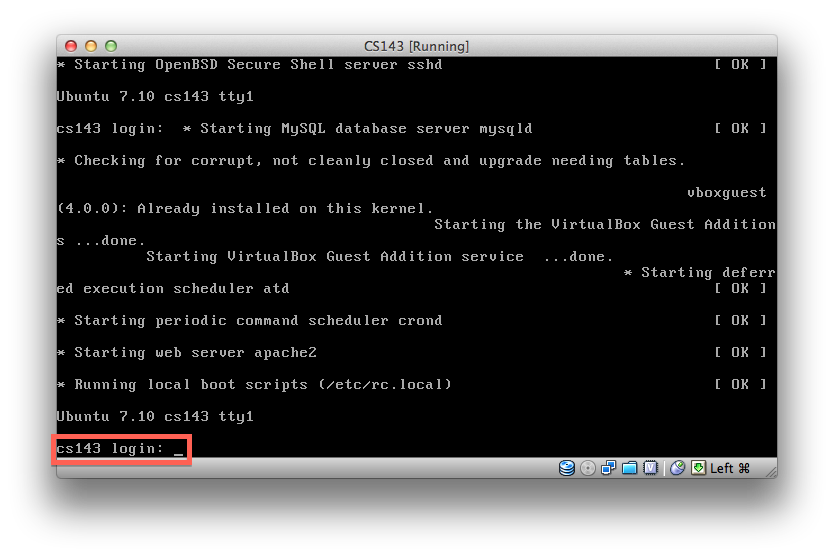
- After a while, you will see the login screen. Type 'cs143' in Login input box
and 'password' in Password input box.
- Once you log in to the guest machine, you will see the following screen with an
xterm window on the upper-left corner of the desktop.

SSH login to Virtual Machine from Host
The CS143 virtual machine shares the internet connection provided by the host. If desired, you can access the virtual machine at the IP address 192.168.56.20 from the host machine.
For example, you can use this IP to connect to the guest machine with an
SSH client in the host (this setup will help you "cut-and-paste" some text
from the host to a file in the guest machine).
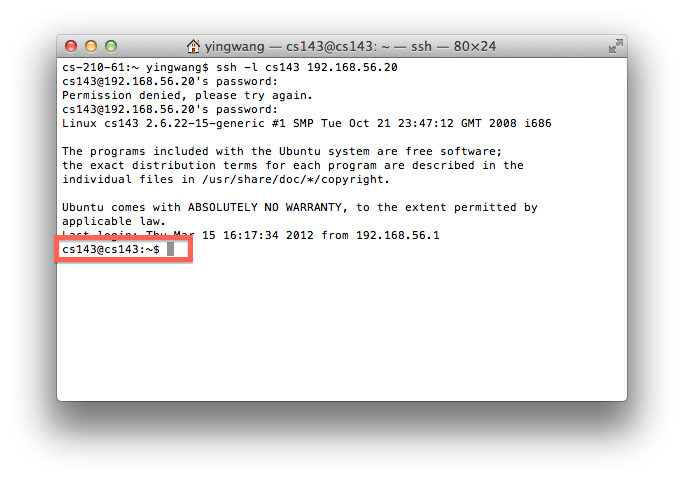
- Open a terminal in the host and type 'ssh -l cs143 192.168.56.20'
- If the terminal asks 'Are you sure you want to continue connecting?', type 'yes'.
- If you cannot ssh to the guest from the host, please check Setting Host-Only Networks.
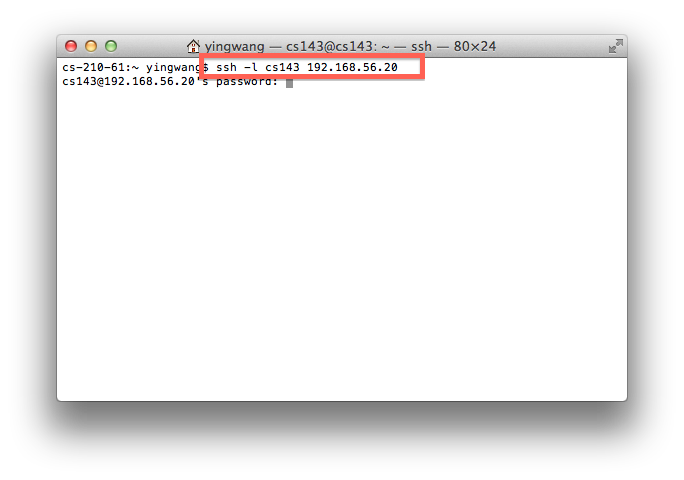
- Then if the terminal asks password, type 'password'.
- Now you can access the guest machine from the host via ssh.
Siimilarly, you can use this IP to access
the Tomcat Web server in the guest machine using a broswer in the host.
In case you are unable to access the virtual machine at 192.168.56.20, see the following troubleshooting page:
Exiting VirtualBox
To exit from the guest machine, click the red circle button
on the guest machine window. You will see 3 options.
- Save the machine state: saves the current state. You can access
the preseved state later.
- Send the shutdown signal: sends shutdown signal. But it may not work in some cases.
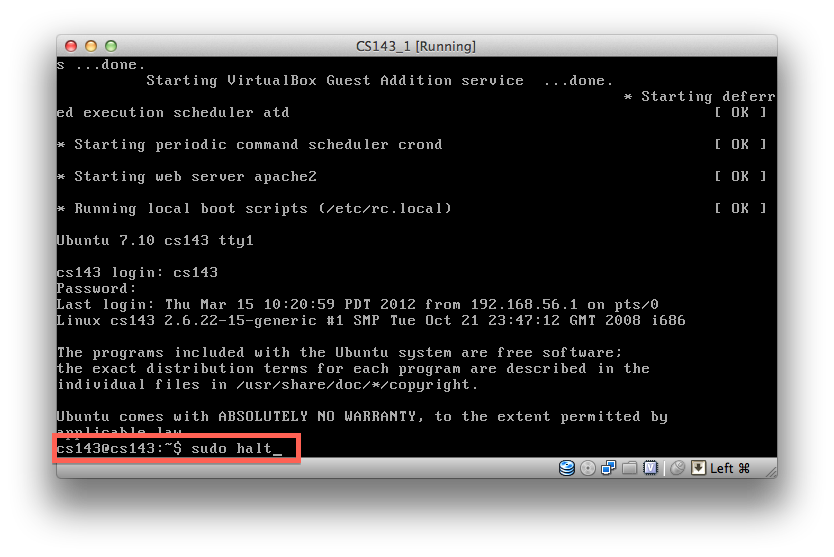
- Power off the machine: Turns off the guest machine. Please avoid using this option. Instead, please type "sudo halt" in the xterm to turn of the virtual machine.
For a reboot, You may type "sudo reboot" in the xterm.

Setting Host-Only Networks
- In top menu, click 'VirtualBox' and then choose 'Preferences...'
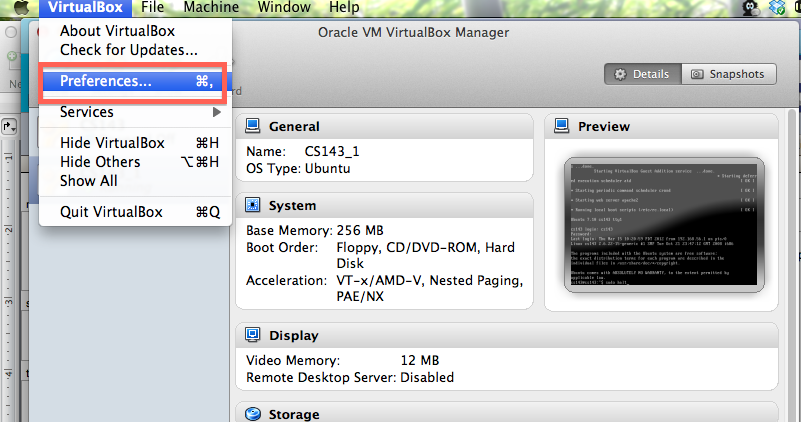
- Choose 'Network' and click 'Add(+)' button. You will see 'vboxnet0' is newly added.

- Now click 'Settings' in the VirtualBox Manager window.

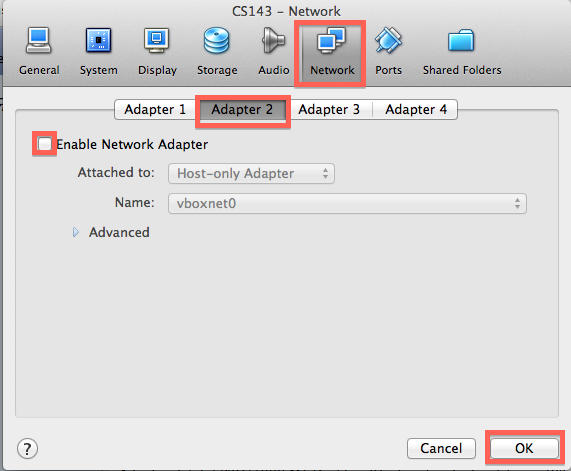
- Choose 'Network' and then select 'Adapter2'.
- Uncheck the checkbox 'Enable Network Adapter'.
- Click 'OK'.
- Click 'Settings' in the VirtualBox Manager window again.
- Choose 'Network' and then select 'Adapter2'.
- Check the checkbox 'Enable Network Adapter'.
- Click 'OK'.
- Click 'Start' in the VirtualBox Manager window to start your virtual machine.

 )'+'i' in the screen below.


 )'+'i' in the screen below.


