Introductory Digital Design Laboratory
CS M152A, Lab 1, 2021 Spring, UCLA, Department of Computer Science
This is CS M152A Introductory Digital Design Laboratory by Prof. Majid Sarrafzadeh and I work as TA Instructor for Lab 1.
Syllabus
This is a simplified version of the Syllabus, check the full syllabus on CCLE.
Course Description
In this lab class, you will get hands-on experience with design implementation on Field Programmable Gate-Arrays (FPGAs). You will apply what you’ve learned in CS51A or ECE M16 (combinatorial and sequential logic) and implement some designs using modern design tools and Hardware Description Language (HDL).
We have designed several projects for you to implement using the Xilinx ISE design and implementation environment. These projects are intended as tutorials for you to learn how to put designs together, implement them in Verilog HDL, and provide the design in simulation only.
Due to the major concerns regarding the coronavirus outbreak, unfortunately, you will not be able to access the lab or work with the real hardware this quarter. You will work on the designs on your own computer using the free version of Xilinx ISE (Webpack), and will simulate and synthesize the designs before submitting the project.
Important Notes
- There will be no teamwork. Each project is graded individually.
- While the course syllabus and structure are similar between sections, the sections are separate in terms of grading and other class activities. Please only contact the instructor or the TA in charge of the section you are enrolled in.
- While the class is being offered online, attendance is required and it will be part of the grading. If you think, for a justified reason, you would not be able to join the class regularly, please contact the instructor and TA (you need to have approval by 04/09/2021)
- All deadlines are fixed and there will be no extensions.
Schedule
| Date | Session Agenda | Deadline |
|---|---|---|
| Mon, 3/29/2021 | Introduction and Getting to Know Students / Syllabus Overview | |
| Wed, 3/31/2021 | Introduction to FPGA & Verilog / What we need in the course | |
| Mon, 4/5/2021 | Lecture [Verilog + Experiments] | |
| Wed, 4/7/2021 | Project 1 Introduction (FP) | |
| Wed, 4/14/2021 | Project 1 Due: Sunday 04/18 - 11:55PM PST, Project 2 release: Sunday 04/18 - 5pm PST | |
| Mon, 4/19/2021 | Project 2 Introduction (Clk Gen) | |
| Wed, 4/28/2021 | Project 2 Due: Sunday 05/02 - 11:55PM PST, Project 3 release: Sunday 05/02 - 5pm PST | |
| Mon, 5/3/2021 | Project 3 Introduction (FSM Vending Machine) | |
| Wed, 5/19/2021 | Project 4 Introduction (FSM Parking Meter) | Project 3 Due: Sunday 05/23 - 11:55PM PST, Project 4 release: Sunday 05/23 - 5pm PST |
| Mon, 5/31/2021 | Memorial Day Holiday | |
| Wed, 6/2/2021 | Project 4 Due: Sunday 06/06 - 11:55PM PST |
First Things First
How to start with Xilinx ISE design suite
Xilinx ISE design suite runs in a VM and it takes about 40G storage. TAs are still trying to find some workstations for students with limited storage space. I’ll appreciate it if you can clean up some storage space in your computer.
Download and Install ISE
This is my notes for downloading the ISE. This ISE is a VM running in Virtual Box so you can handle that no matter what system you are using. For detailed notes see Here and Here. For Windows user, these two manuscript provide methods to install without a preexisted VirtualBox, but I’ve never tried that. I guess the installer will install a VB for you, lmao
-
Install Virtual Box, follow the instruction or you can simply use
brew install --cask virtualboxon MacOS with Homebrew. - For the first time user, please register your Xilinx account Here. I used my cs email address (example@cs.ucla.edu) to register, using ucla email address (example@ucla.edu) works as well
- Then download the ISE Design Suite for Windows 10 by choosing 14.7 Windows 10 > 14.7 Windows 10
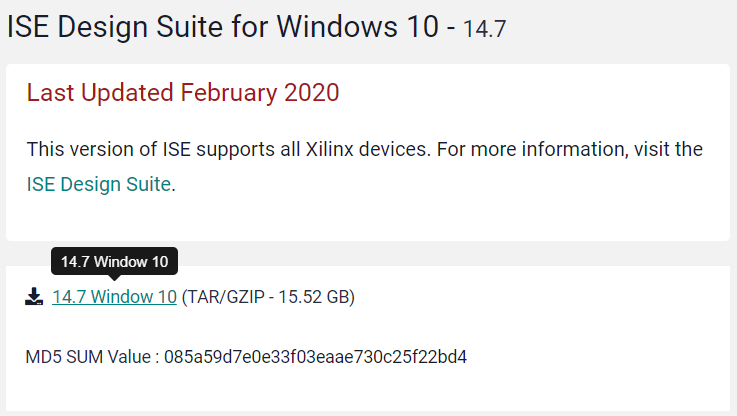
This package takes ~40G to install, please note that you need to download the windows 10 version no matter what system you are using.
-
You will be navigated to the name and address verification page, I used UCLA as company name (address 404 Westwood plaza Eng VI, 90095) and that works. Click download.
-
The file name should be
Xilinx_ISE_14.7_Win10_14.7_VM_0213_1.zip, unzip it and findXilinx_ISE_14.7_Win10_14.7_VM_0213_1/ova/14.7_VM.ova -
Double click it to import to Virtual Box, you can also click
importbutton on virtual box to import that.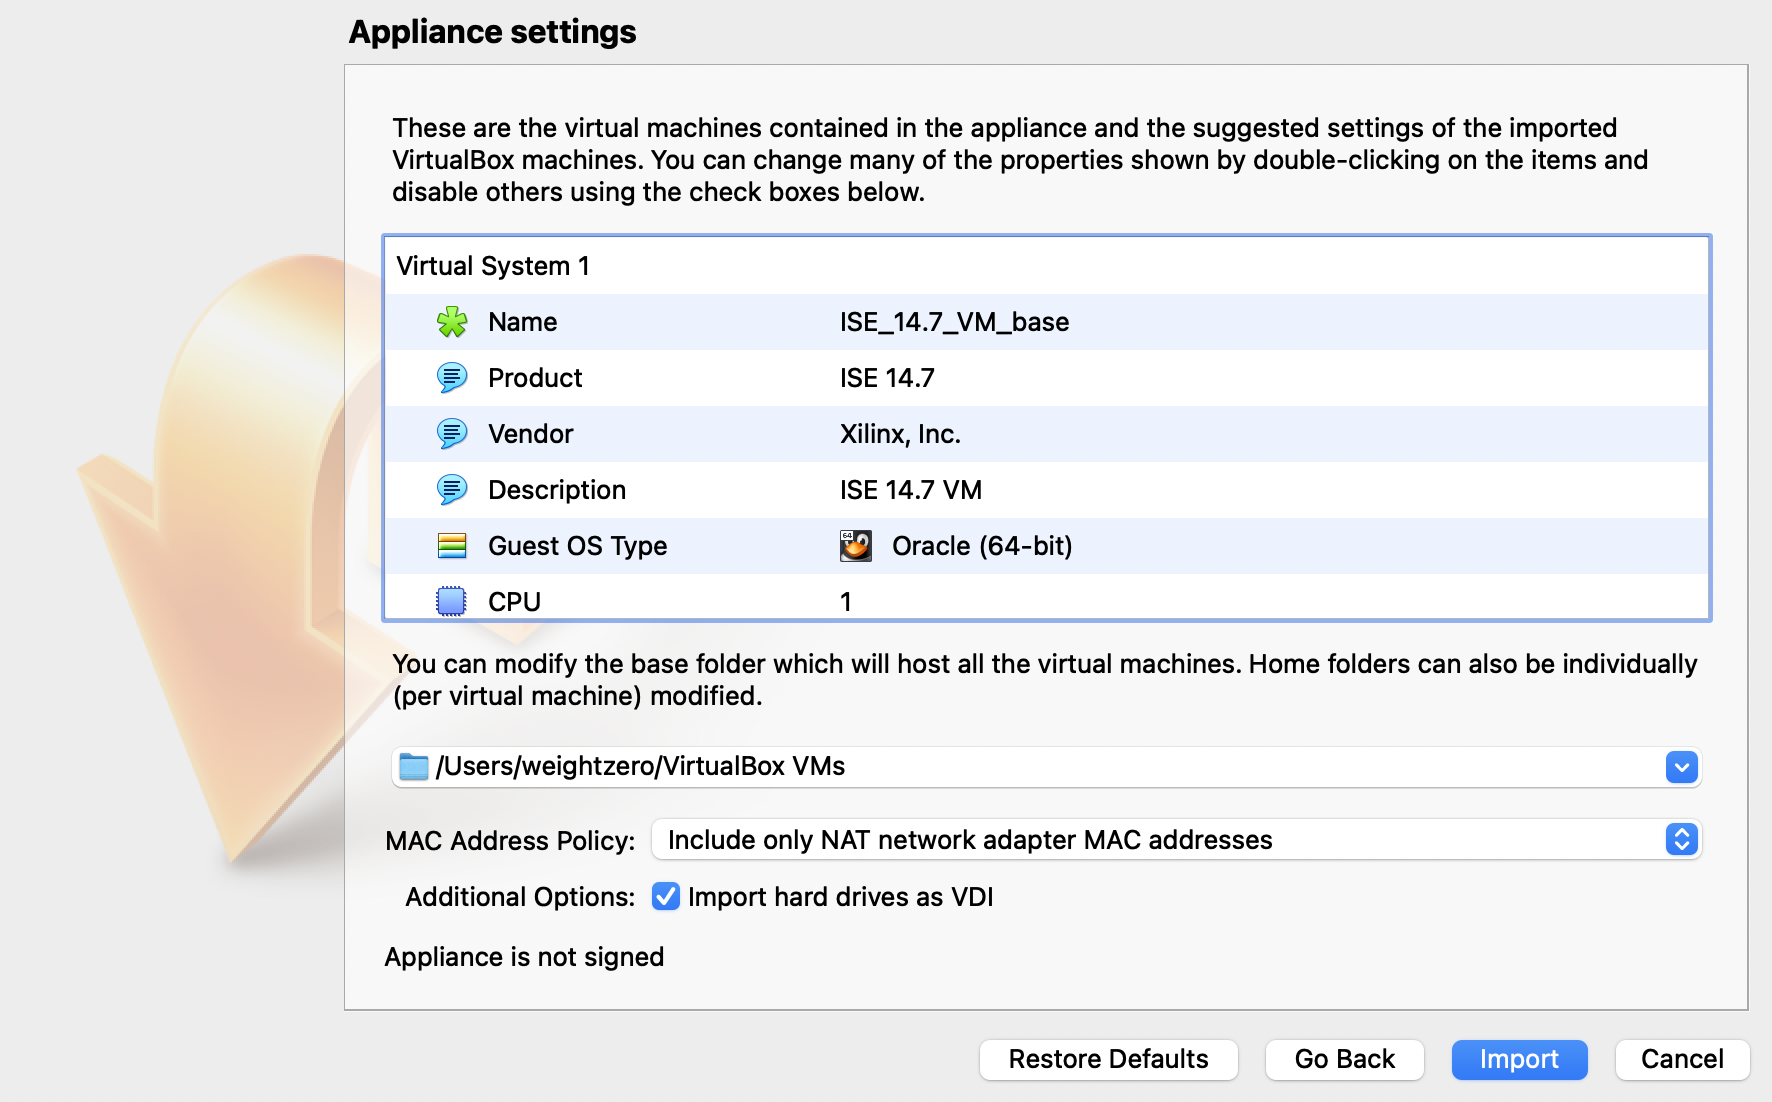
-
Click import, then select the
ISE_14.7_VM_baseon the homepage then click start
- Common error on Mac:
kernel driver not installed (rc=-1908)solution: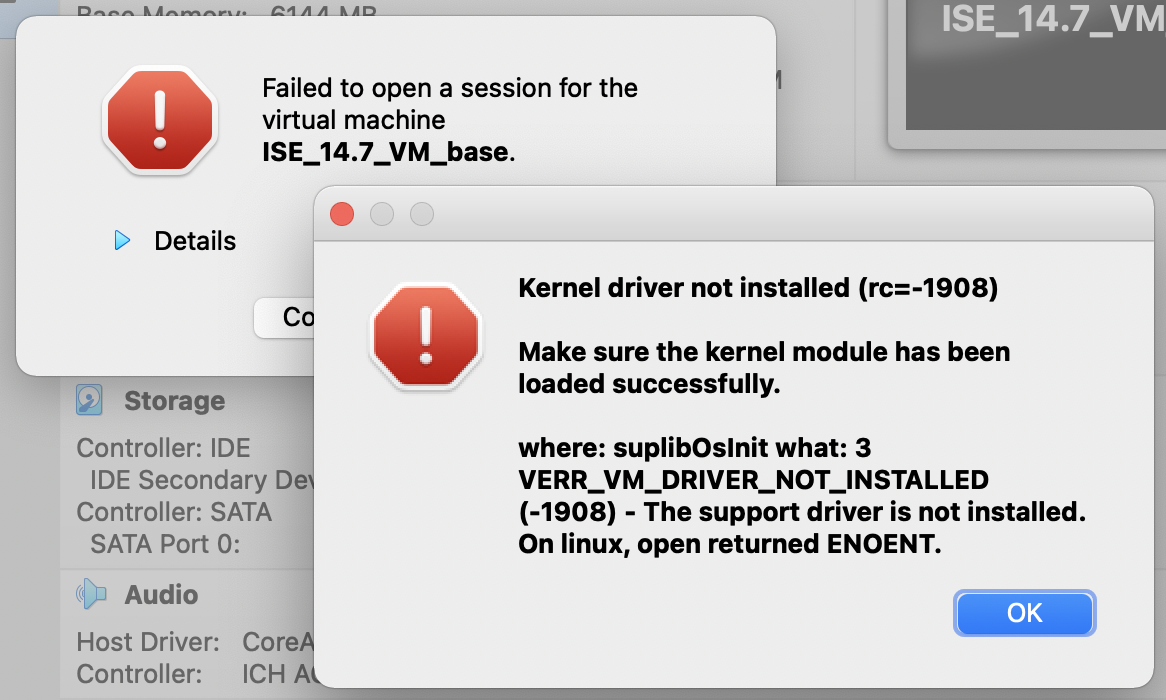 Try to reinstall the virtualbox by
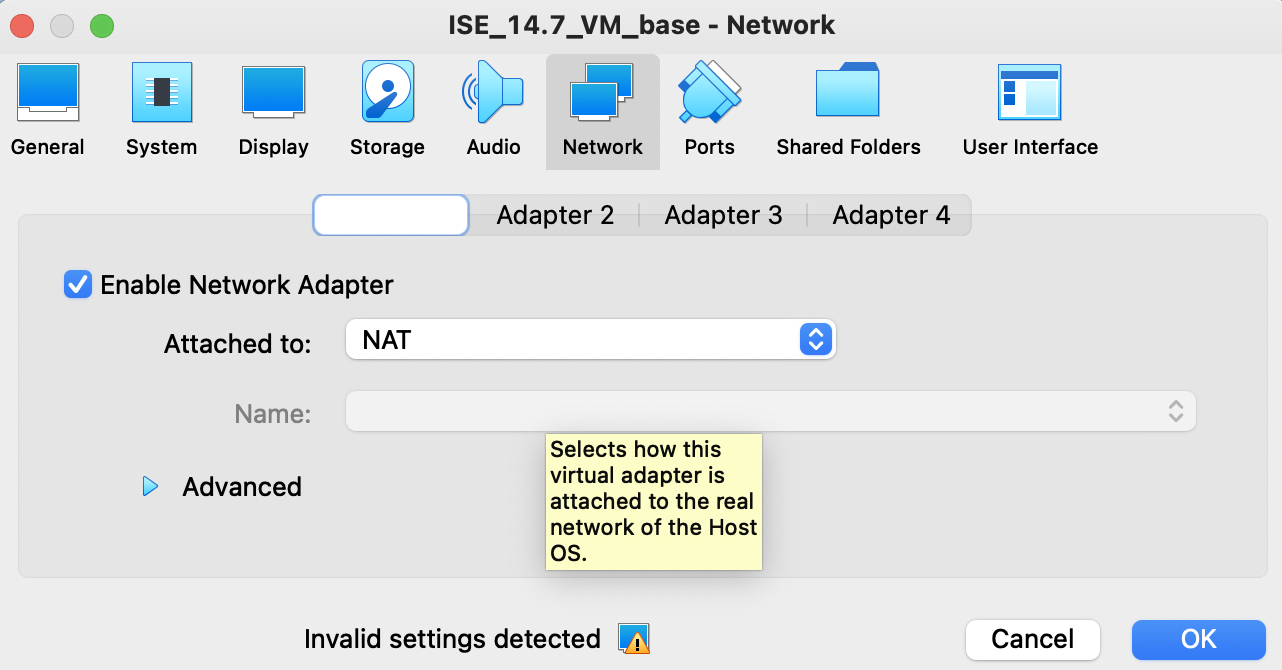
 brew reinstall --cask virtualbox. Then in System Preferences > Security & Privacy, click the lock and giveOracle Americaloading privilege. - Network Configuration: for the sake of simplicity I switch the network (in Settings > Network) to NAT
- Common error:
NS_ERROR_INVALID_ARG (0x80070057), try this link and find some solutions. One basic error is you do not have enough space on your disk (~40GB+). But there might be some other issues.
- Common error on Mac:
- Congratulations! You have successfully installed the ISE.
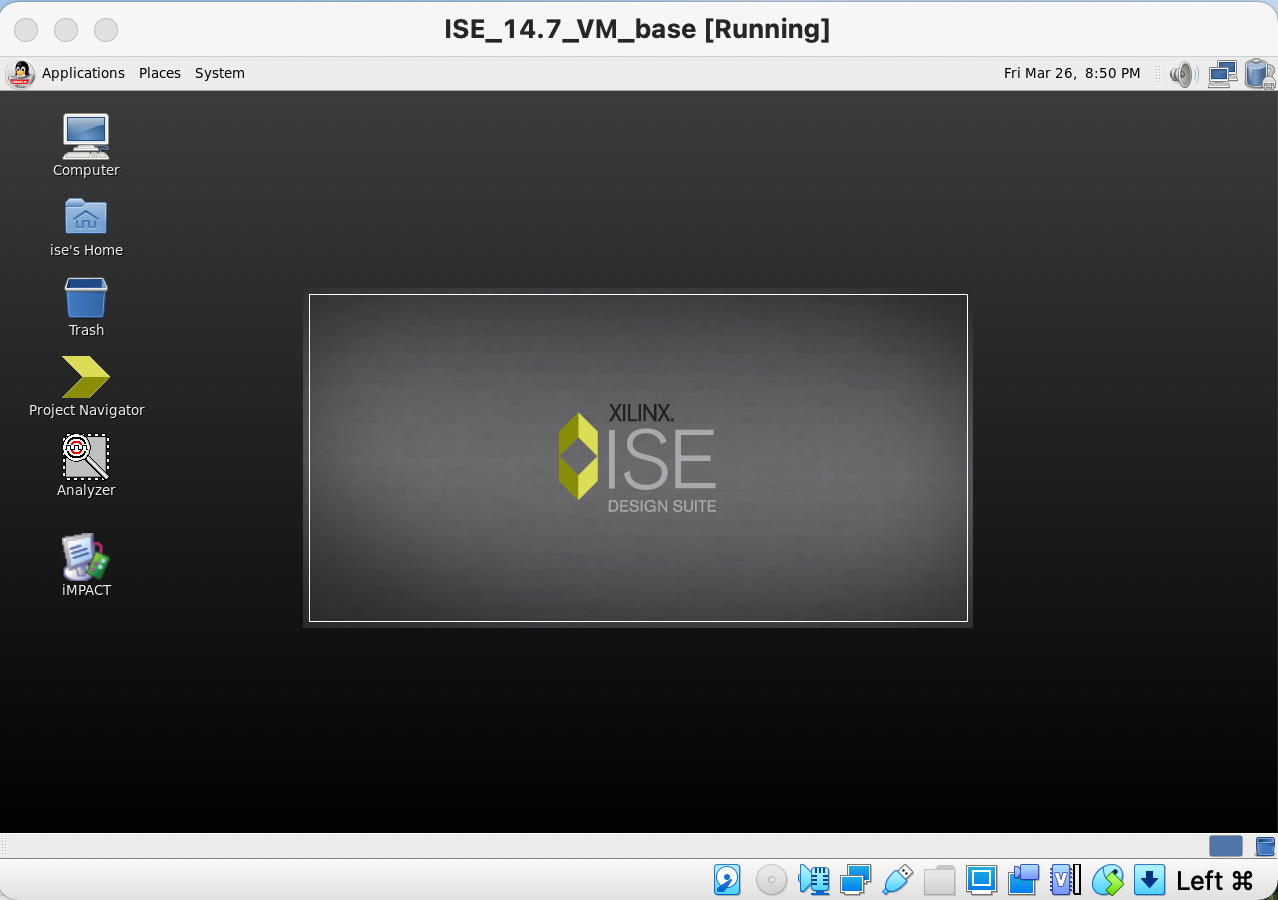 The username for that Linux Guest system is
 iseand password isxilinx
Useful VB tricks
-
Create a share folder would help you transfer files in and out the ISE VM. Click
Settingsin VirtualBox Manager, underShared Folderstag, click the+button on the right. Enter the folder path for the share folder in your Host Machine. Remember to selectAuto-mount. Start your VM and you will see it on the desktop.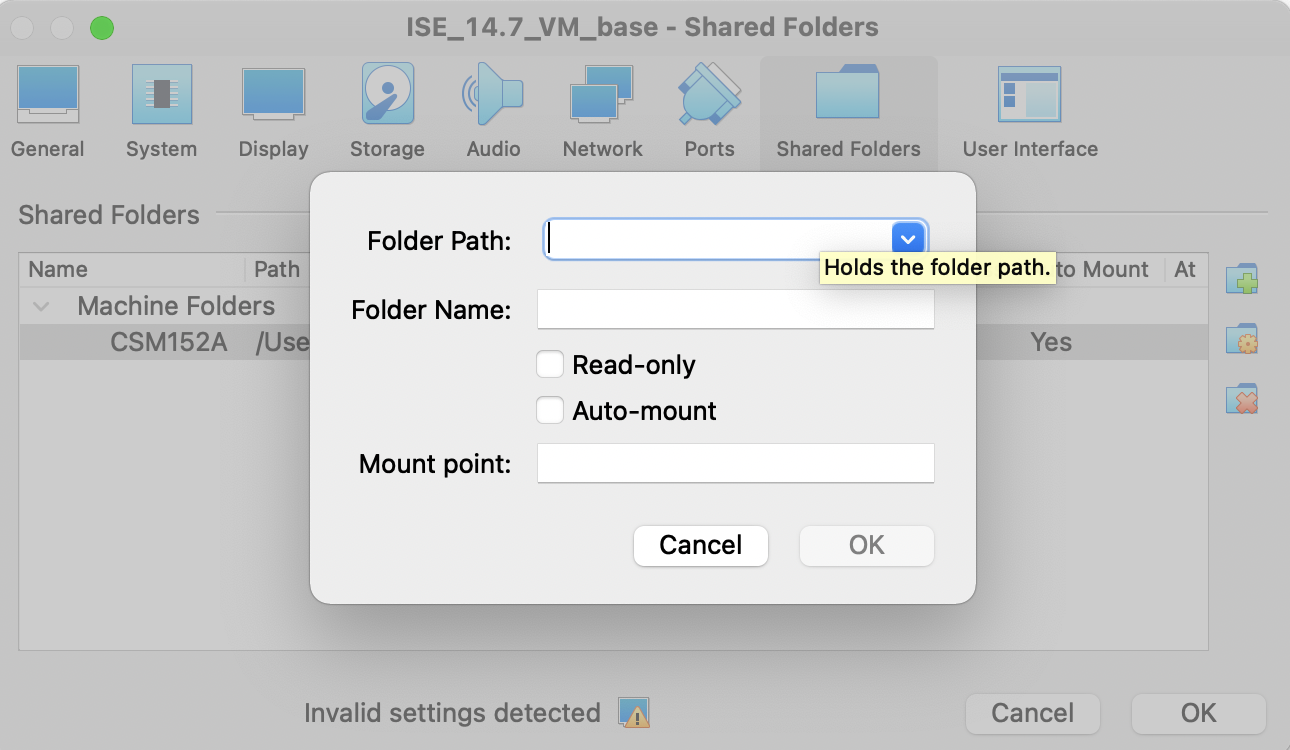
-
You can make the screen larger by View > Scaled Mode (or
Host + Cas hot key). You can make the font larger by (in Guest system) System > Preference > Display > Resolution. In the scaled mode, a lower resolution makes a larger fonts, 1920 x 1080 works fine on my Macbook. -
Typically you do not need to power off the VM, you can save the state of VM instead.
-
You can boost the performance of VM by allocate more CPU, Memory for that. Check Settings > System for detail. Personally I assign 8GB RAM and 4 CPU cores to that. Do NOT change the graphic card and enable 3D acceleration, this would make the latency of the cursor really annoying!
Obtaining License
- Log back to Xilinx with your registered account, click
Product LicensingunderProduct Support. You may have to finish the Name and Address Verification again. - On the Product Licensing page >
Create New Licensetab, checkISE WebPACK License. ClickGenerate Node-Locked Licenseand thenNexton the review page.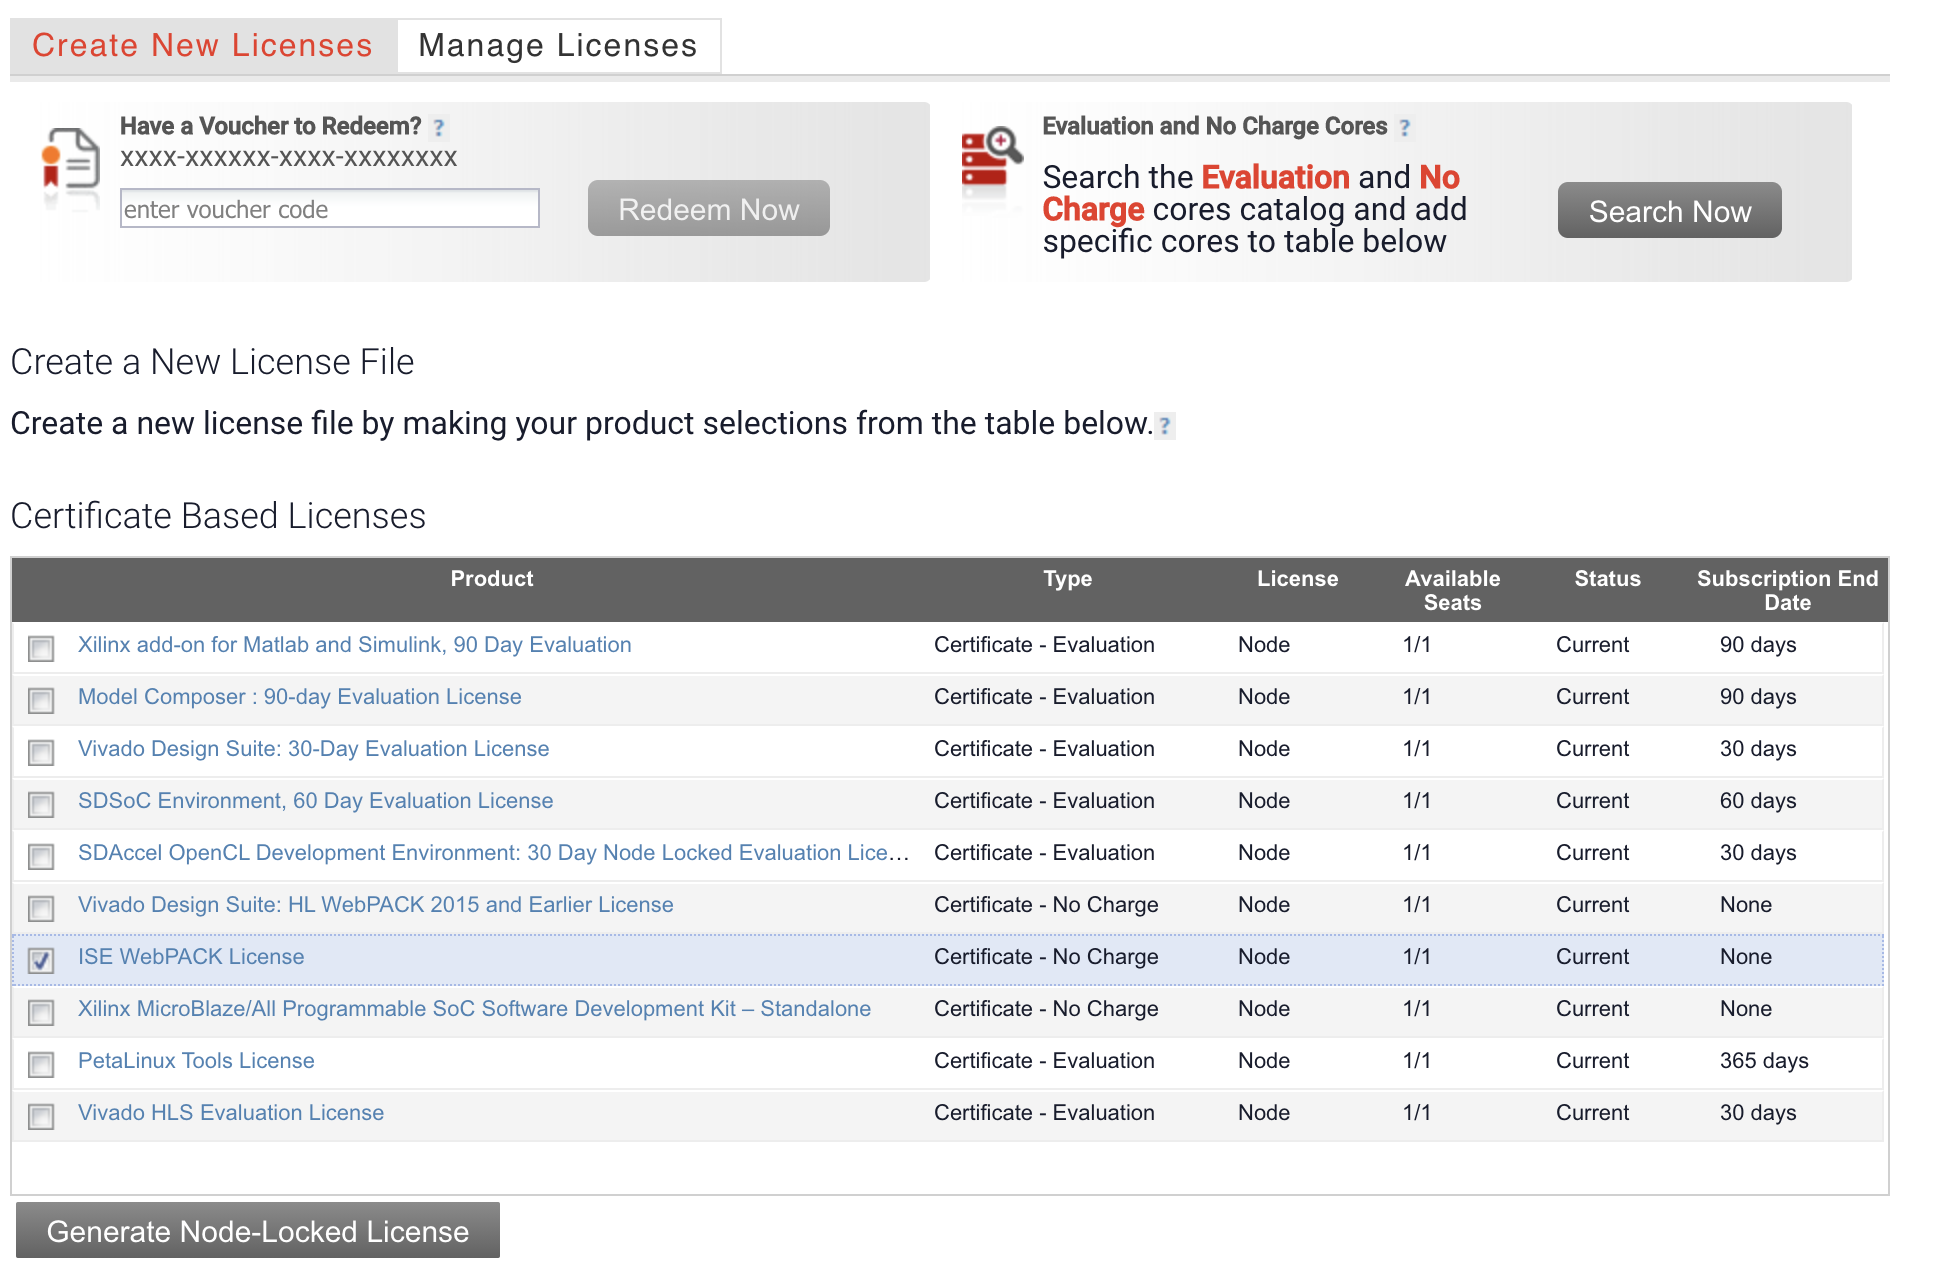
- On the
Manage Licensestab, select theISE WebPACK Licenseand clickDownload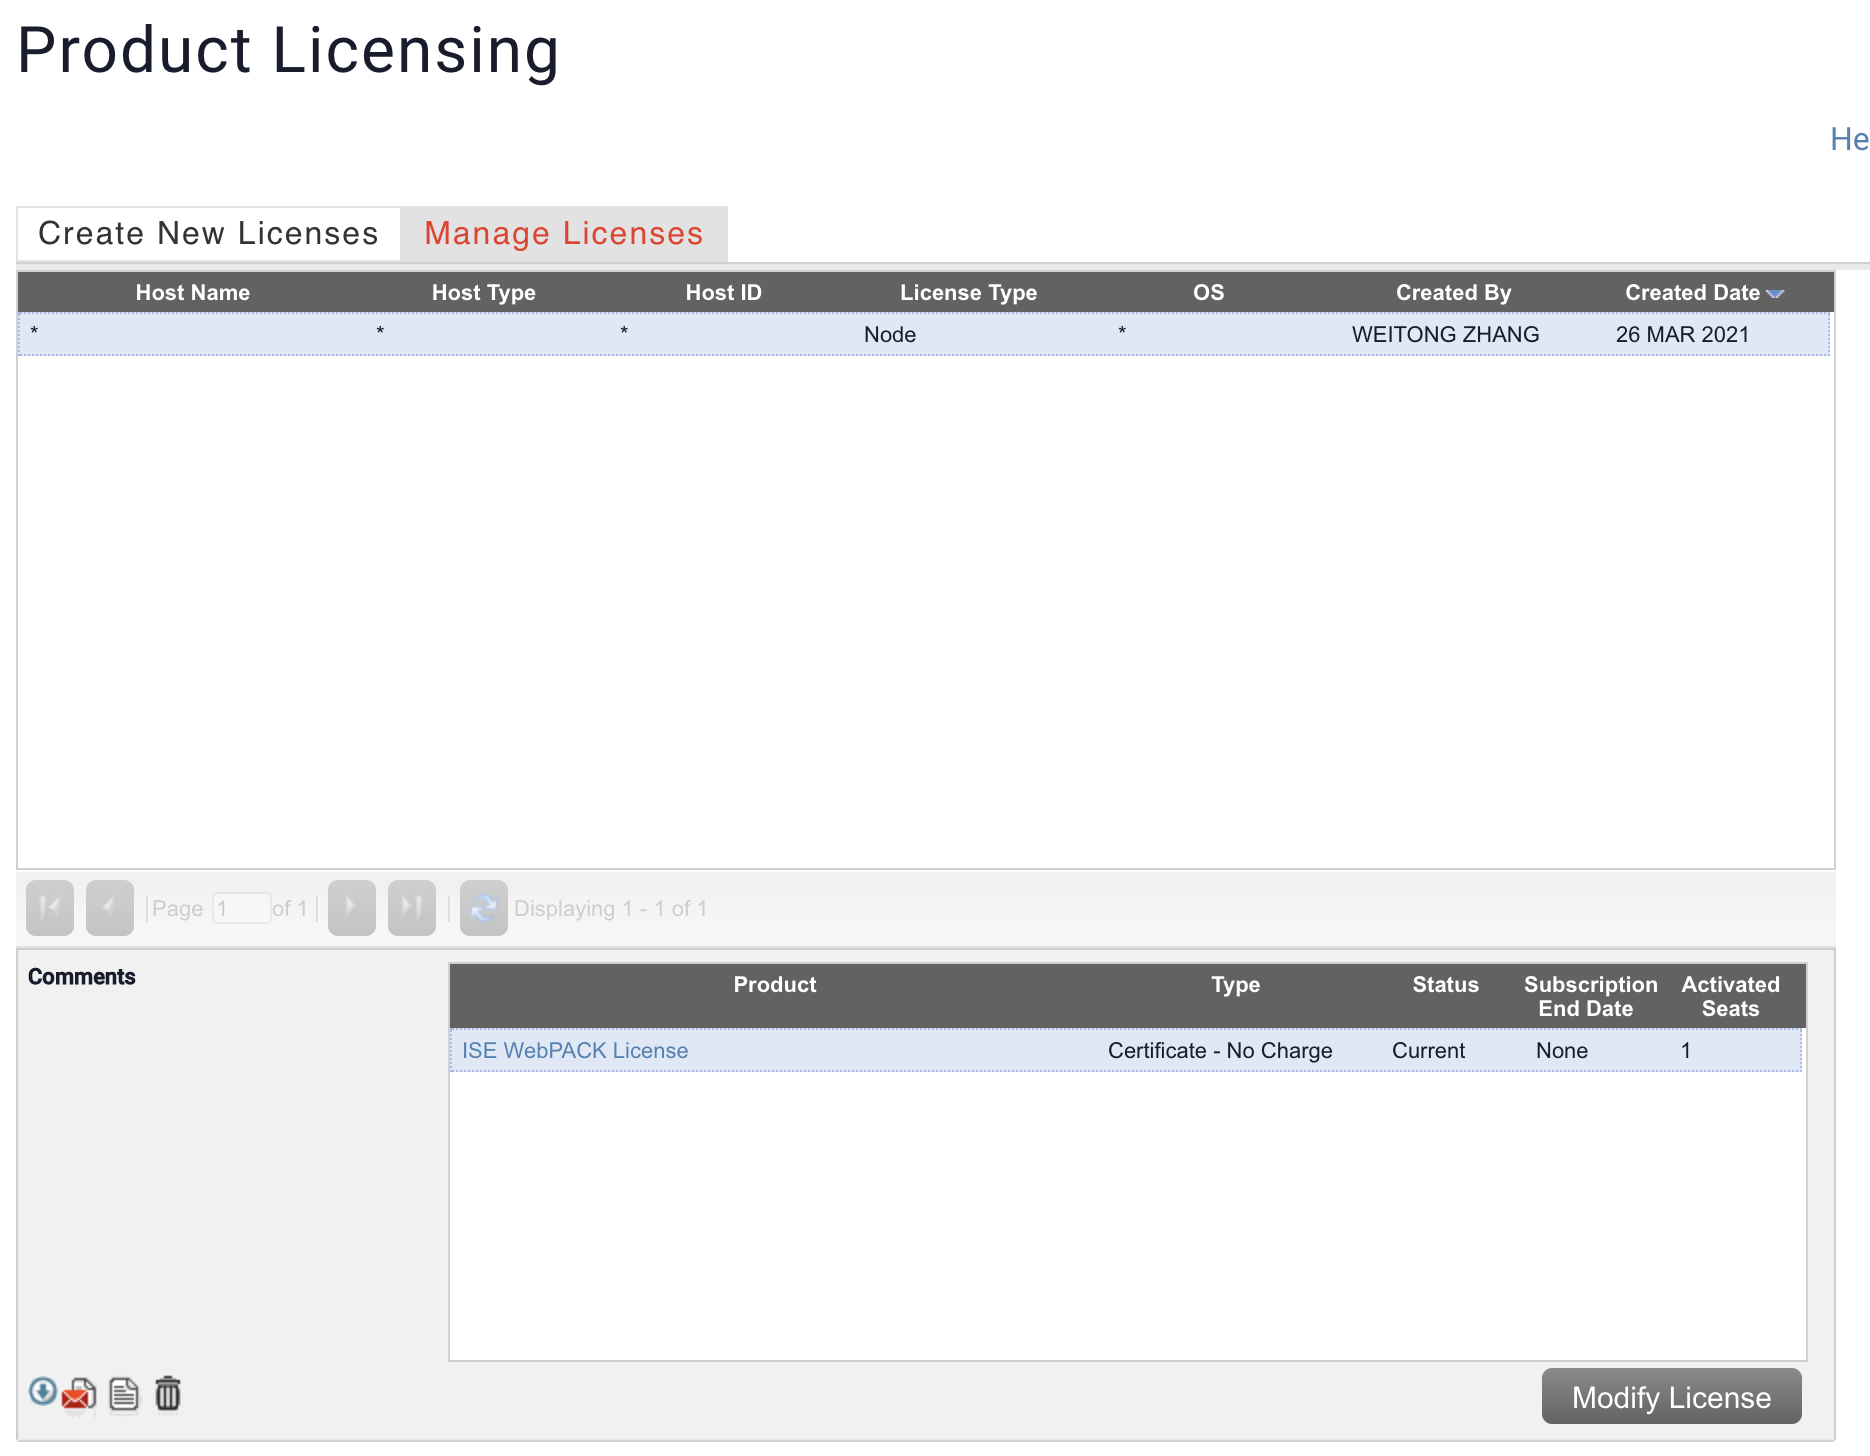
- You will obtain a
.licfile and you can transfer it to the ISE VM. - Start the
Project Navigatorin ISE VM, then under theHelptag, selectManage License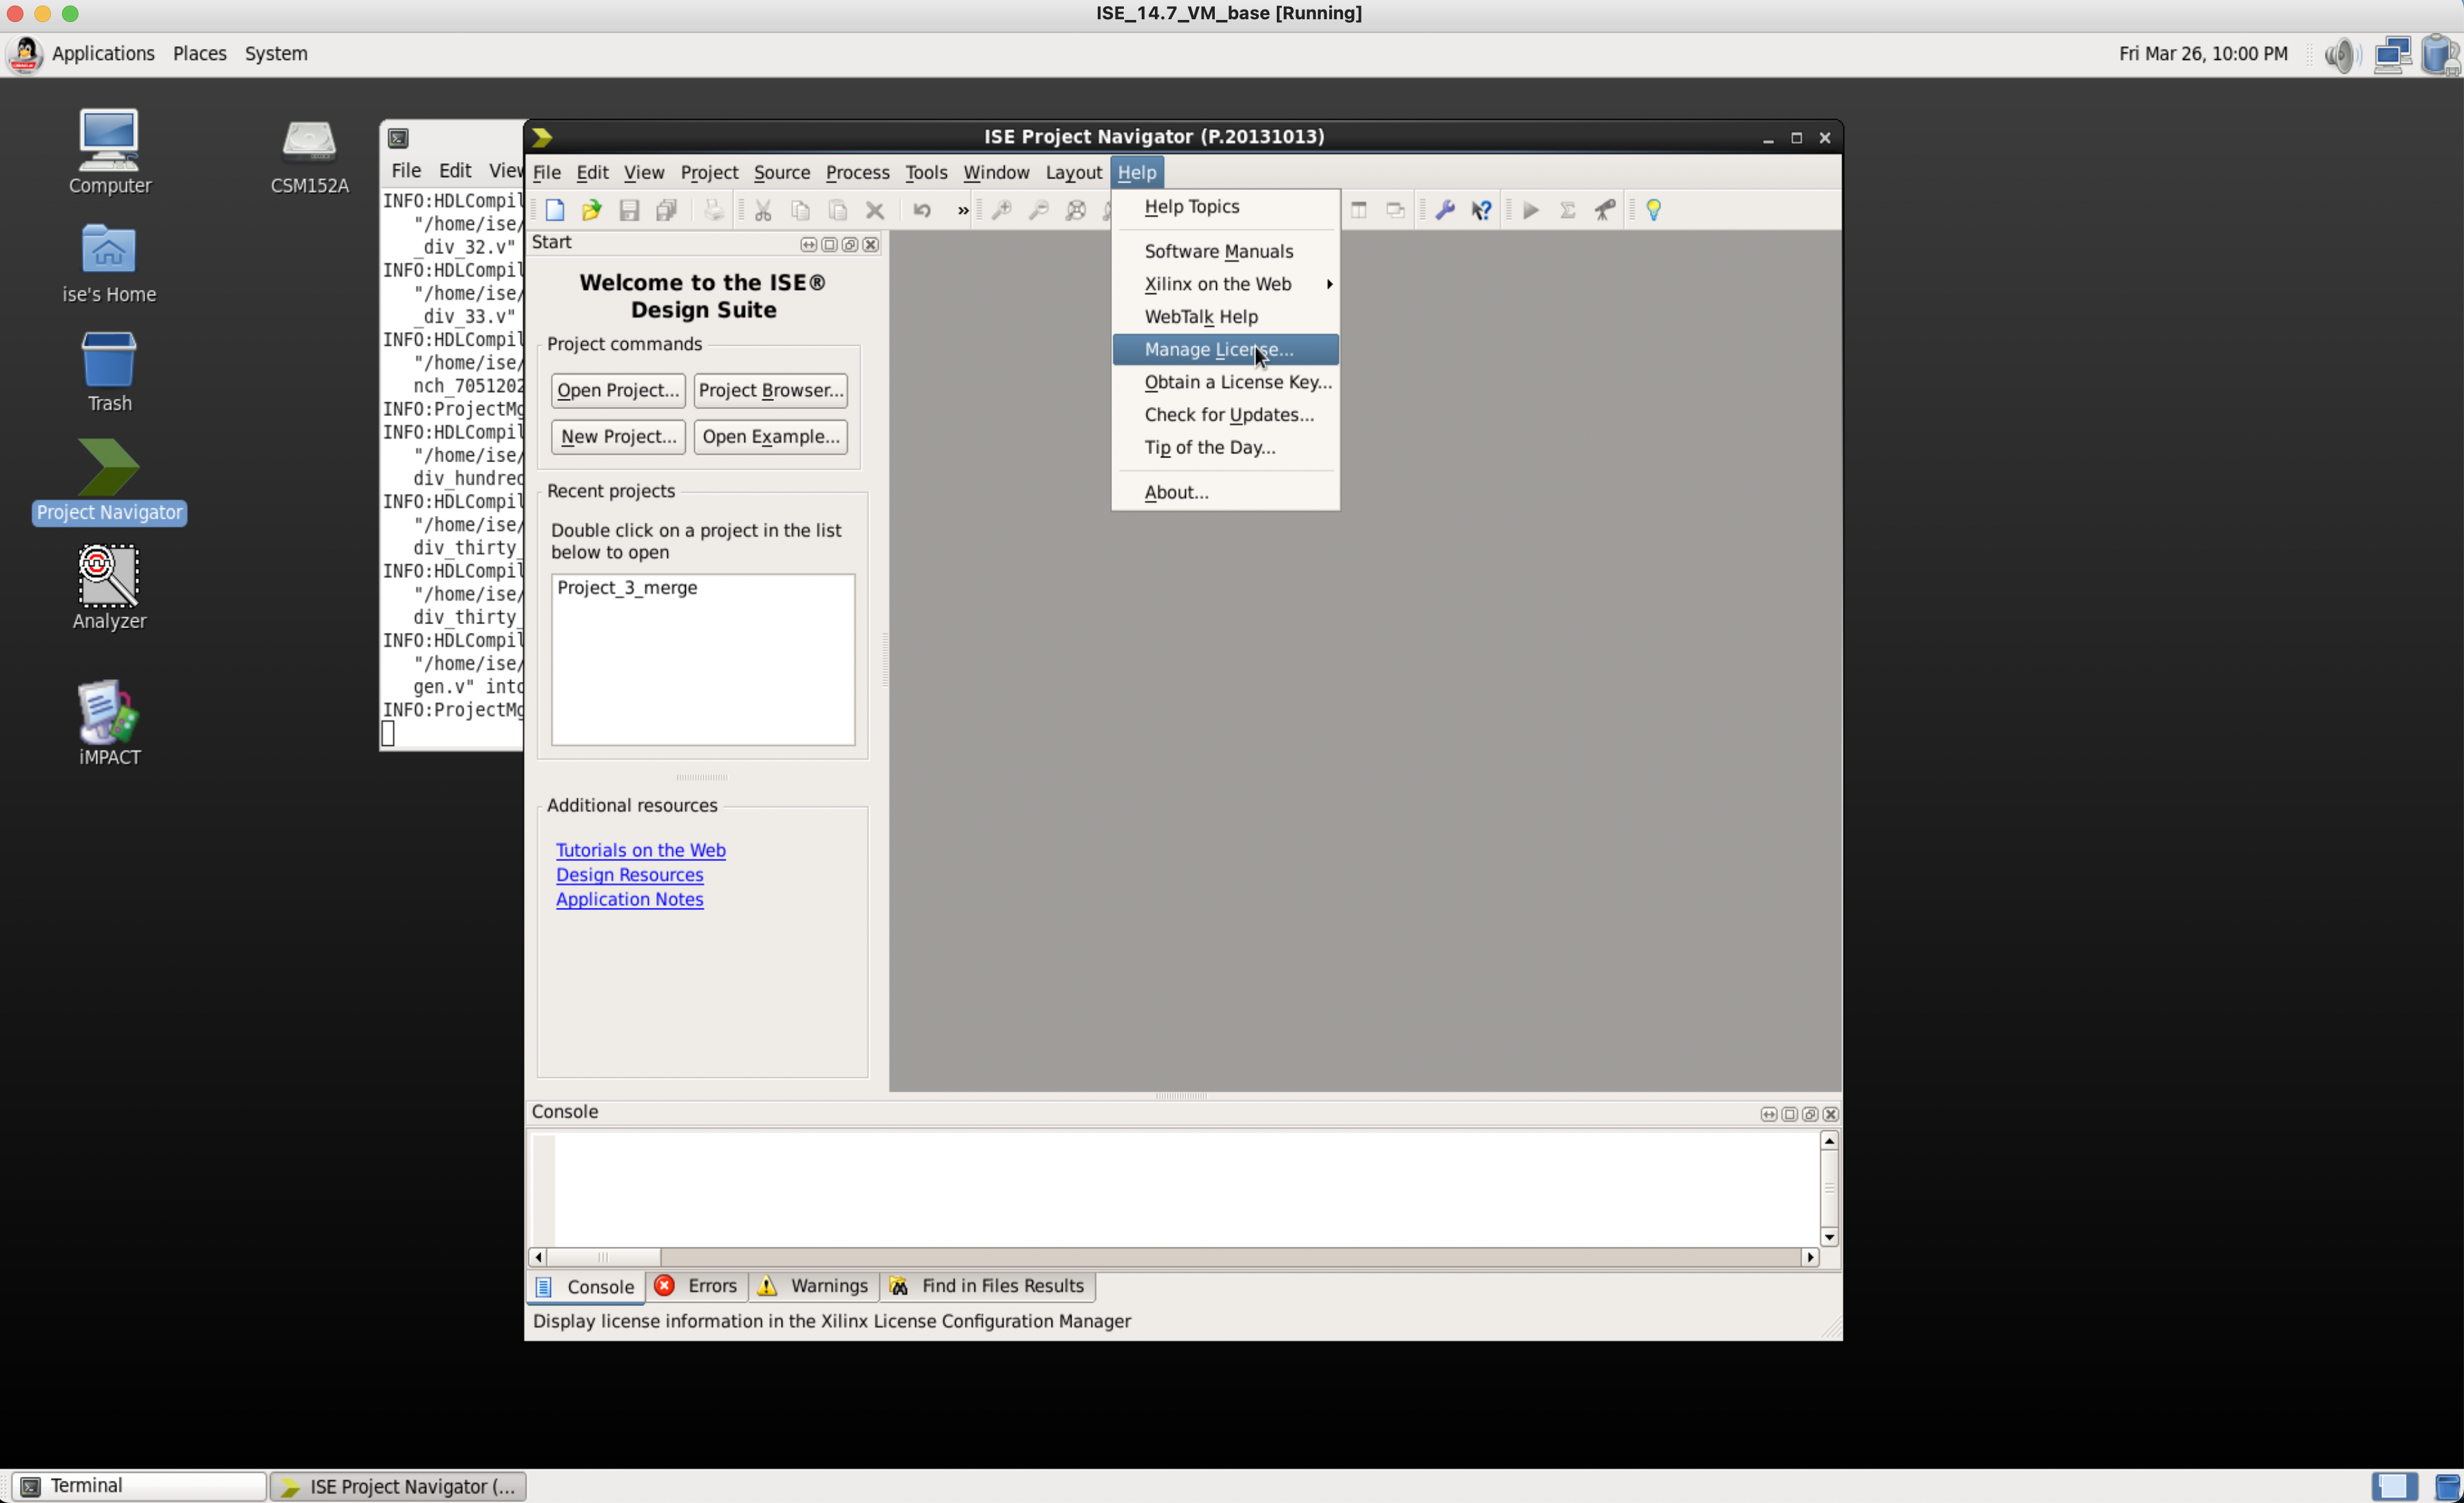
- Click
load licenseand find your.licfile. The manager would ask to overwrite the license file, clickYes.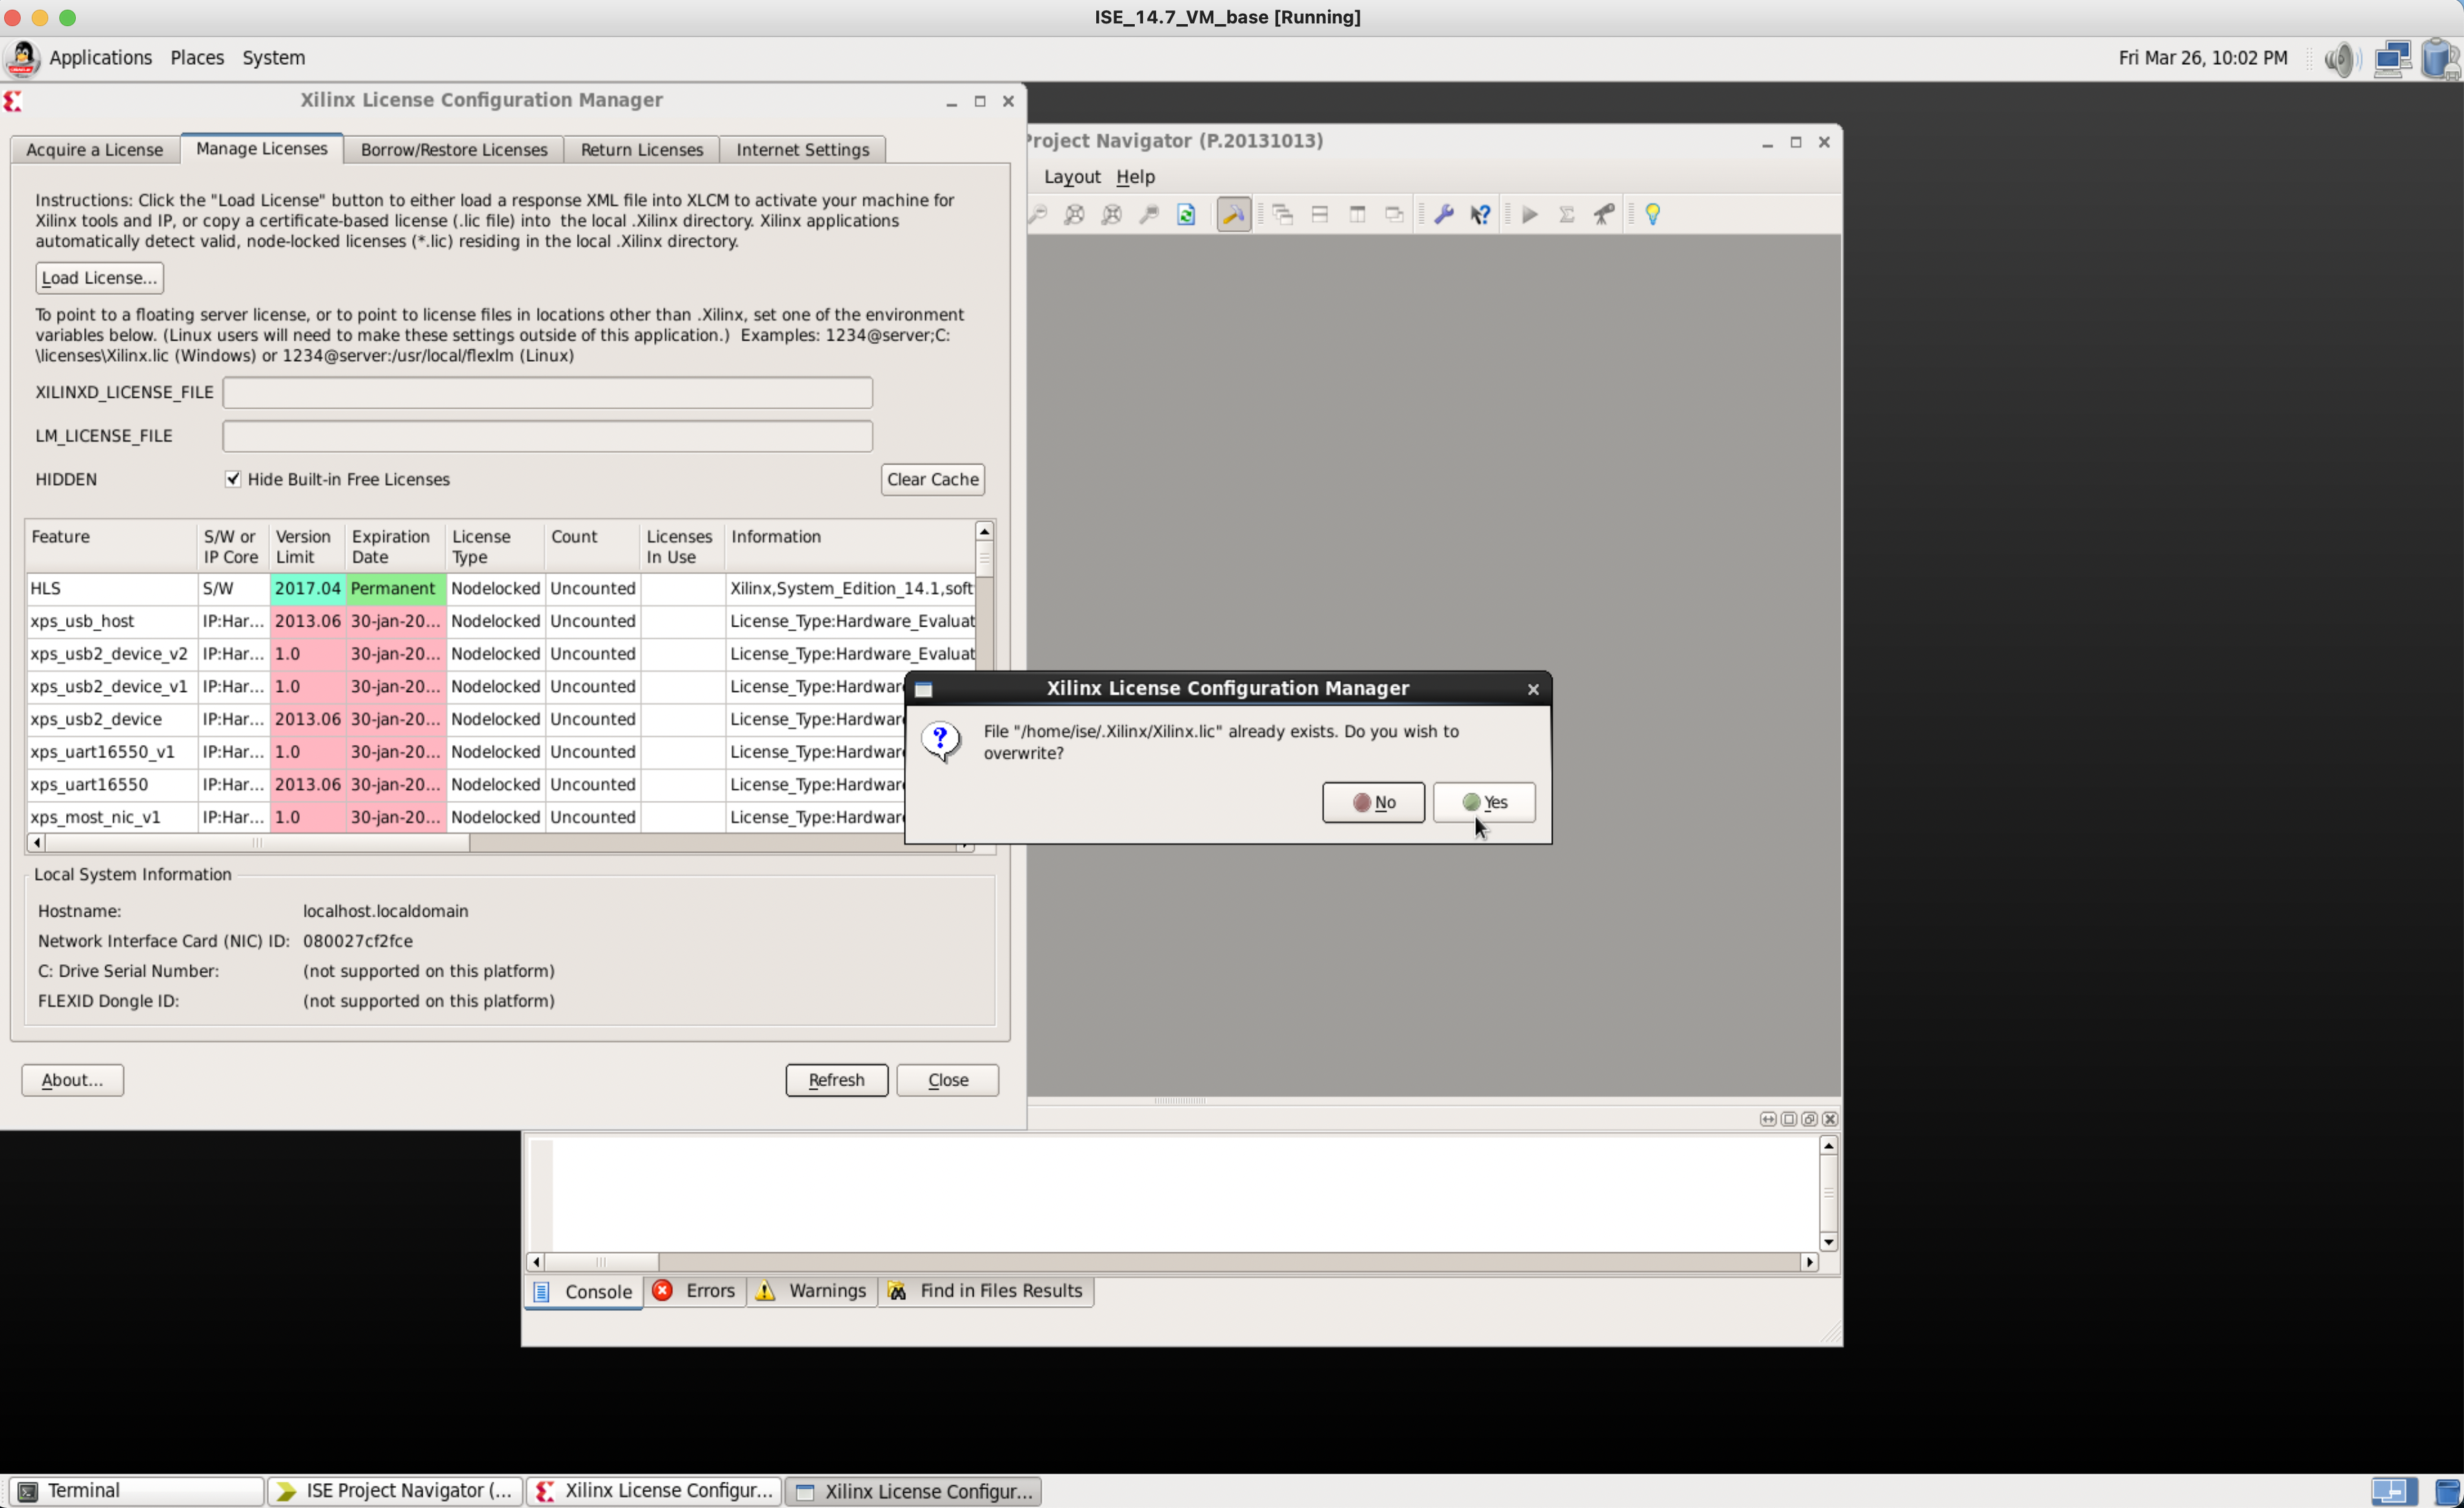
- Close the manager and you are all set.
First Xilinx Project
Next we will build the very first xilinx project to demonstrate the usage of the ISE.
New project and load files
- Open ISE and Click on the
New Project, select a location without space in the path and Choose theHDLProject, clickNext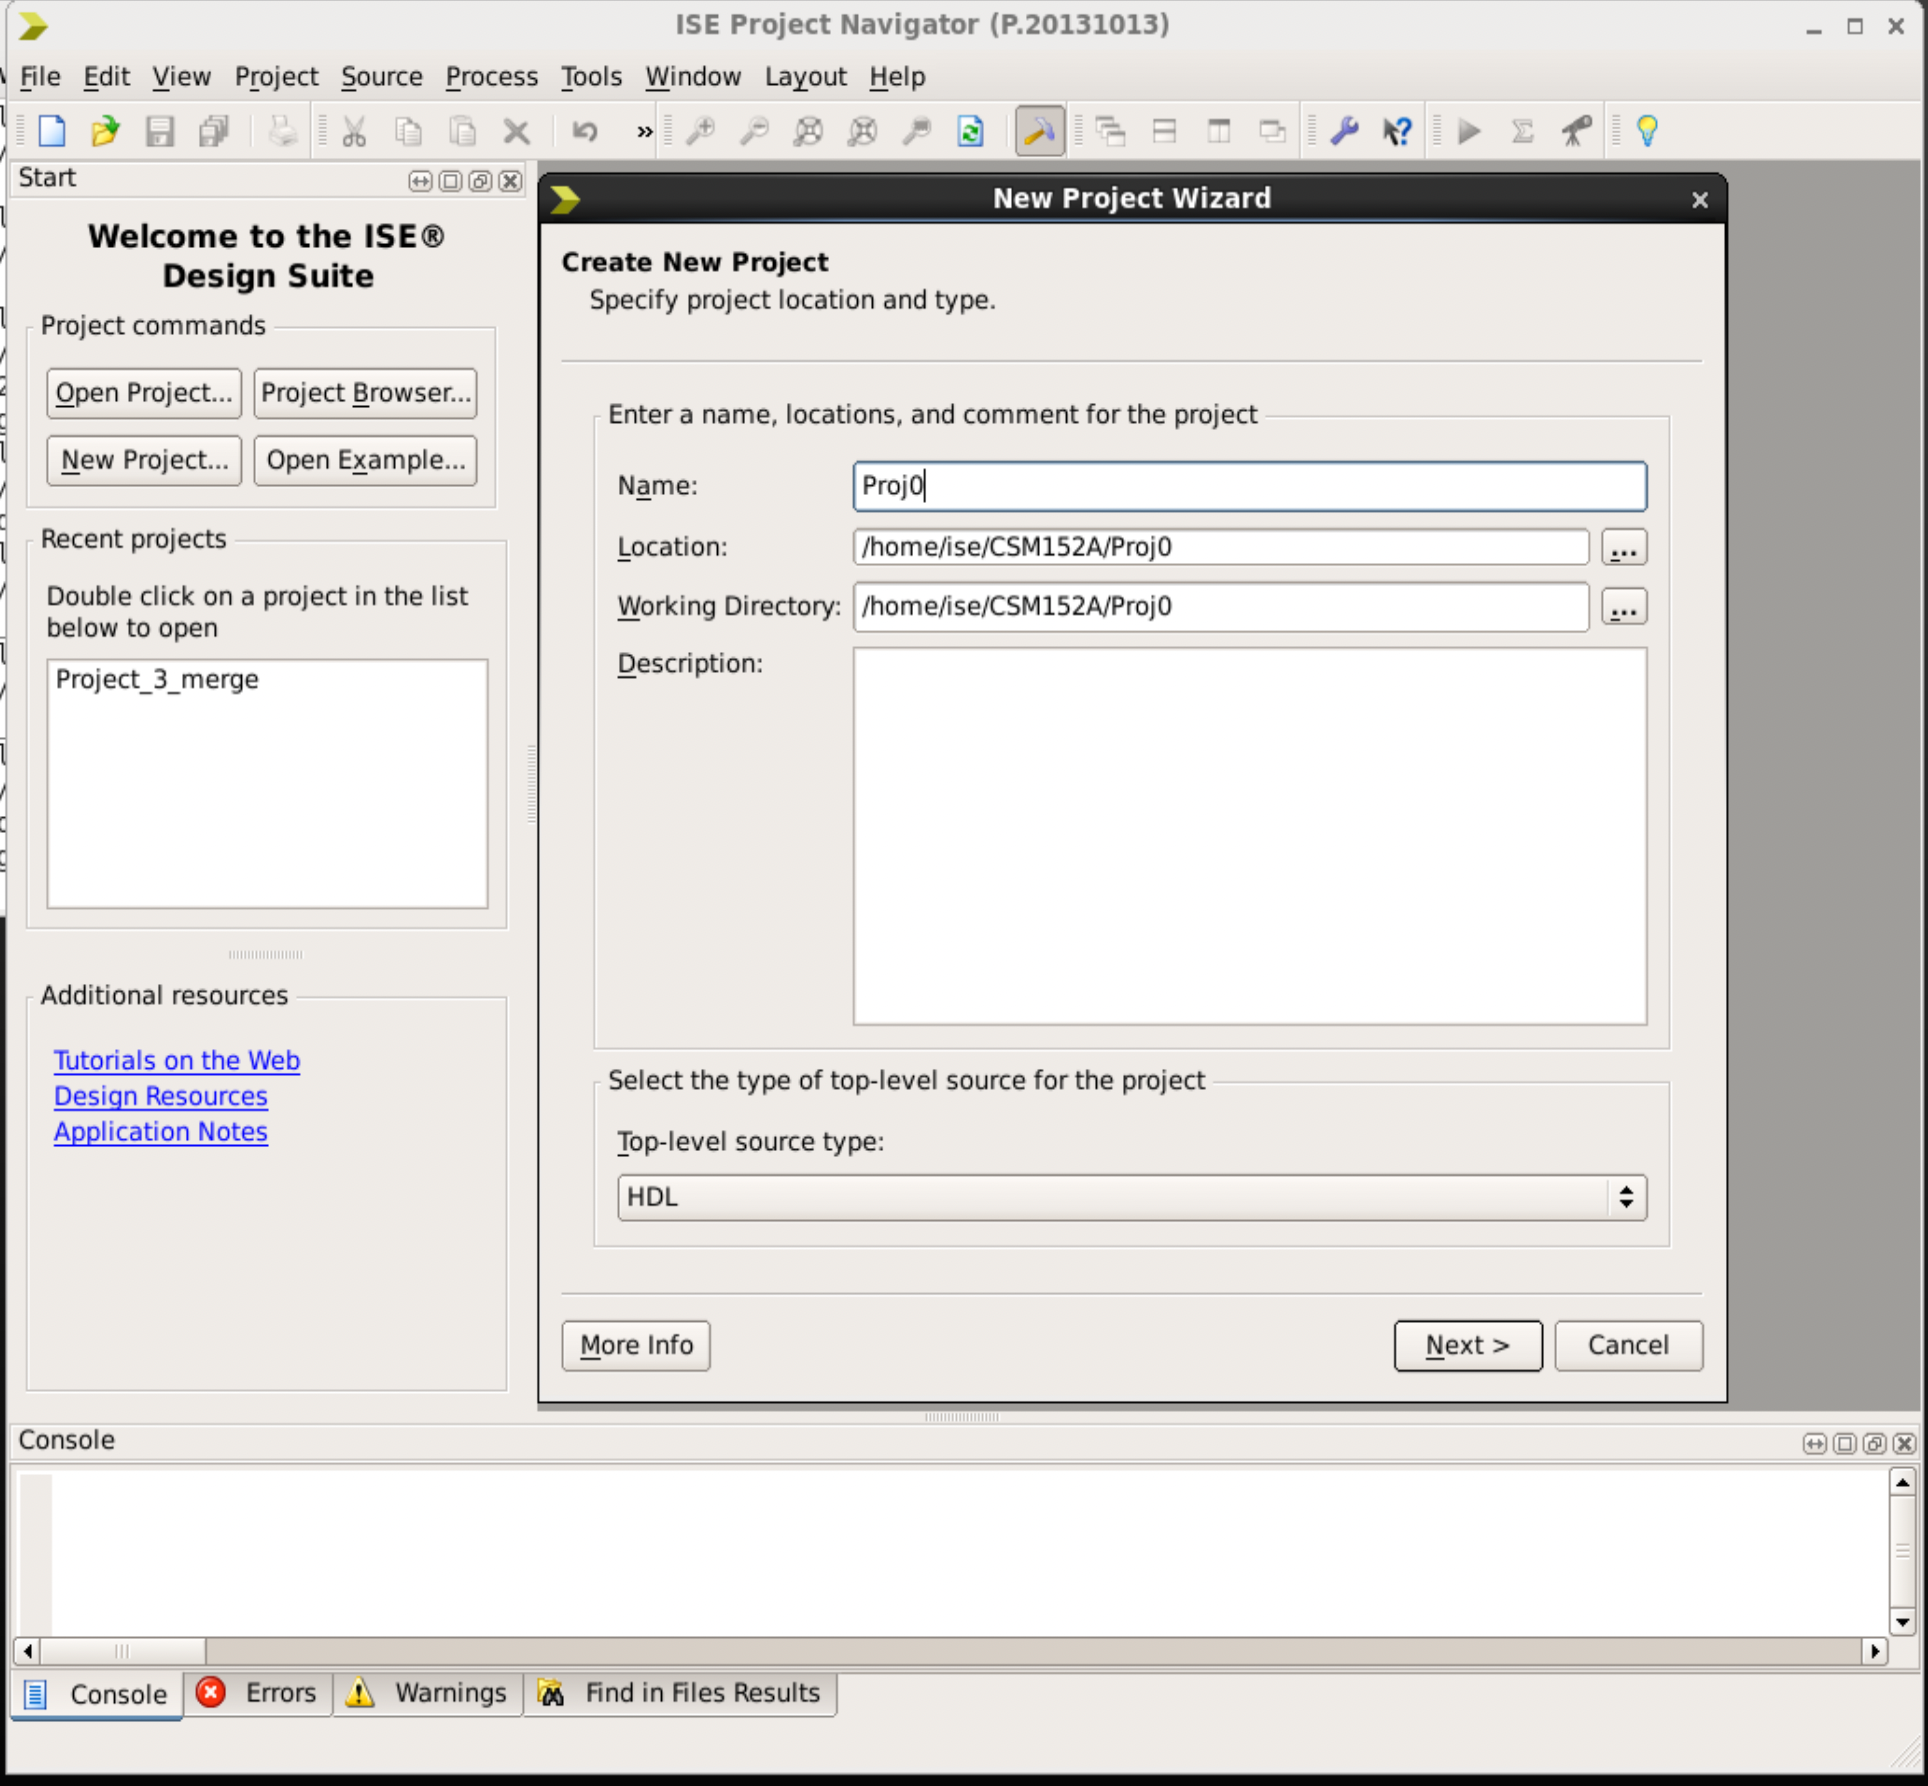
- In the Project Setting page, set
FamilytoSpartan6and Device toXC6SLX16. Then clickNext(twice) to create the project.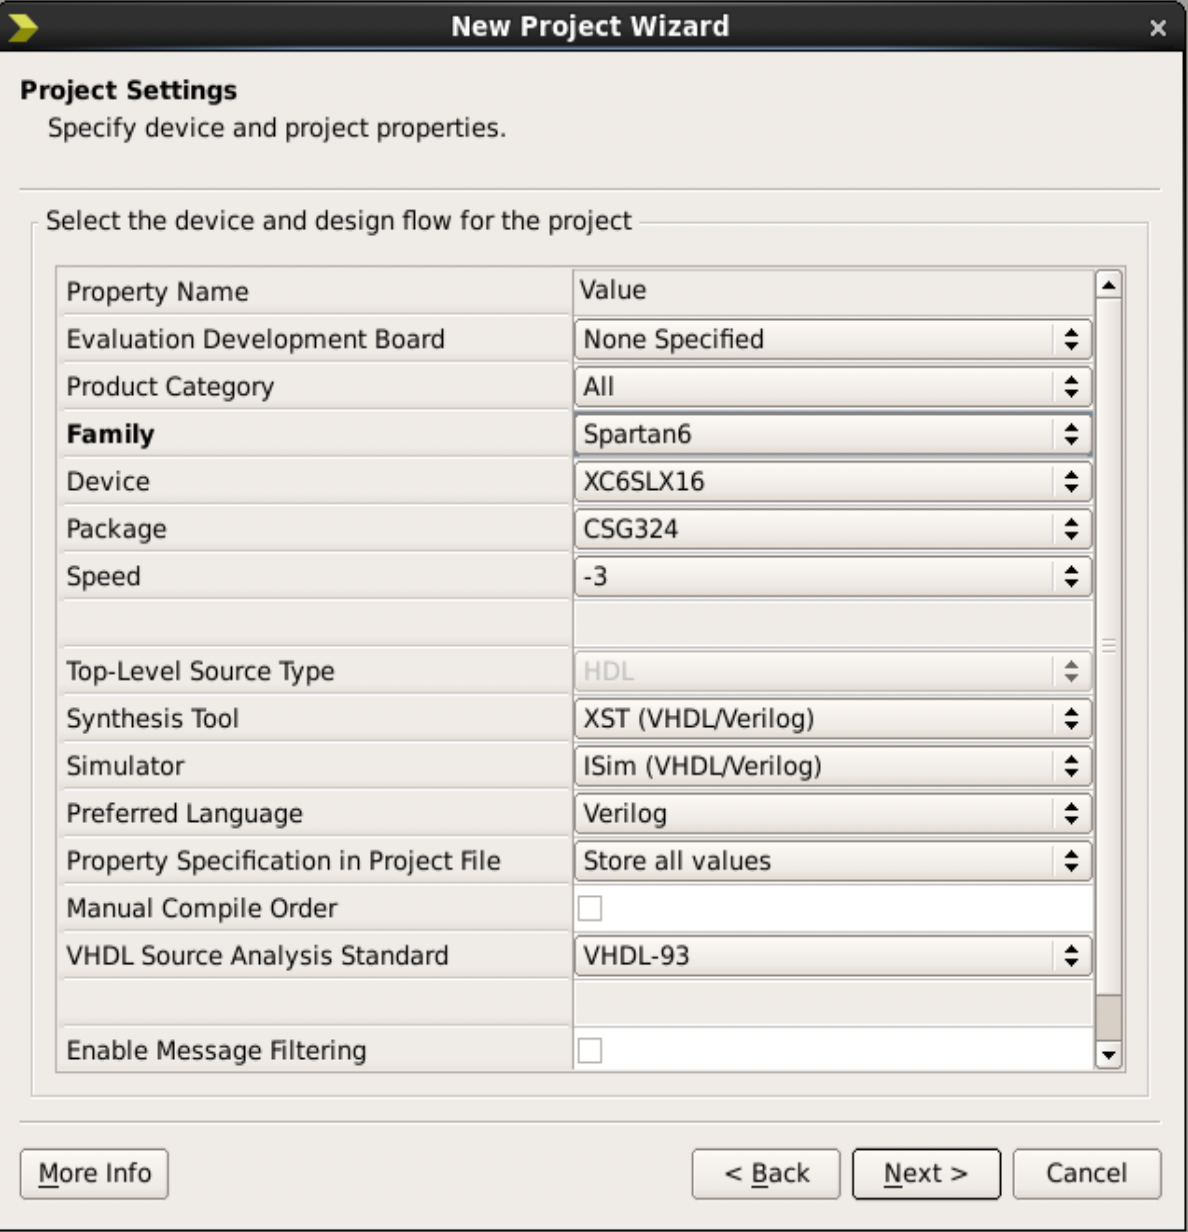
- Click
Add Sourcefile on the left to add files (you will needNew Sourceabove to create files.)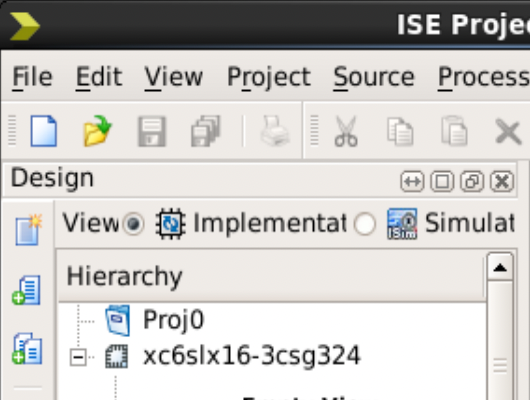
- Load the
combinational_gates_muxed.ucfandcombinational_gates_muxed.vand clickOpen.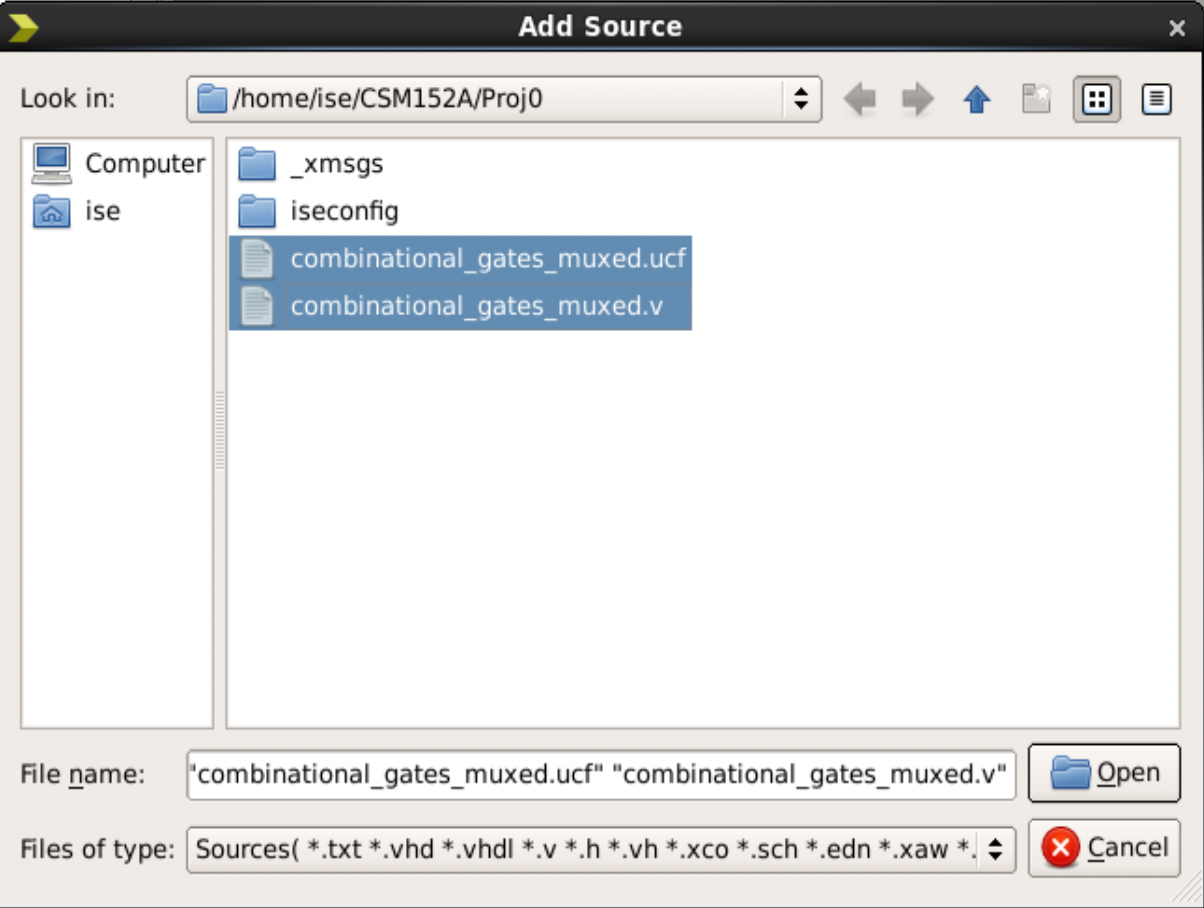
- Configure the files,
.ucfshould be associated asImplementand.vshould beAll, clickOK.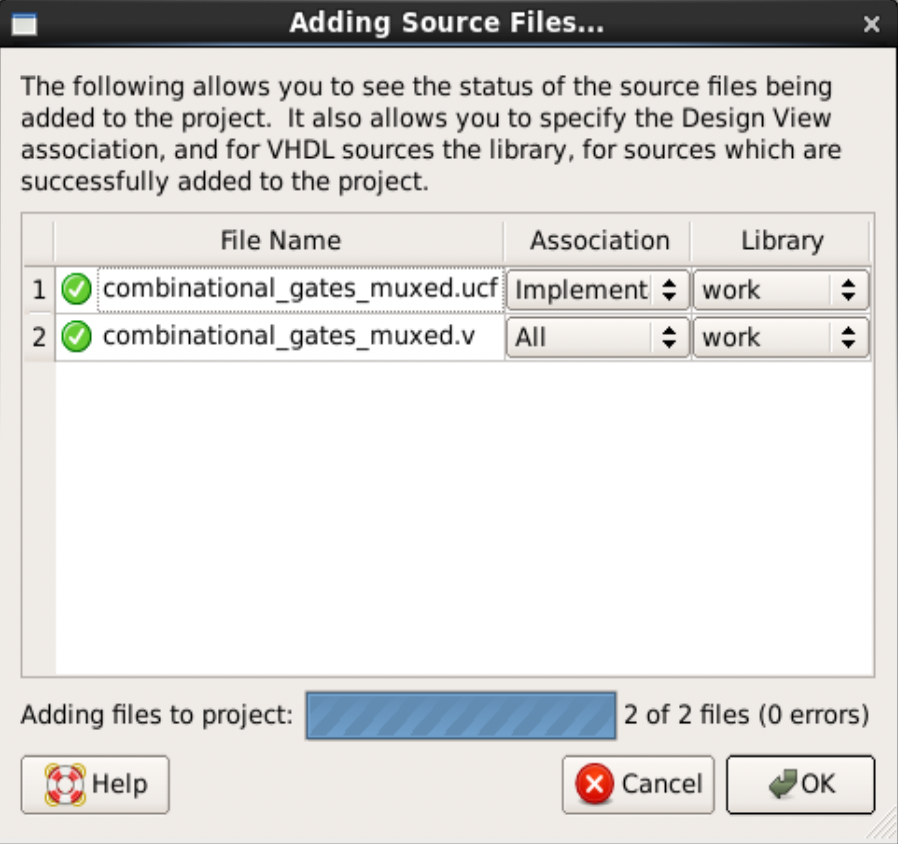
Load testbench and run
- Load test bench file:
combinational_gates_muxed_TB.vand associate it asSimulation, clickOK. - Switch to
simulation, select the..tb.vfile. Right clickSimulate Behavioral Modeland click onProcess Properties.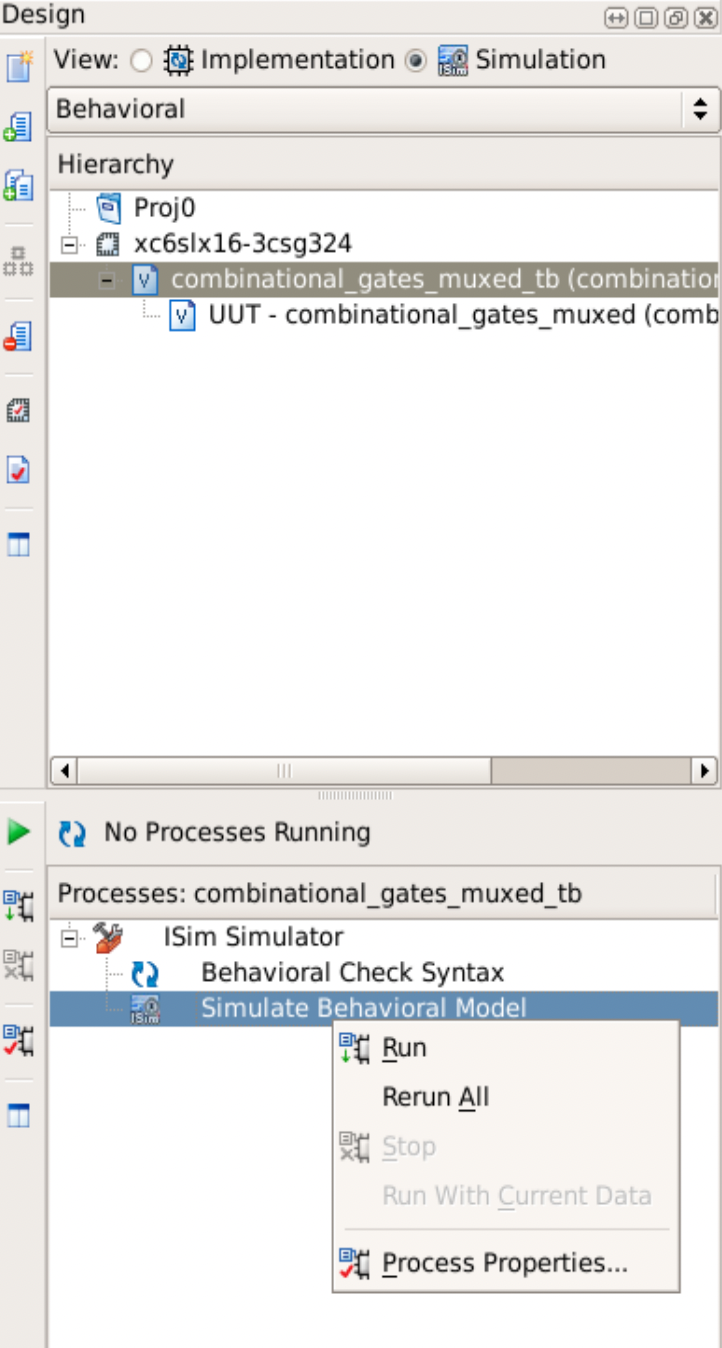
- Uncheck
Run for Specified Time, Our simulation is terminated by making a$finishsystem task call, clickOK.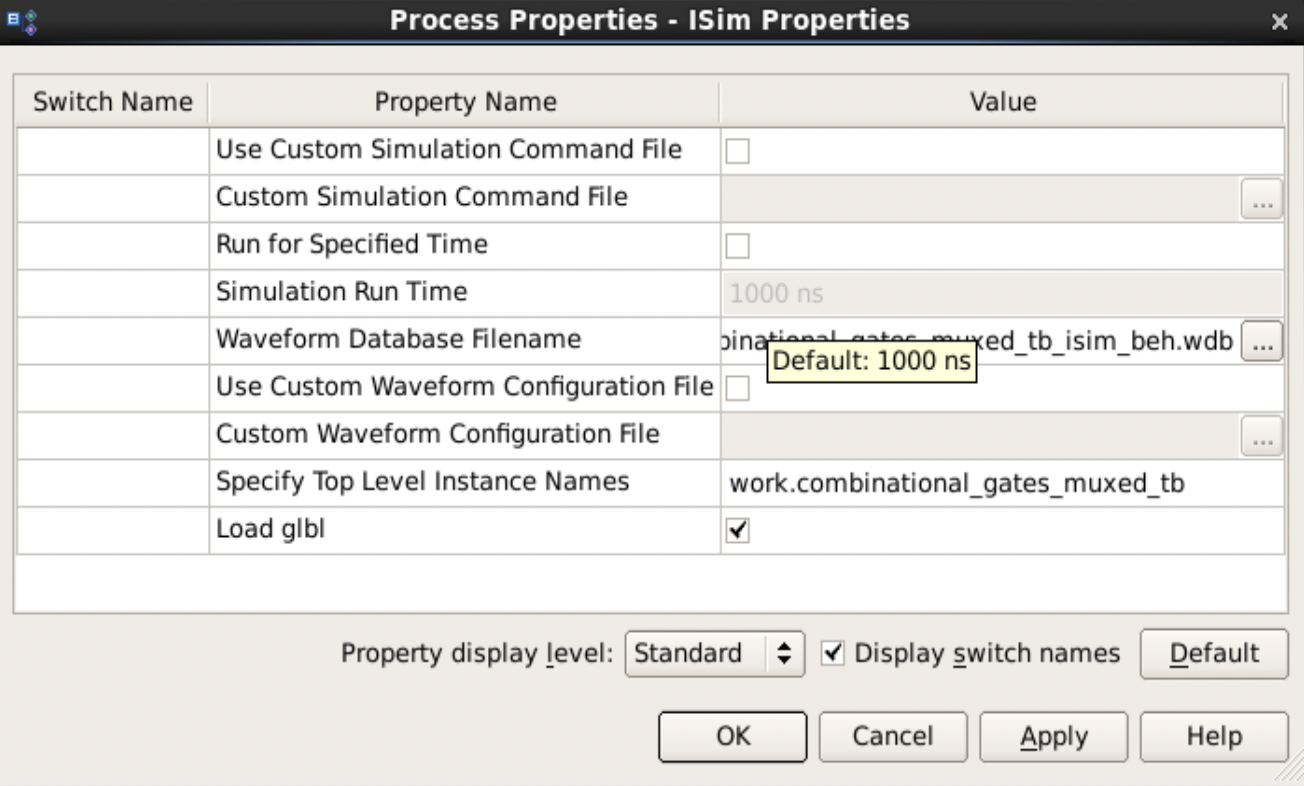
- Right click
Simulate Behavioral Modelagain and selectRun(Rerun All). You will see the waveform in a new window.’ - Click the “Play” button to run the simulation. You can also add any signals to the waveform by
- Select the instance name (
UUT) inInstance and Process Nametab - Select the signal in
Objecttab - Right click >
Add to Wave Window
- Select the instance name (
View Schematics then Plase-n-Route
- Back to
Implementationmode, double clickView RTL Schematictag under Processes > Synthesize - XST. - Select
Start with a schematic of the top-level block, clickOK - Then double click
Implement DesignthenGenerate File. You will obtain the bit file to downstream to FPGA.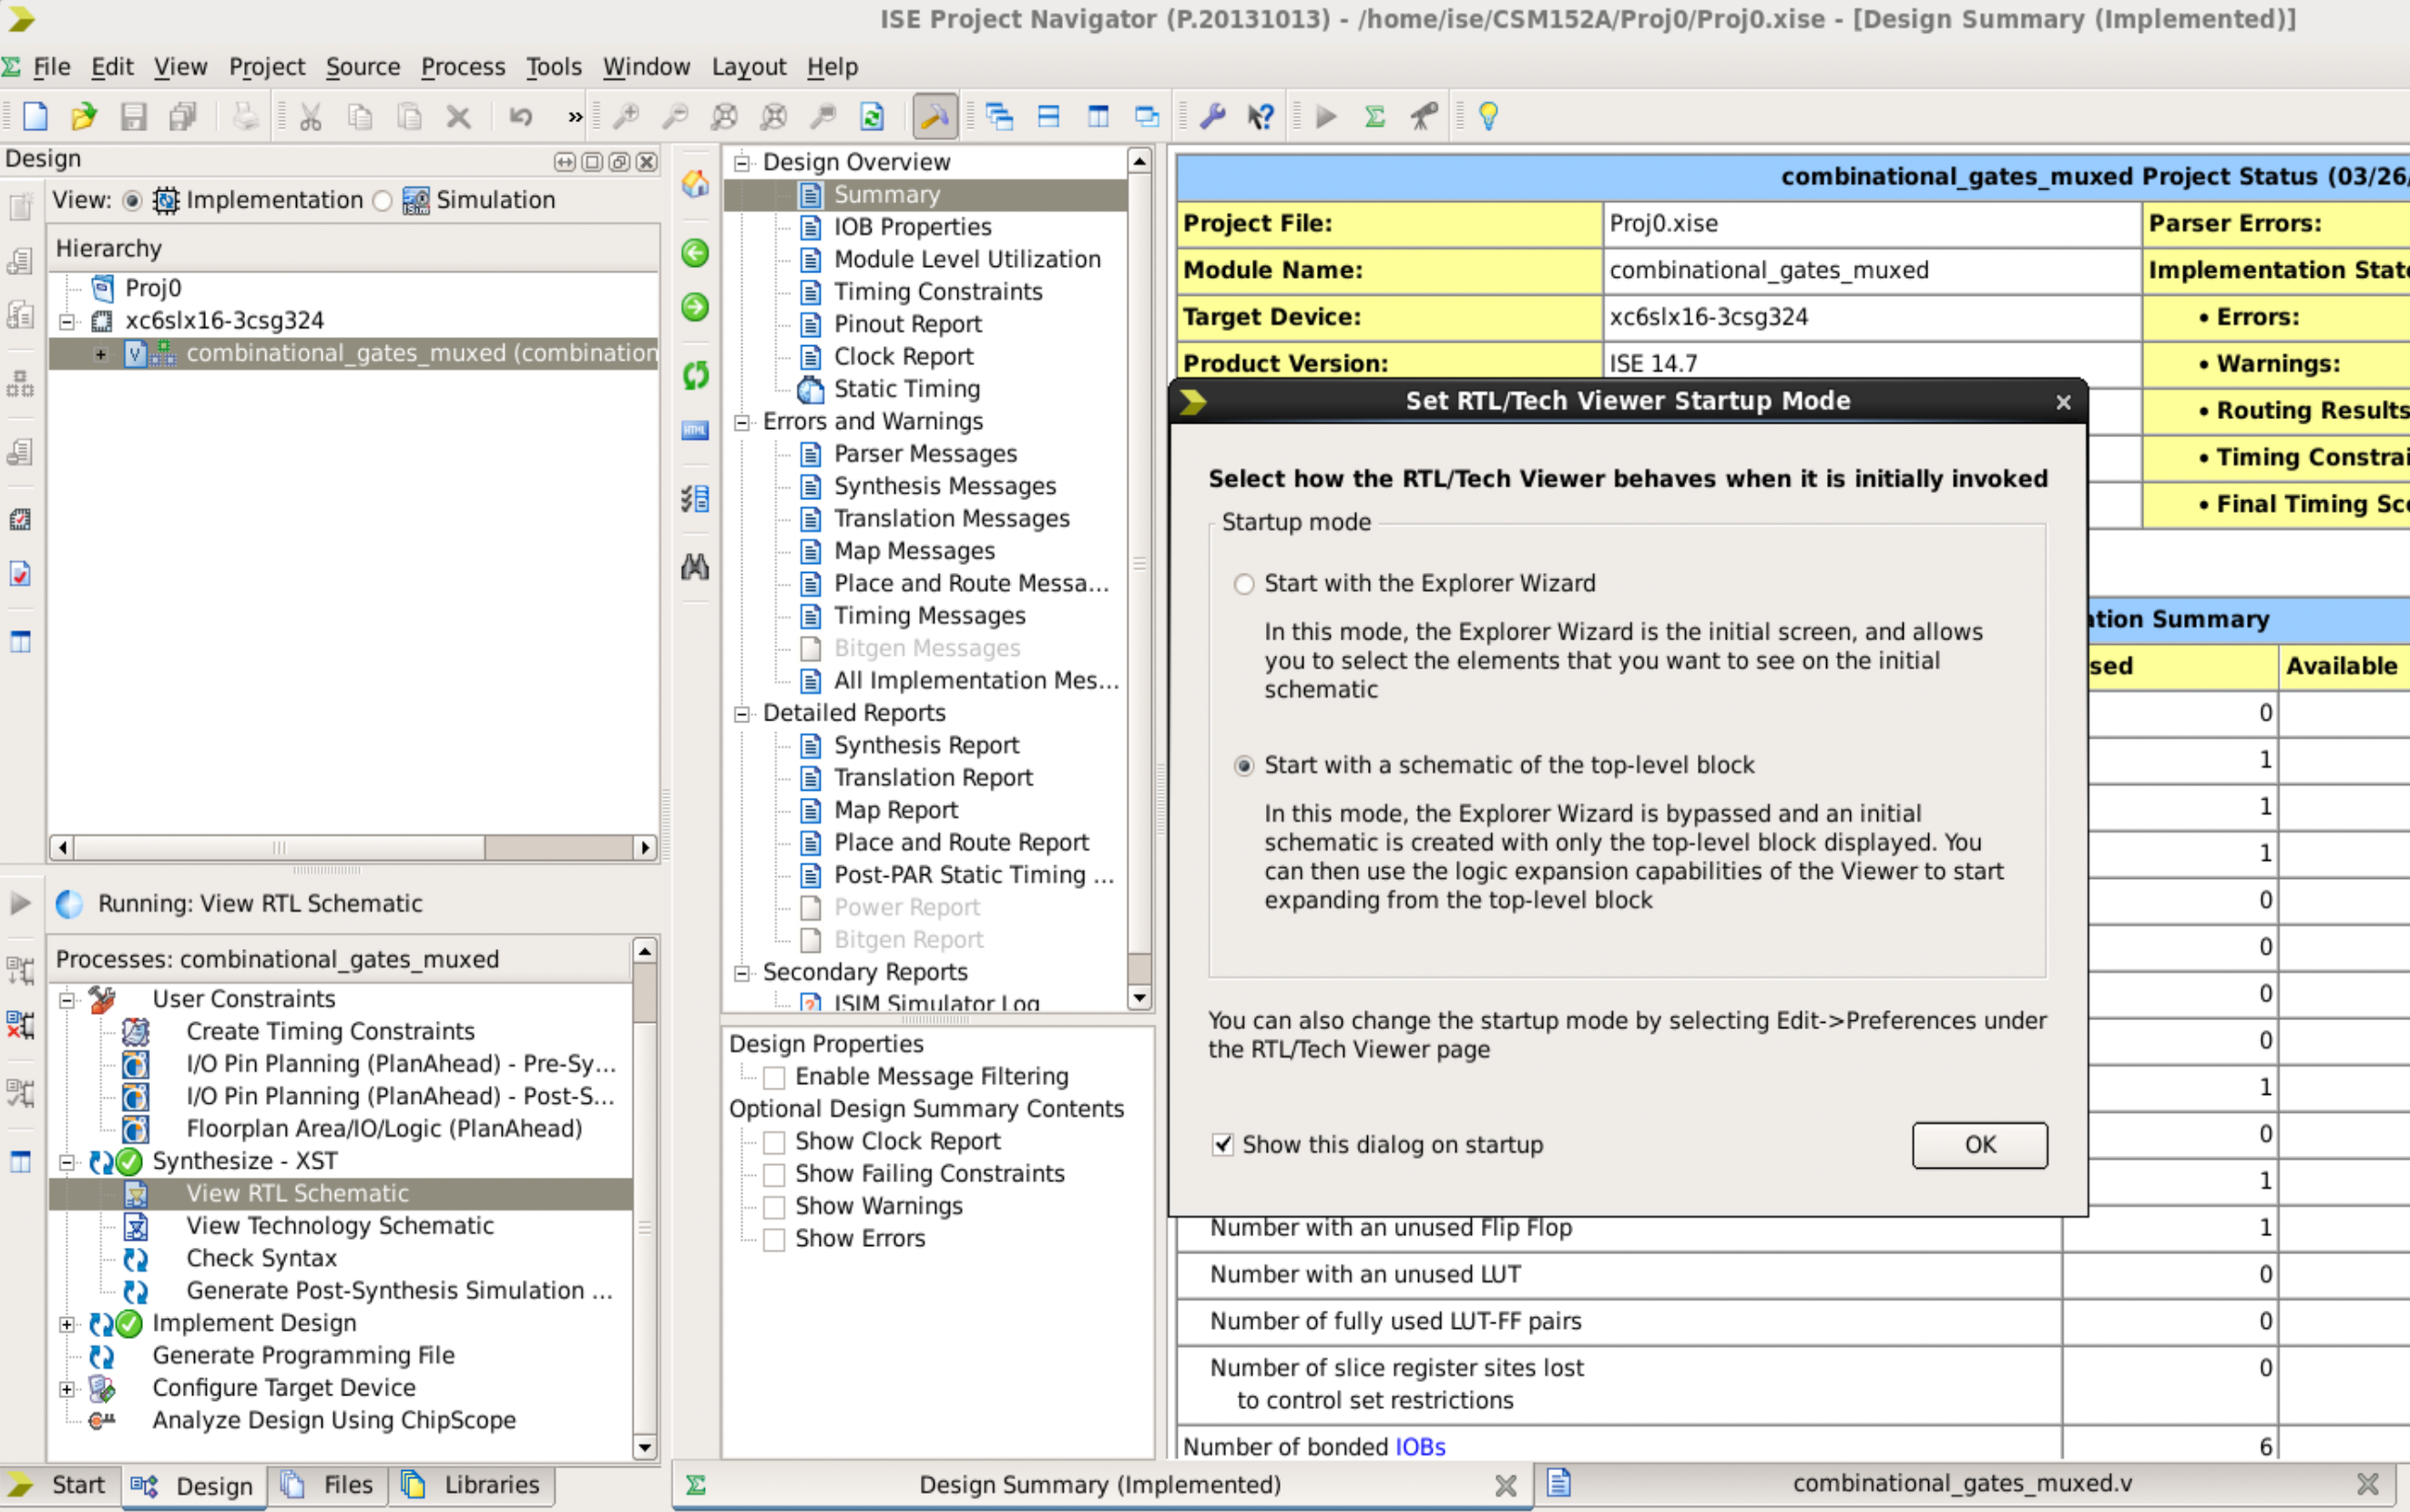
Due to COVID we do not need to do this step in our projects.
Write your own code
- For verilog file, click
New Source, then selectVerilog Moduleand follow the instructions. - For test bench, click
New Source, then selectVerilog Test Fixtureand follow the instructions. - Since in this class we are only doing simulation, you do not need to config the port name, input or output, in the verilog, nor need you write the
.ucffile.
Getting started with Verilog
From this section, I will not cover every technical details. Verilog is a comprehensive language. I learnt Verilog all by myself 4 years ago in Tsinghua University so I’m not sure I know every detail of that language. That’s the weird tradition in Tsinghua, they ask you to write a vending machine in FPGA but they don’t teach you a single line of Verilog, they ask you to write a chat bot with GUI without teaching you Qt and TCP/IP protocol, lol.
I found this link very useful and you can almost find every best practice on that. I will also note some interesting fact or methods in this notes (again, this is not < Everything in Verilog >)
Define clock in Testbench
always #5 clk = ~clk; //create a clock with T = 10.
always #5 clk1 = ~clk;
always #10 clk2 = ~clk; // each always env can only support one clock
How to build a hierarchical design of verilog
From this link.
//  top.v
module top (q, p, r, out);
input q, p, r;
output reg out;
reg intsig;
// (q, p, r) -> bot1 -> intsig -> bot 2 -> out
/*
The following is like this in Python:
u1 = new bot1(a=q, b=p, c=intsig)
u2 = new bot2(l=intsig, m=r, n=out)
*/
bot1 u1(.a(q), .b(p), .c(intsig));
bot2 u2(.l(intsig), .m(r), .n(out));
endmodule
//
// bot1.v
module bot1 (a, b, c);
input a, b // define the input and output inside the module
output reg intsig; // and output here, a, b, c only works as formal parameter in `new`
// some code here
endmodule
//
// bot2.v
module bot2(l, m, n);
input l, m;
output reg n;
//some code here
endmodule
Summary
I was assuming I can keep a single blog of all these projects in the quarter. But it seems I am too busy lazy to do this. I really enjoy working with students for this quarter and really appreciate their positive or constructive suggestions.
Students Reviews (selected)
-
I really appreciate Weitong’s help during the office hours. He was willing to help explain the difficult concepts of parts of the labs and was even willing to talk about the previous labs and how to make them better even after they were due. Also, he was very fast in responding to emails which I also appreciate a lot.
-
Our TA was great, he was very helpful and his lecture presentations were clear and concise. He was always available to us if we needed it and was knowledgeable about course concepts, able to fix problems and provide recommendations.
-
The TA was very knowledgeable. I learned a lot from him. He was always available outside the classroom via email, and that was very helpful, especially when learning a difficult language like Verilog. His presentations were well done, and I actually appreciate the time we had simply to ask him questions. I like that we had a lot of time away from class.
-
This teaching assistant is very professional and very knowledgeable. He always prepares the material for the lab section very carefully and the project spec are carefully annotated, which are helpful for us to do the projects. I definitely recommend taking this class with him.
-
Weitong was a very kind and helpful TA. This lab class was challenging since we would just have projects thrown at us for us to just complete. However, Weitong is always very responsive to emails, and also holds lots of office hours where we can ask our questions. He was very helpful in giving tips on how to approach projects and I really appreciate the time he puts in to help us succeed!