Version Control
with Subversion
Software
This lab requires an Eclipse installation with the following plugins:
- Java Development Tools
- Subclipse (a Subversion
frontend)
The following screenshots and
procedures were developed using the Helios Eclipse release (version
3.6.1).
Subversion: The basics
This tutorial will walk you through the basics in working
collaboratively with Subversion (often abbreviated as SVN).
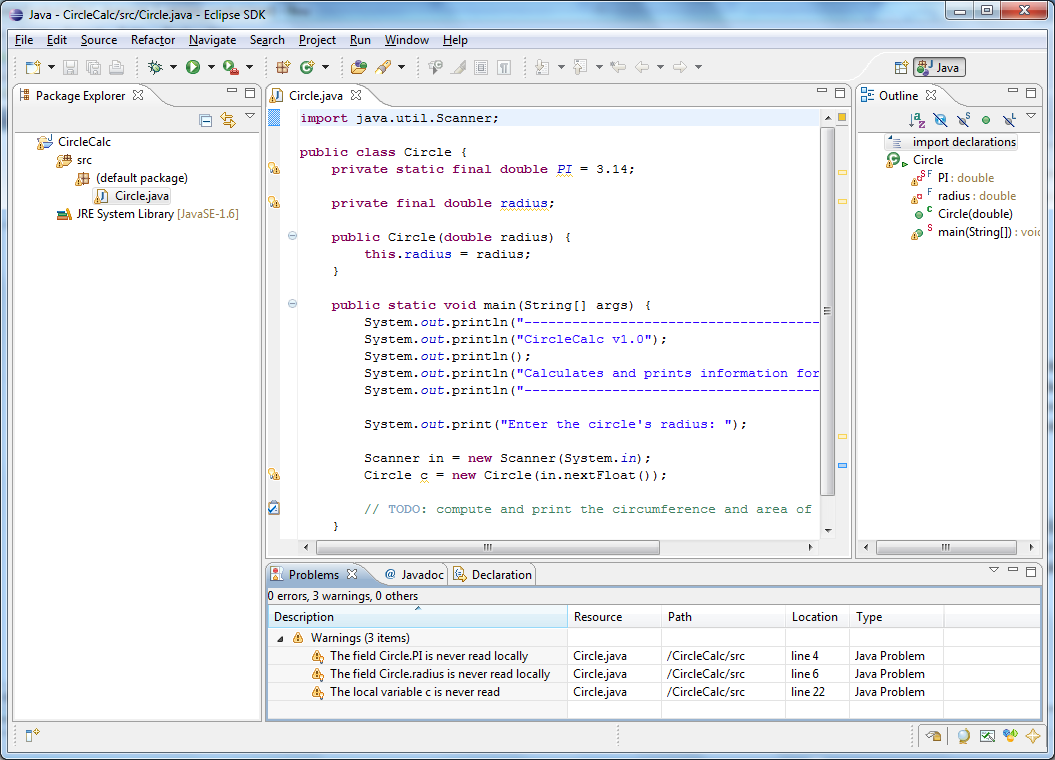
We'll be creating a simple program, CircleCalc, that
calculates the vital statistics for a circle given a user-supplied
radius. We'll show you how to import code into a
Subversion repository so it can be shared and then make changes that
will be checked in to the repository. To more closely match
what it's like to collaborate through a Subversion server we'll have
you play the role of two separate developers working on the same file.
We'll simulate an encounter where changes
to be checked in conflict with each other and explore what
needs to be done to resolve it. The instructions below will
be using the Subclipse plug-in as a frontend to working with a
Subversion repository.
Our project
First we'll need some code to bring under revision control by
Subversion. Follow the instruction from TA to create a new project in Eclipse
called CircleCal and copy the code of class Circle.java file from https://www.assembla.com/code/ee461l-circlecalc/subversion/nodes into your project.
Circle.java is under Trunk/src in the repository. You can take a look at our starting point.
Import the project into
Subversion
Our first step is to import the CircleCal project into SVN. Right
click
on the CircleCalc project and navigate to the "Team -> Share
Project..." entry. This will bring up the "Share Project"
dialog which will prompt for what repository type you'll be using.
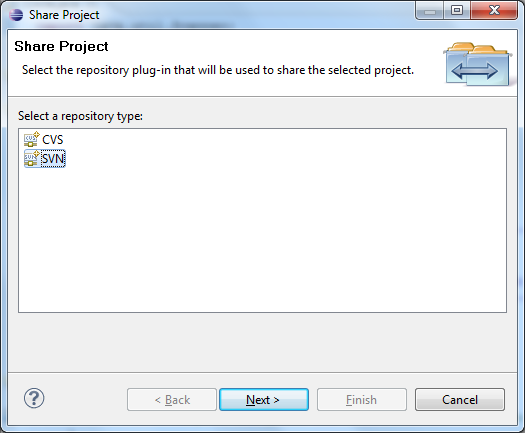
Select "SVN" to indicate that we'll be working with a Subversion
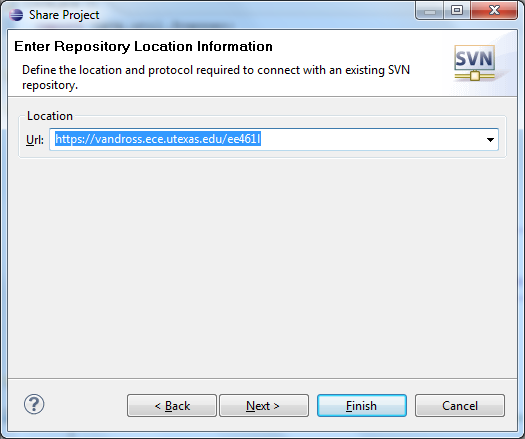
repository. Click "Next" and you will be prompted to enter
the Subversion repository location in the form of a Uniform Resource
Locater (URL). Do NOT use the
following SVN URL from the vandross server. Use the SVN URL for
the repository you created. The SVN URL should be on the left upper
corner. For example, it looks like this:
https://subversion.assembla.com/svn/kab2487-ee461l-circlecalc-fork/
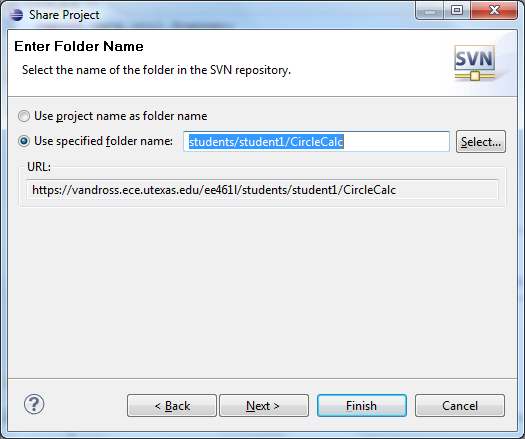
Click "Next", and you'll be prompted for where within the repository
you wish to store the project. You'll want to specify a
location for which you have write privileges, so select "Use specified
folder name:" and direct Subclipse to import the project
into a folder within your student folder in the repository.
The specified folder name should be:
Disregard the following URL. Use your SVN URL shown in the Assembla
account.
Click "Next" and you will have the opportunity to supply an initial
check-in message.
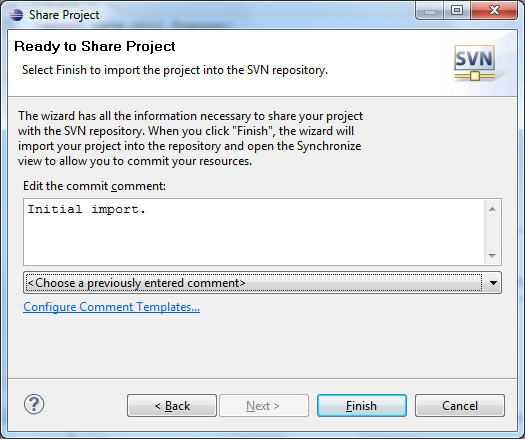
The default is fine, so go ahead and click "Finish". This
will create a space within your student folder in the class Subversion
repository for the project. It will likely also prompt you
about switching to the "Team Synchronizing" perpsective. You
can skip this as we can do everything we want through the Java
Perspective (if it automatically switches you without asking, just
switch back using the Window -> Open Perspective ->
Other..." menu item and choosing the Java perspective).
At this point the space for your project will have been created in the
repository and your project files will have been marked for inclusion.
The next step is to commit the files. For this,
right click on the CircleCalc project and select the "Team ->
Commit..." menu item. This will bring up the "Commit" dialog.
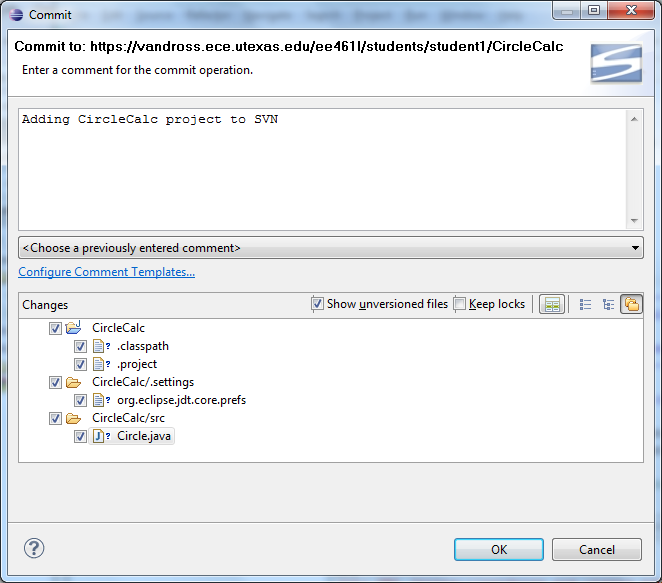
This window shows you a list of files that will be affected by the
commit and provides a text box for you to provide a commit message for
the commit action. This message will be associated with the
changes that are being commit and will show up in the log.
These messages are important! Resist the urge to
use terse or empty commit messages - instead be descriptive so that
other developers know the intent and rationale for the commit.
The message for this commit is pretty simple since we're just
bringing the project under version control, so use the following:
"Adding CircleCalc project to SVN". Click "OK" to commit the
change and publish it to the SVN repository.
Check out the project
Now that we've published our project to the repository let's introduce
a collaborator. We'll switch roles for a bit and play the
part of another developer named Alice. We've asked Alice to
help us out by implementing the circumference functionality while we'll
focus on adding the area functionality. The first thing Alice
will need to do is check out the project we just published.
Let's do so now using the "File -> Import..." menu
item. This will again bring up the "Import" dialog, but this
time we'll be selecting the "Checkout projects from SVN" item in the
"SVN" category.

Click "Next" and Subclipse will ask you what repository you wish to use
for checking out the project.
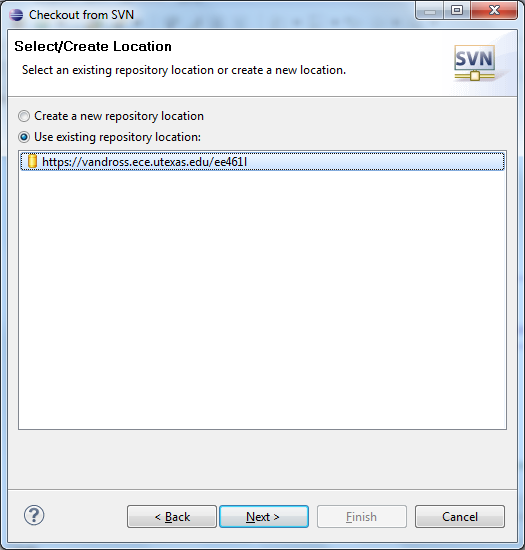
Select the class repository which should already be listed as an option
and click "Next". This will bring up the "Select Folder"
dialog which will ask you to find the location in the repository that
contains the project we wish to use.
Please use the trunk folder under your own repository. Disregard
the following SVN URL and the folder structure.
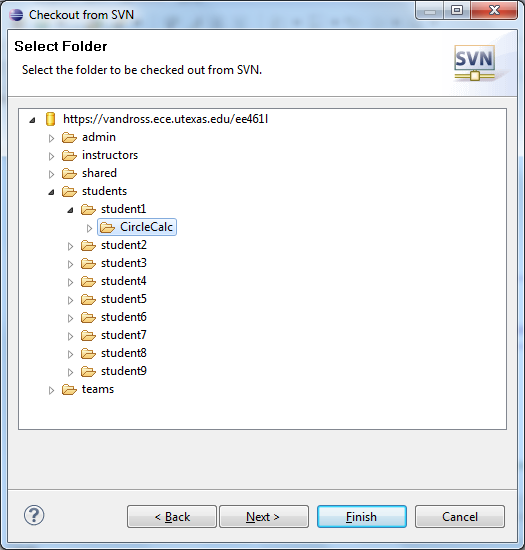
Find the CircleCalc folder we just checked in above and select it.
Click "Next" and you will be prompted for the name you wish
the project to be checked out as into your workspace. It
suggests "CircleCalc", but let's modify it to be "CircleCalc_Alice" so
that we can distinguish it from the other "CircleCalc" project already
in our workspace.
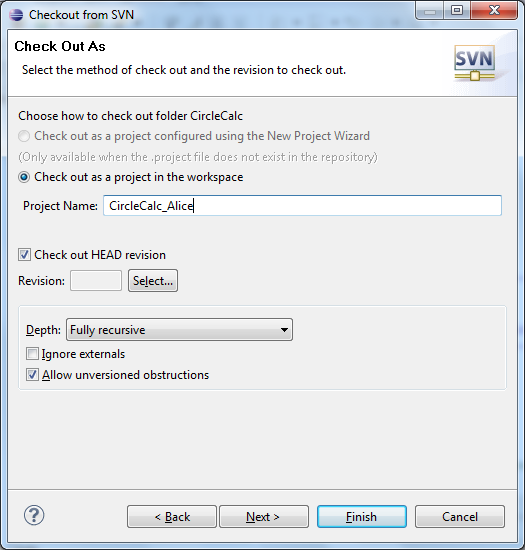
The rest of the defaults are fine, so click "Finish" to checkout the
code and add it to your workspace. You'll now have two
independent copies of the CircleCalc project in your workspace.
Checking in changes
Since we're currently playing the role of Alice, let's work on her
changes first. Open the Circle.java file from the
CircleCalc_Alice project. Alice has been assigned to work on
the circumference functionality, so let's consider what needs to be
done. Take a look at the code below for how Alice updated the
"Circle" class:
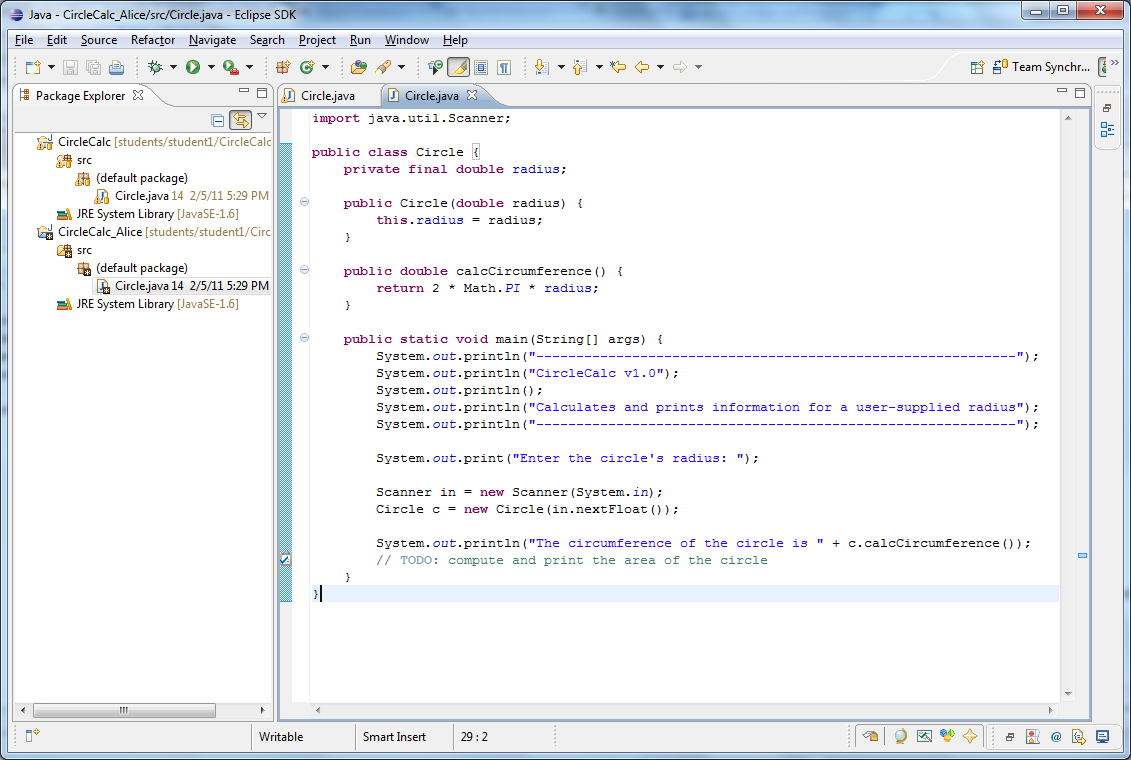
Alice made four changes, let's look at each in turn. She:
- added the calcCircumference
method: This allows the circle class to compute its own
circumference
- added a print statement to
report the circle's circumference,
- updated the "TODO" comment
so that it no longer states that circumference functionality needs to
be added, and
- removed the PI field.
The first three are obvious choices, but you'll notice that the last
change was made because Alice, being the smart developer that she is,
realized that it'd be better to use the value for pi that is provided
by Java's "Math" package. Since she chose to use this value
instead, she wisely cleaned-up the redundant field from the class.
As you can guess... this will come into play later.
Alice tests her changes and feels confident she's completed her
assigned task so now it's time to check them in to the
repository. For this, we follow the same procedure we used to
check-in the project files from above. Right click on the
"CircleCalc_Alice" project and select the "Team -> Commit..."
menu item. This will again bring up the "Commit" dialog.
Let's craft our commit message as: "Added circumference
functionality and removed redundant PI field". Also, note
that if you double click on the "Circle.java" entry in the changed file
list it will show you the changes side-by-side, as seen below.
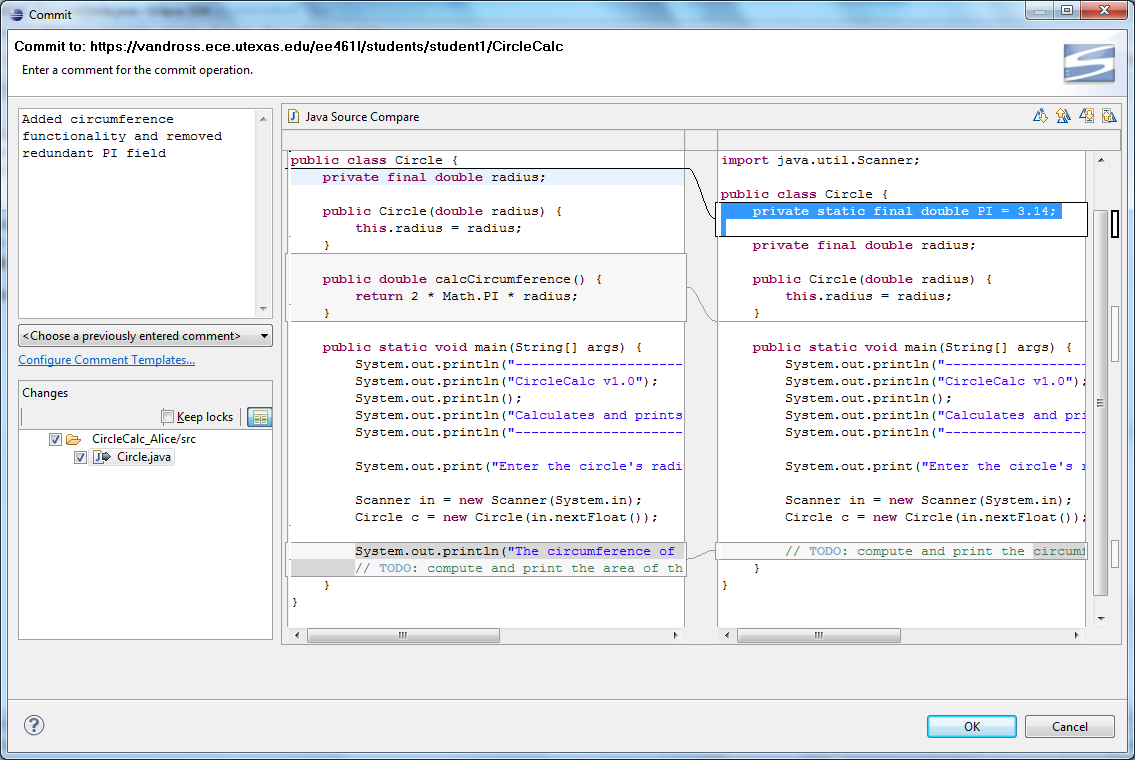
Click "OK" to commit the changes and publish them to the repository.
Conflict Resolution
Now we'll switch back to be ourselves and work with the project we
originally checked in to SVN. You may want to close Alice's
project to avoid confusion (just right click on her project and select
"Close Project"). Returning to the Circle.java file from our
original project, we'll now work on adding the area functionality.
The changes we'll need to make are pretty similar, so take a
look at the solution below:
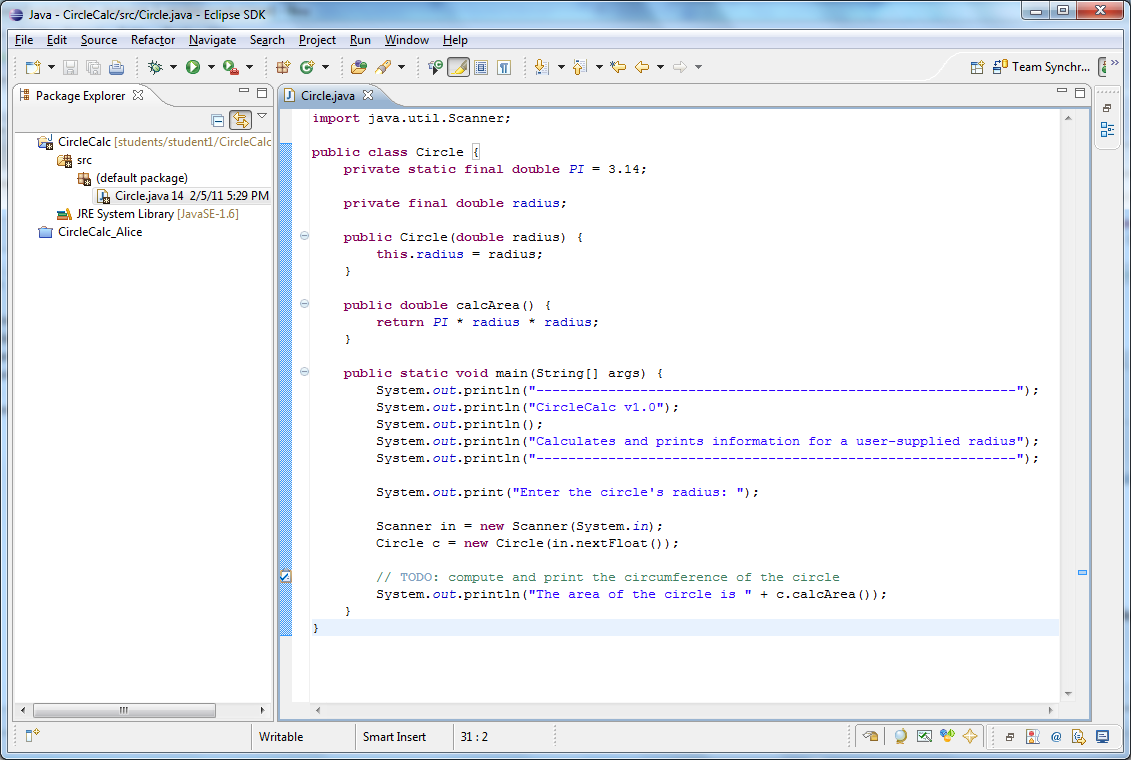
Again the changes are pretty simple. We:
- added the calcArea method:
This allows the circle class to compute its own area
- added a print statement to
report the circle's area, and
- updated the "TODO" comment
so that it no longer states that area functionality needs to be added.
We test our changes and are satisfied that we're ready to commit.
As before, we do so by right clicking on the "CircleCalc"
project and selecting the "Team -> Commit..." menu item.
We'll add our commit message as: "Added area functionality"
and click "OK" to perform the commit.
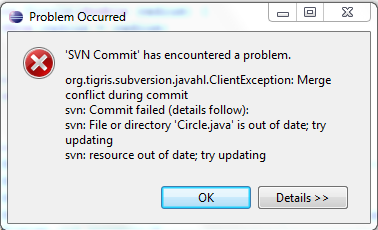
Something's amiss. The error message says our resource is out
of date - someone else must have committed something while we were
working. So let's grab their changes and try again.
Grabbing the latest changes involves performing an "update",
which is done by right-clicking the "CircleCalc" project and selecting
the "Team -> Update to HEAD" menu item (HEAD means get all of
the latest changes). SVN will retrieve any changes that have
been checked in to the repository and attempt to apply them to our
working copy. If the changes don't conflict (meaning you
haven't changed any lines locally that were also changed in the
repository) then they will be applied automatically. But for
cases, such as ours, where another developer has changed the same lines
we changed, the conflict will be marked with conflict markers as seen
below:
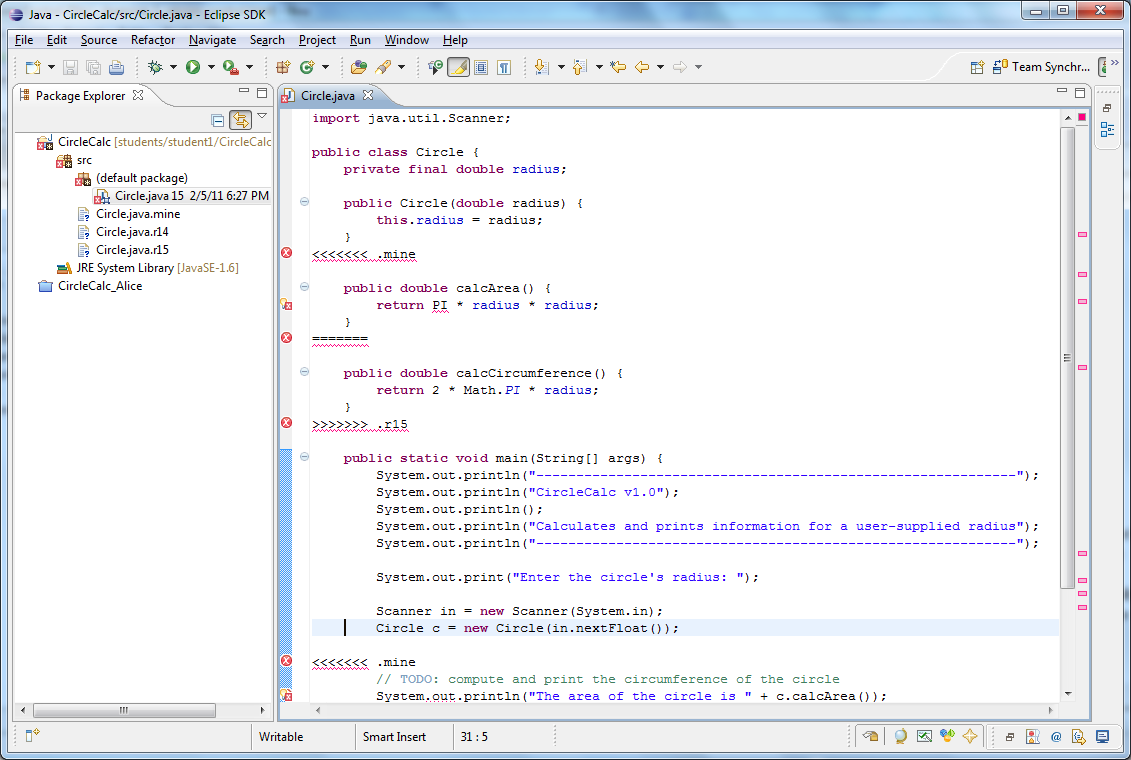
There are two conflicted blocks in our file and we'll have to resolve
the conflict manually. SVN adds conflict markers to denote
the changes you added that haven't been checked in yet on the line
starting with:
Everything after this marker should look familiar, up to:
=======
The lines after this separator are the new text that was added to the
repository, up to:
The number at the end lets you know the revision number of the file
from which the text supplied came (15 in this case, your
revision number will undoubtably be different). The two
conflict blocks in our case are pretty simple to resolve.
For the first we want both Alice's "calcCircumference" method and our
own "calcArea". So we can merely remove the three conflict
marker lines. The second conflicted block can be resolved by
including both print statements and removing the TODO comment
altogether (since there's nothing left TO DO). Resolving
these identified conflicts results in the following text:
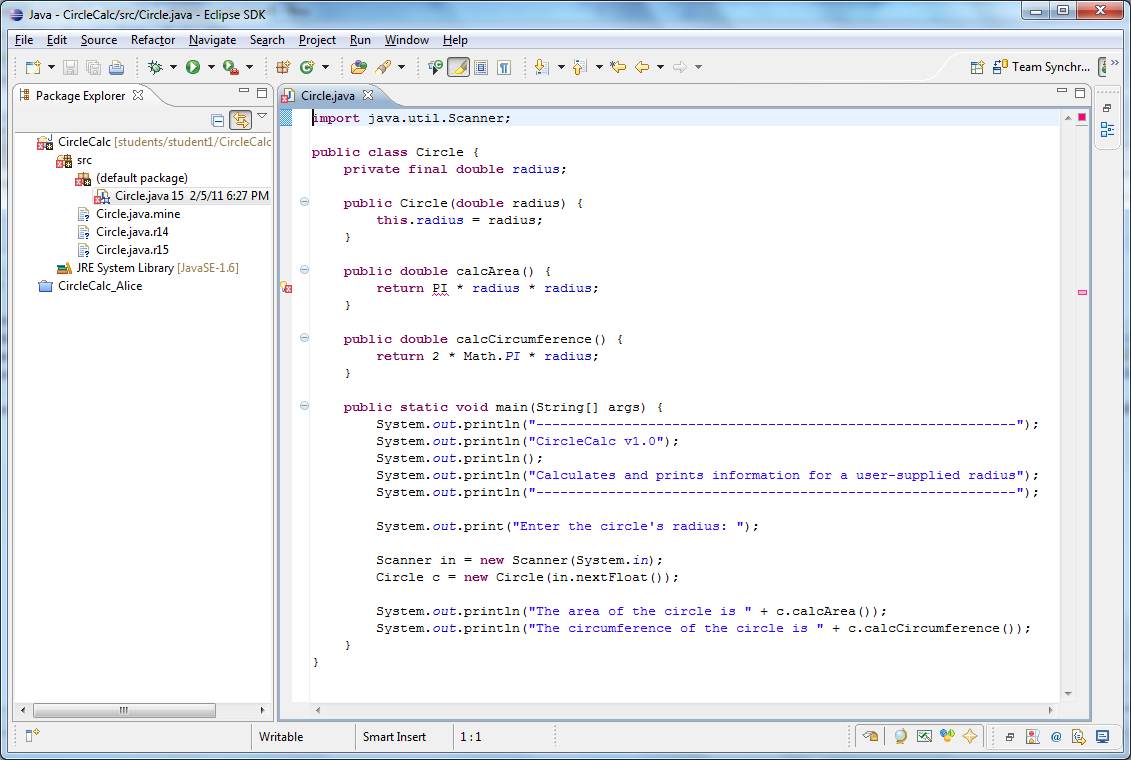
However,
you'll note that we still have a problem. Our calcArea method
uses a field that is no longer defined. How did this happen?
If you recall, Alice removed the PI field, and since this
change wasn't near any of our changes in the file, SVN automatically
included it. However, this causes a problem with our planned
change. This shows an important lesson: SVN won't catch all
conflicts - it is ultimately up to the developer to ensure that their
change doesn't introduce any problems. Here, all we need to
do is recognize where the problem came from, and update our code to use
"Math.PI" instead.
With that final change, the conflicts have been resolved
within the source code. We must now inform Subversion that
the conflict has been resolved using the "Team -> Mark
Resolved..." menu item available by right clicking on the "Circle.java"
file.
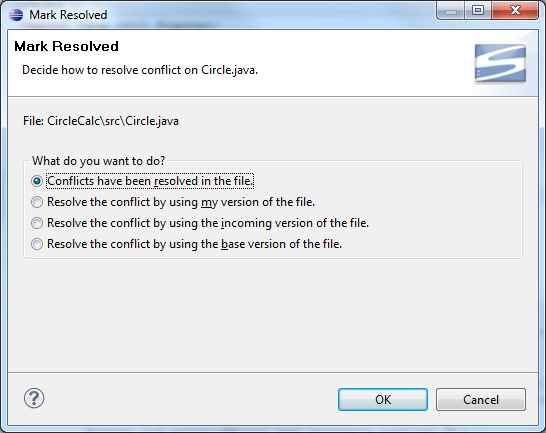
You'll notice that there are several options here. We
resolved the conflict manually within the file, so this is the option
we want. Click "OK" to complete the conflict resolution.
The final step is to checked in the
code using the now familiar "Team -> Commit..."
dialog).
Conclusion
This gives you an introduction to the basic functionality and workflow
of collaborative software development with Subversion. For
more advanced topics, such as the ability for code development to
"branch" and continue along different development paths, take a look at
the excellent documentation project for SVN located at: Version Control
with Subversion
Developed with guidance from
Miryung Kim
Copyright
(c) 2011
Professor Miryung Kim and a course development TA Evan Grim
Permission is granted to copy, distribute and/or modify this document
under the terms of the GNU Free Documentation License, Version 1.1 or
any later version published by the Free Software Foundation; with no
Invariant Sections, no Front-Cover Texts, and no Back-Cover Texts.
A copy of the license can be found on the GNU web site here.